
The best easy Halloween crafts for preschoolers use paper plates, handprints, pom poms, and cotton balls, take 10 to 20 minutes, and need little more than washable paint, glue sticks, and googly eyes. For ages 2 to 3, stick to handprint art, tearing and sticking, and peel and stick googly eyes with no small loose parts. Four and five year olds can handle training scissors, bending pipe cleaners, and sensory play like shaving cream marbling.
Last October I ran the craft table at my son’s preschool Halloween party. Sixteen kids, groups of four, and about eight minutes per group before someone wandered off toward the snack table.
That one afternoon taught me more about Halloween crafts for preschoolers than any Pinterest board. The pom pom spiders were finished in four minutes flat. The marshmallow ghosts lost half their marshmallows to snacking before the glue set. And the one little girl who refused to touch paint spent her whole turn happily tearing toilet paper for a mummy.
So every craft below comes with an age range, a mess rating, how long it really takes, and what tends to go sideways the first time. Most lists of Halloween arts and crafts for preschoolers skip that last part, usually right up until a three year old tries to eat a googly eye.
Everything here uses things you probably already have: paper plates, pipe cleaners, cotton balls, egg cartons, the usual suspects. Where you don’t, there’s a free swap.
Updated for Halloween 2026: our preschool asked families to skip food crafts at this year’s party, so every project that uses food now has a no food option right next to it.
Before You Start: Ages, Time, and Setup
The biggest variable in Halloween crafts for preschoolers isn’t the craft. It’s the age. A just turned 3 year old and a nearly 6 year old want completely different things from a paper plate, so here’s how I match them.
What Each Age Can Realistically Do
- Ages 2 to 3: They want to smear, stick, tear, and press. Glue sticks, peel and stick googly eyes, handprints, tearing paper. You do every cut and handle anything small enough to swallow. Expect 5 to 10 minutes of focus.
- Ages 4 to 5: Training scissors on straight lines, bending pipe cleaners, small amounts of liquid glue, and strong opinions about where the eyes go. Expect 10 to 20 minutes.
- Ages 5 to 6: Cutting gentle curves, threading pipe cleaners through holes, and following a simple pattern like the candy corn stripes. Most can finish a whole craft with you nearby rather than right beside them.
Every time estimate in this article is active time with your child. Drying time is listed separately, because a craft that needs to dry is really two short sessions, and that’s often a good thing with this age group.
Set Up Before You Call Them Over
Most Halloween art and crafts for preschoolers fall apart at the setup stage, not the craft stage. A few habits that changed everything at our kitchen table:
- One rimmed baking sheet per child. It holds the plate, catches paint drips, and stops pom poms from rolling off the table.
- Cover the table with a dollar store plastic tablecloth or an old shower curtain liner, taped down at the corners so little hands can’t pull it.
- An old adult shirt worn backwards is the best smock there is. Roll the sleeves up twice.
- Paint in a muffin tin, about a teaspoon per cup. Less waste, and a tipped cup is a small spill instead of a disaster.
- Wipes and a damp towel within arm’s reach before any paint lid comes off.
Practical note: Do all the adult cutting before your child sits down. Prep each craft into its own zip bag the night before. A preschooler waiting while you cut cat ears is a preschooler who has already left the table.
Supplies For Easy Halloween Crafts For Preschoolers (And Free Swaps)
These 20 crafts share most of their supplies. One basket of basics from a dollar store or craft store in early October covers nearly the whole list, and your recycling bin covers the rest.
| Supply | What I use | Free or low cost swap |
| Paper plates | The cheapest thin, uncoated white plates in a big pack | Circles cut from cereal box cardboard |
| Washable paint | Crayola Washable Kids’ Paint in orange, black, white, and purple | Washable markers, or crayons pressed hard |
| Googly eyes | Peel and stick googly eyes (essential for under 4s) | White hole punch circles with a marker dot |
| Pipe cleaners | Black, orange, green, and purple | Twisted strips of paper or lengths of yarn |
| Pom poms | Black, about 1 inch across | Balls of scrunched black tissue paper |
| Construction paper | Black, orange, green, white, yellow, pink | Paper grocery bags or painted cereal boxes |
| Glue | Elmer’s glue sticks plus Elmer’s School Glue | Flour and water paste for paper projects |
| Cotton balls | Any store brand | Torn tissues or toilet paper |
| Gauze | Cheesecloth from the kitchen aisle | Toilet paper or strips of an old white shirt |
| Scissors | Blunt tip training scissors (Fiskars makes good ones for small hands) | You do the cutting |
| Tea lights | Battery LED tea lights | No swap: never a real flame |
The recycling bin supplies the rest: cardboard egg cartons, tissue boxes, plastic jars, paper lunch bags, and newspaper or junk mail.
Two things I’d never skimp on for Halloween crafts for preschoolers: washable paint and decent glue sticks. Cheap paint is where Halloween art and crafts for preschoolers get frustrating fast, because thin paint needs three coats and stains clothes, while the bargain glue sticks dry out and barely hold paper.
One small detail that saves a lot of grief: look for the AP seal from the Art and Creative Materials Institute (ACMI) on paint, markers, and glue. It means the product has been evaluated and certified as nontoxic.
On paper plates: Buy the thinnest, plainest ones. Glossy coated plates make paint bead up and slide around, and you’ll end up doing three coats while your child loses interest after one.
Safety And Supervision
Halloween arts and crafts for preschoolers come with a few specific hazards that general craft guides tend to gloss over. None of them are reasons to skip a craft. They’re reasons to set it up right.
- Small parts. Googly eyes, pom poms, mini marshmallows, raisins, dried beans, and tiny plastic spiders are all choking sized. For under 3s, use peel and stick eyes pressed down firmly by you, big pom poms, and large plastic toys, and stay at the table.
- Food in crafts. If it might get eaten, treat it as food. Marshmallows and raisins are on most choking hazard lists for young children, and dried beans aren’t safe to eat uncooked. Each food craft below has a safer swap.
- Button batteries. Most LED tea lights run on a coin battery, and a swallowed coin battery can cause serious internal burns within hours. Only use lights with a secure battery cover, and keep spares locked away.
- Use nitrile gloves for the frozen hands craft. Latex allergies are common enough that many preschools don’t allow latex at all.
- Pipe cleaner tips. The wire ends are sharp. Fold each cut end back on itself before it reaches small fingers.
- Blunt tip training scissors only. Under 4s generally watch while you cut.
- Hot glue. Adults only, low temp gun, and park it on a plate well out of reach.
- Dyes and foam. Food coloring tints skin for a day or so, and shaving cream stings if it gets near eyes. Keep a damp cloth close.
I also label each craft with one of three supervision levels:
- Nearby: you can be cooking dinner in the same room.
- At the table: you’re sitting with them the whole time.
- Hands on: you’re doing parts of it yourself.
Mess level is rated Low, Medium, or High. High means paint or foam is going somewhere it shouldn’t, and you’ll want the tablecloth down.
Practical note: Test the battery cover on every LED tea light before it goes near a preschooler. Plenty of cheap ones slide open with a fingernail, and the coin battery inside is one of the most dangerous small objects in your house for a young child.
All 20 Halloween Crafts for Preschoolers at a Glance
Match a craft to your child’s age, your tolerance for mess, and how much time you really have before dinner. Times are active time; drying or freezing time is listed after the plus sign.
| # | Craft | Best ages | Mess | Time | Supervision |
| 1 | Pom-Pom Pipe Cleaner Spider | 4 to 5 | Low | 5 min | At the table |
| 2 | Puffy Cotton Ball Ghost | 2 to 5 | Medium | 15 min + overnight | At the table |
| 3 | Candy Corn Craft | 4 to 6 | Low | 15 min | At the table |
| 4 | Marshmallow Ghosts | 4 to 5 (pom poms for younger) | Low | 10 min | At the table |
| 5 | Egg Carton Spider | 3 to 5 | Medium | 15 min + 30 min | Hands on |
| 6 | Toilet-Paper Mummy Plate | 2 to 5 | Low | 10 min | Nearby |
| 7 | Black Cat Paper Plate | 3 to 5 | Medium | 20 min + 30 min | At the table |
| 8 | Orange Pumpkin Paper Plate | 2 to 5 | Medium | 15 min + 20 min | Nearby |
| 9 | Splatter-Paint Monster | 2 to 5 | High | 15 min + 30 min | At the table |
| 10 | Purple Pipe-Cleaner Spider | 3 to 5 | Medium | 20 min + 2 coats drying | At the table |
| 11 | Monster Tissue Box | 4 to 6 | Medium | 25 min + 30 min | Hands on |
| 12 | Stuffed Paper Bag Pumpkin | 3 to 5 | Low | 20 min | At the table |
| 13 | Mummy Jar Luminary | 3 to 5 | Low | 15 min | Hands on |
| 14 | Handprint Spider | 2 to 5 | Medium | 10 min + 20 min | Hands on |
| 15 | Handprint Ghost | 2 to 5 | Medium | 10 min + 15 min | Hands on |
| 16 | Footprint Bat | 2 to 4 | High | 15 min + 20 min | Hands on |
| 17 | Orange Spaghetti Sensory Bin | 2 to 5 | High | 30 min prep, 20 min play | At the table |
| 18 | Shaving Cream Marbled Pumpkins | 3 to 5 | High | 20 min + 1 hr | At the table |
| 19 | Eyeball Jiggler Sensory Cups | 2 to 5 | Medium | 15 min + 3 hr chill | At the table |
| 20 | Frozen Spooky Hands | 3 to 5 | Medium | 10 min + overnight freeze | At the table |
Craft-Room Staples (Pipe Cleaners, Pom-Poms & Egg Cartons)
If you keep a stash of pom poms and pipe cleaners around like I do, these come together in minutes. They’re also my favorite Halloween craft ideas for preschoolers who lose interest the moment anything needs to dry.
1. Pom-Pom Pipe Cleaner Spider

This was the hit of the party table: four minutes from start to a spider that stands on its own legs. If you only try one of these easy Halloween crafts for preschoolers, start here.
Ages: 4 to 5 (3 year olds with help) | Mess: Low | Time: 5 minutes | Supervision: At the table
Materials:
- Black pom pom, 1 inch or bigger (bigger is easier for small fingers)
- 4 black pipe cleaners
- Googly eyes (peel and stick for under 4s)
- Glue (school glue, or a low temp glue gun that only you touch)
Steps:
- Cut the pipe cleaners in half to make eight legs, and fold the sharp tip of each one back on itself.
- Lay four halves across the other four and twist them together in the middle.
- Let your child bend each leg down and out at the “knee” so the spider can stand.
- Glue the pom pom on top of the twisted center and add the googly eyes.
What goes wrong: school glue takes ages to grab a pom pom, and kids pick the spider up to play immediately. I put one dot of low temp hot glue on the center myself, then hand it back for the eyes.
Older kids: Make a spider family in three sizes and count all the legs out loud.
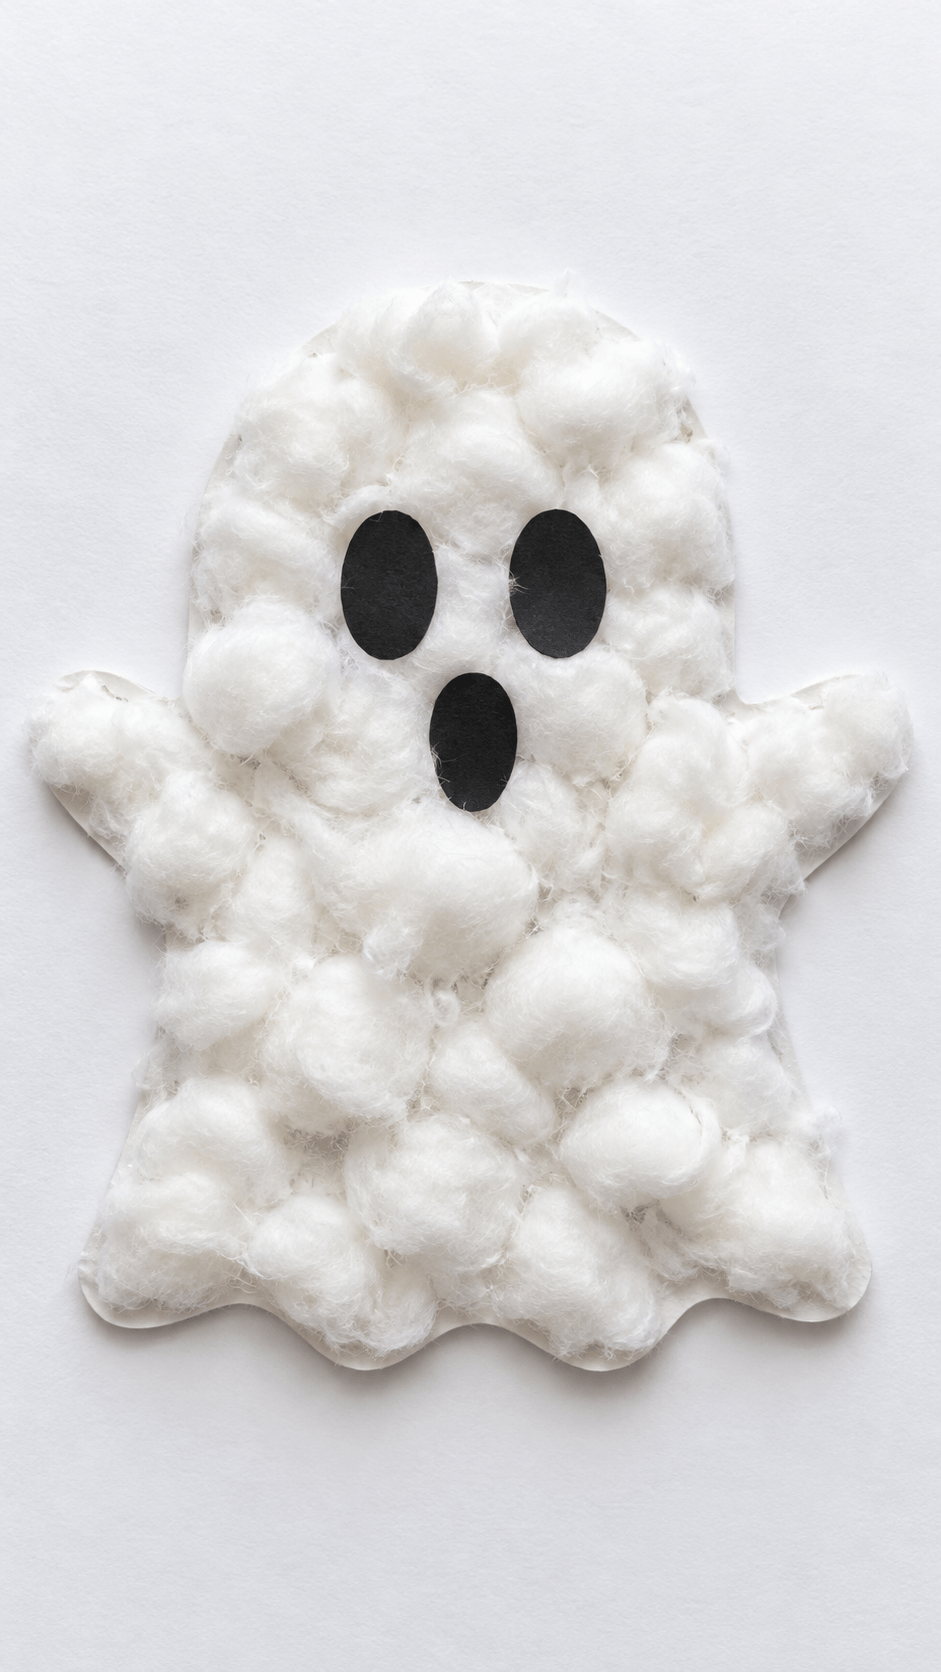
2. Puffy Cotton Ball Ghost

Gluing cotton balls is oddly satisfying for little kids, and this ghost uses plenty of them. It’s the best pick on this list for 2 year olds because there’s genuinely no wrong way to do it.
Ages: 2 to 5 | Mess: Medium (glue) | Time: 15 minutes plus overnight drying | Supervision: At the table
Materials:
- White cardstock (or a cereal box panel)
- Ghost template (or freehand a tall upside down U with a wavy bottom)
- Cotton balls (torn tissues work too)
- Black construction paper
- School glue
- String or yarn, if you want to hang it
Steps:
- Draw or print the ghost outline on the cardstock.
- Spread glue inside the outline with a paintbrush instead of squeezing blobs. Blobs soak the cotton and flatten it.
- Let your child press cotton balls into the glue until the ghost is fully covered.
- Once it’s dry, glue on black paper eyes and a mouth. Punch a hole at the top and add string to hang it.
Tip: gently stretch each cotton ball apart before it goes down. The ghost gets twice as puffy and you use half as many.
Younger vs older: two year olds will glue cotton outside the lines, so cut the ghost out after it dries. Five year olds can cut their own ghost shape from the cardstock first.
3. Candy Corn Craft

This is my go to for scissors practice. Three straight cuts, three colors, and a real sense of “I made that myself.”
Ages: 4 to 6 | Mess: Low | Time: 15 minutes | Supervision: At the table
Materials:
- White, orange, and yellow construction paper (or a printable candy corn template)
- Glue stick
- Blunt tip training scissors
- String for a garland (optional)
Steps:
- Draw a tall triangle and split it into three bands: a wide yellow base, an orange middle, and a small white tip.
- If your preschooler isn’t ready for scissors, precut the bands. If they are, draw straight lines on each color and let them cut along them.
- Have them stack and glue the pieces in order: yellow at the bottom, orange in the middle, white at the point.
- Make five or six and glue them along a string for a garland.
What goes wrong: almost every kid glues the white piece at the bottom the first time. Show them a photo of real candy corn before they start.
4. Marshmallow Ghosts
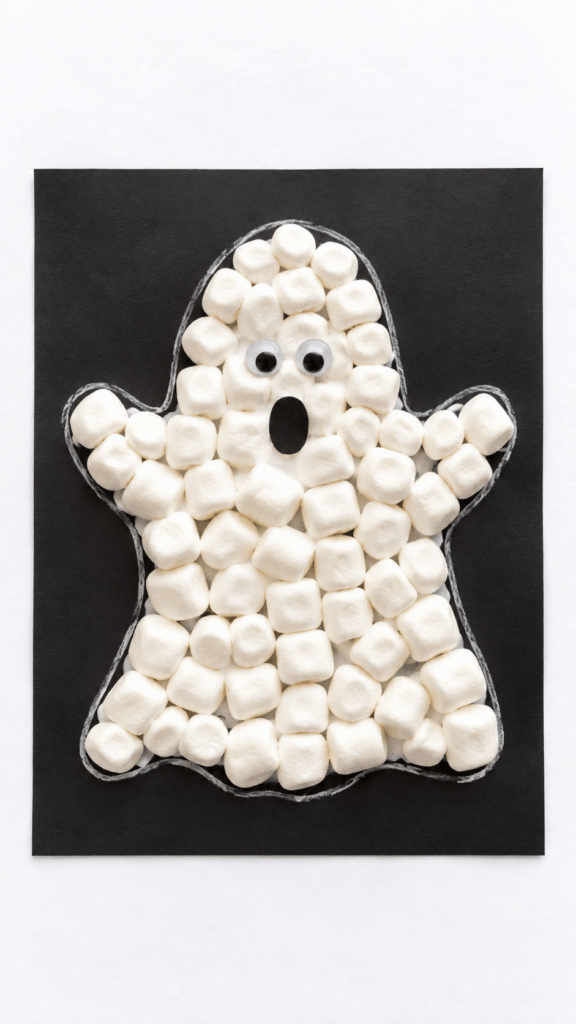
Honest warning: about a third of the marshmallows will be eaten. That’s fine for most 4 and 5 year olds, but for younger kids or a food free classroom, small white pom poms work just as well.
Ages: 4 to 5 with marshmallows, 2 to 3 with pom poms | Mess: Low (but sticky) | Time: 10 minutes | Supervision: At the table
Materials:
- Mini marshmallows (or small white pom poms)
- Black construction paper (or a printable ghost outline)
- Markers
- Tiny googly eyes
- School glue
Steps:
- Draw a ghost outline on the black paper with white crayon or chalk so your child can see where to place things.
- Dot glue inside the outline and press the marshmallows on in a cluster.
- Let the glue set for about 15 minutes, then add tiny googly eyes and a small marker mouth.
Tip: marker smears on marshmallows. A dot of black paint on the end of a toothpick works better, or skip faces on each piece and add one big face to the whole ghost.
5. Egg Carton Spider

Every egg carton you’ve recycled could have been twelve spiders. Make sure it’s the cardboard kind; foam cartons won’t take paint and crack when you poke holes in them.
Ages: 3 to 5 | Mess: Medium | Time: 15 minutes plus 30 minutes drying | Supervision: Hands on (you poke the holes)
Materials:
- Cardboard egg carton
- Black paint (or a black marker for a no paint version)
- Pipe cleaners (two per spider, each cut into four pieces)
- Googly eyes
Steps:
- Cut out single cups and trim the ragged edges.
- Let your child paint each cup black inside and out. Cardboard soaks up thin paint, so load the brush.
- Once dry, poke four holes on each side with a sharp pencil (adult job).
- Thread the pipe cleaner legs through, bend them at the knees, and glue the eyes on the front.
Younger vs older: For 3 year olds, you thread and they bend. Five year olds can thread every leg themselves, which is great fine motor practice.
Paper Plate Classics
These are the bread and butter of preschool Halloween crafting: cheap, forgiving, and endlessly customizable. Paper plates are behind most of the easy Halloween crafts for preschoolers I do at home, because one big pack covers the whole season.
6. Toilet-Paper Mummy Plate

This one gets called mess free, and it is, as long as you skip liquid glue. School glue soaks straight through toilet paper and turns it into gray mush in about ten seconds.
Cover the plate in glue stick instead and let your child lay the strips on top. It’s also the craft I hand to any kid who hates paint on their hands.
Ages: 2 to 5 | Mess: Low | Time: 10 minutes | Supervision: Nearby
Materials:
- Paper plate
- Toilet paper or gauze strips (cheesecloth looks the most like real wrappings)
- Googly eyes (two big ones)
- Glue stick
Steps:
- Rub glue stick over half the plate at a time, so it doesn’t dry before the paper goes down.
- Let your child tear or unroll toilet paper strips and lay them across the plate at different angles.
- Leave a gap across the middle for the face.
- Stick two googly eyes in the gap.
Younger vs older: for 2 year olds, the tearing is the whole activity, and it’s great for hand strength. Older kids can wrap strips around the edge of the plate so the mummy looks bandaged from the side too.
7. Black Cat Paper Plate

The cat has more pieces than any other plate craft here, so it’s the one where prep matters most. I cut all the ears and noses the night before and kept them in a sandwich bag.
Ages: 3 to 5 | Mess: Medium | Time: 20 minutes plus 30 minutes drying | Supervision: At the table
Materials:
- Paper plate
- Black paint (or black construction paper glued on for a no paint cat)
- Pink and black construction paper
- Googly eyes
- White or silver pipe cleaner for whiskers and mouth
- Glue
Steps:
- Paint the plate black and let it dry fully. Two thin coats look more even than one thick one.
- Glue small pink triangles onto larger black triangles for the ears, then glue them behind the top edge of the plate.
- Add googly eyes and a small pink paper nose.
- Bend a pipe cleaner into a “W” for the mouth and glue it under the nose.
- Glue three short pipe cleaner whiskers on each side.
What goes wrong: black whiskers disappear on a black plate. Use white or silver pipe cleaners so they actually show up in photos.
8. Orange Pumpkin Paper Plate
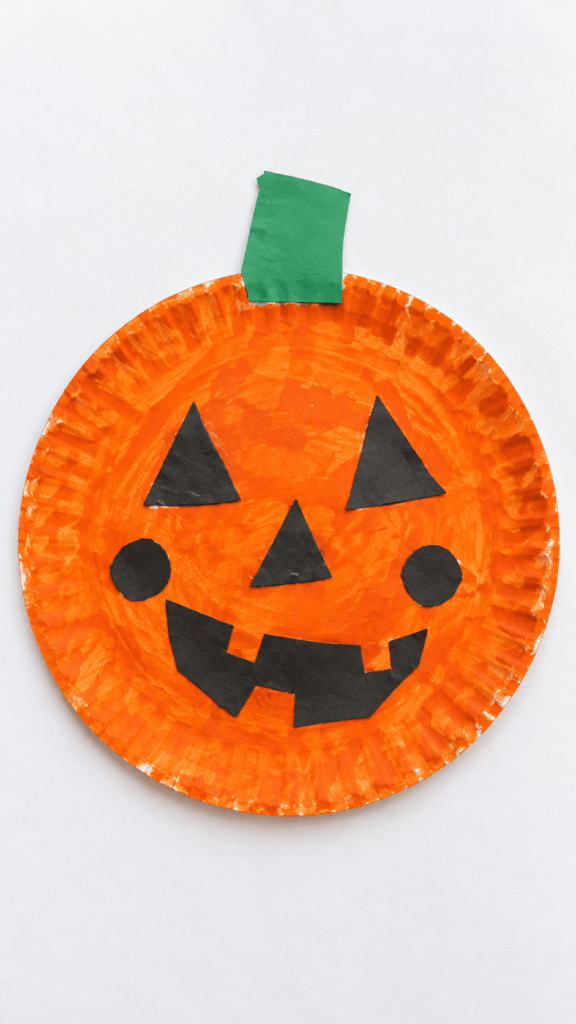
The simplest craft on this list, and the one most likely to come home in a preschool backpack. Let the face be as silly as they want it to be.
Ages: 2 to 5 | Mess: Medium | Time: 15 minutes plus about 20 minutes drying | Supervision: Nearby
Materials:
- Paper plate (an orange plate skips the painting entirely)
- Orange paint
- Green and black construction paper
- Glue stick
- Safety scissors
Steps:
- If you’re using a white plate, let your child paint it orange with a brush or sponge. A sponge drips less for little hands.
- While it dries, cut a green stem and a handful of black triangles and circles.
- Once dry, have your child glue the stem at the top.
- Let them place the face pieces wherever they like.
Practical note: Don’t move the eyes. A pumpkin with three eyes on its chin is exactly what a 3 year old’s pumpkin should look like, and years from now it’s the version you’ll be glad you kept.
Older kids: let them cut their own face shapes and try a happy pumpkin and a scary one.
9. Splatter-Paint Monster
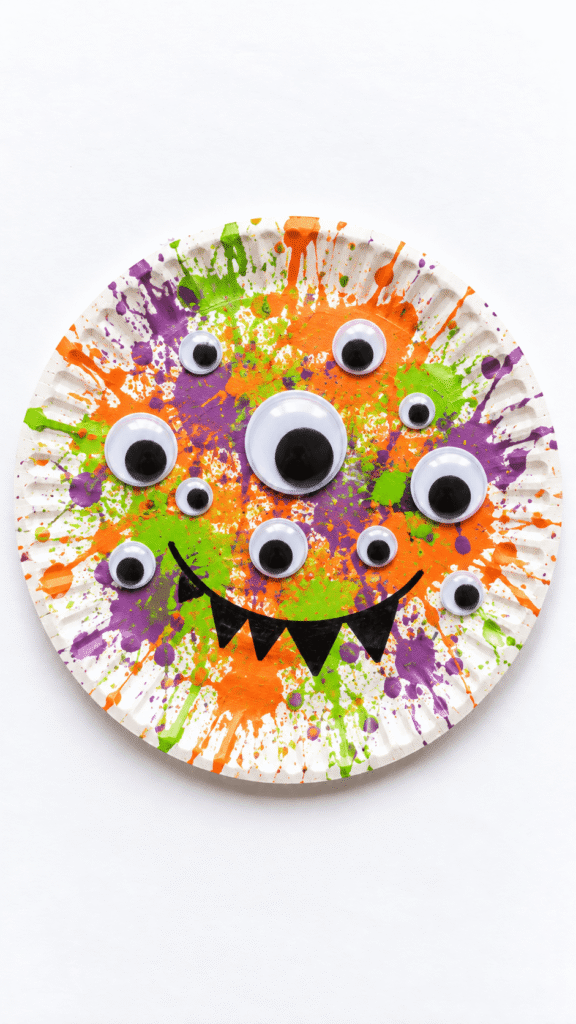
The messiest craft here, and the one kids ask to do again. Contain it by setting the plate inside a big cardboard box with the top flaps cut off. The walls catch most of the flying paint.
Ages: 2 to 5 | Mess: High | Time: 15 minutes plus 30 minutes drying | Supervision: At the table
Materials:
- Paper plate
- Washable paint (three colors at most)
- Googly eye stickers in mixed sizes
- Black marker
- An old toothbrush or chunky brush for flicking
Steps:
- Set the plate in the box, put the backwards shirt on, and roll up sleeves.
- Let your child dab, drip, or flick paint all over the plate. No rules.
- Let it dry completely.
- Hand over a sheet of googly eye stickers and let them add as many eyes as they want.
- Draw a wide, silly mouth with marker.
Trade off: offer three colors, not six. Five colors flicked onto wet paint blend into one swampy brown, and the monster loses all its pop.
10. Purple Pipe-Cleaner Spider

Purple paint goes on thin over a white plate. Plan on two coats, or grab a purple plate if your store has them.
Ages: 3 to 5 | Mess: Medium | Time: 20 minutes plus drying between coats | Supervision: At the table
Materials:
- Paper plate
- Purple paint (red plus blue works, just a bit duller)
- 8 black or purple pipe cleaners
- Googly eyes
- Black marker
- Masking tape
Steps:
- Paint the plate purple, let it dry, then add a second coat.
- Flip it over and tape four pipe cleaners to each side, angled downward like legs. Glue won’t hold pipe cleaners to a plate, but masking tape will.
- Bend each leg in the middle to make a knee.
- Flip it back over, add two googly eyes, and draw a smile with marker.
Younger vs older: 3 year olds can bend the legs once you’ve taped them. Older kids can count out all eight and do the taping themselves.
Jars, Boxes & Bags
Great for turning recyclables into Halloween decor that actually stays out on the shelf all month. These are also the Halloween craft ideas for preschoolers that need the most grown up help, so I save them for a slow weekend morning.
If your kids enjoy making something out of the recycling bin, has plenty more ways to keep that going after Halloween.
11. Monster Tissue Box
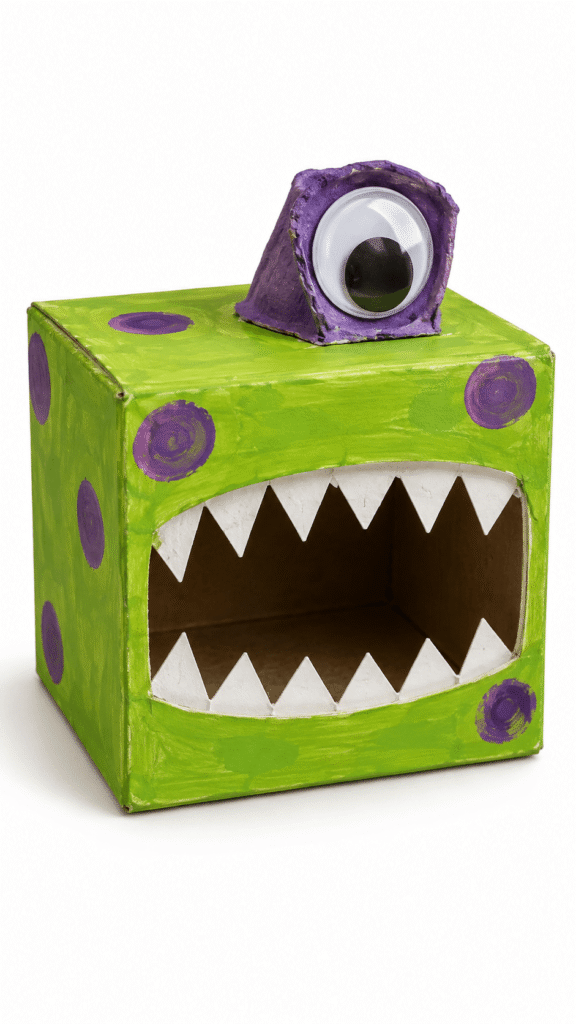
Paint the box, add teeth, top it with an egg carton eye, and the opening becomes a mouth for stashing treats. My son was still “feeding” his monster crumpled paper in December.
Ages: 4 to 6 | Mess: Medium | Time: 25 minutes plus 30 minutes drying | Supervision: Hands on
Materials:
- Empty tissue box (cube boxes stand up best)
- Paint
- White paper or craft foam for teeth
- One egg carton cup
- Googly eyes (one huge eye looks great)
- Glue
Steps:
- Pull out the plastic film from inside the box opening.
- Let your child paint the box. Glossy printed boxes resist paint, so either wrap the box in construction paper first or stir a few drops of dish soap into the paint to help it stick.
- Cut zigzag teeth from white paper or foam and glue them just inside the opening.
- Glue googly eyes into the egg carton cup and glue the cup on top of the box.
What goes wrong: gluing the teeth on before the paint is dry. They slide down into the box. Wait the full 30 minutes.
12. Stuffed Paper Bag Pumpkin
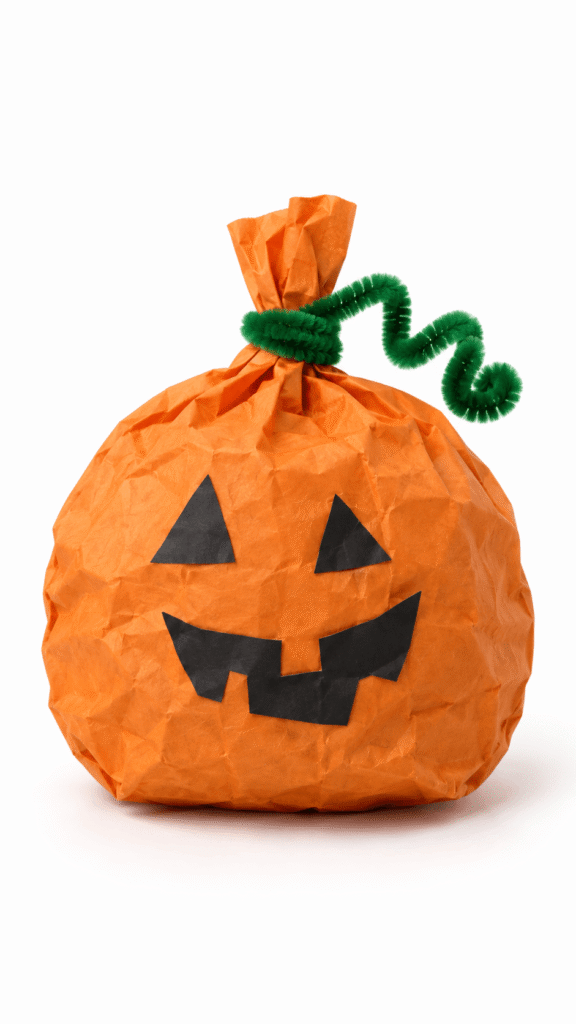
Scrunching newspaper into balls is the best part for preschoolers, and it’s sneaky hand strength practice too.
Ages: 3 to 5 | Mess: Low (newsprint smudges gray onto hands) | Time: 20 minutes | Supervision: At the table
Materials:
- Small orange or white paper bag (lunch bag size)
- Newspaper (junk mail or scrap printer paper works)
- Green pipe cleaner
- Precut black paper shapes
- Tape
- Orange crayon or marker, if your bag is white
Steps:
- If the bag is white, let your child color it orange. Crayon or marker beats paint here, because paint makes the bag soggy and it tears during stuffing.
- Have them scrunch newspaper into balls and stuff the bag about two thirds full.
- Twist the top of the bag and tape it closed (adult job), leaving a short twisted stem.
- Wrap a green pipe cleaner around the stem and curl the ends like a vine.
- Let your child glue on precut black eyes and a mouth.
Tip: if you do paint the bag, let it dry completely, ideally overnight, before any stuffing happens.
13. Mummy Jar Luminary
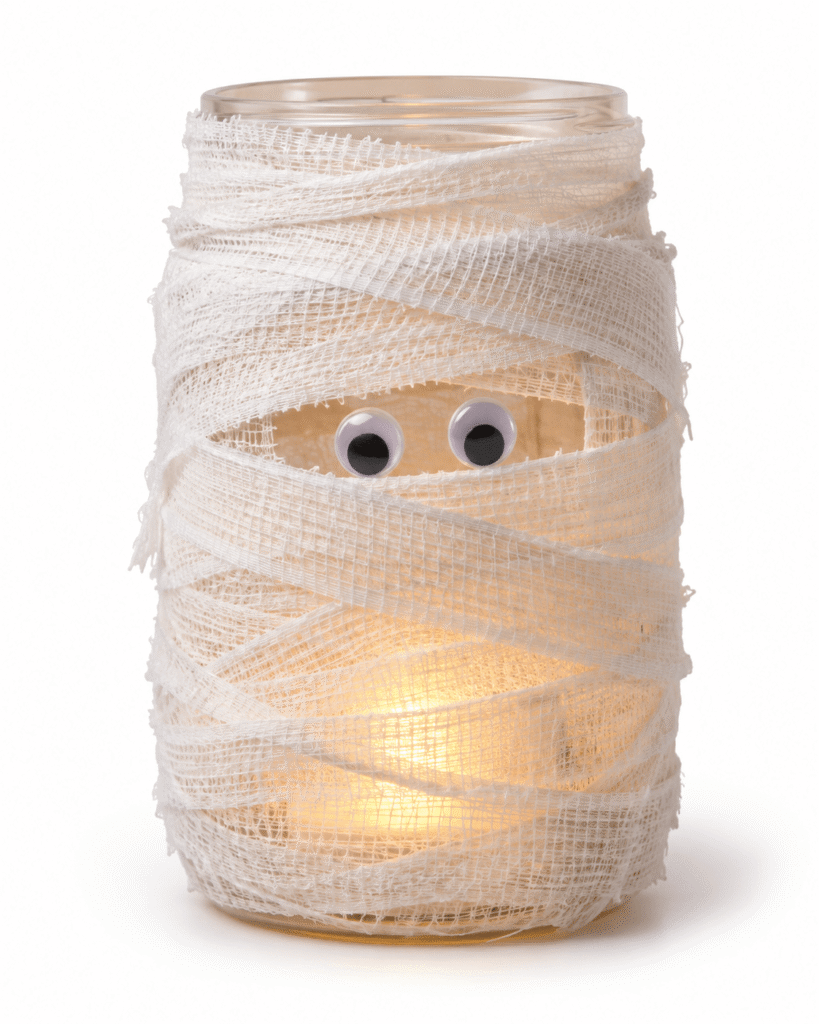
This one glows on the windowsill all October. For preschoolers I swap the glass jar for a washed out plastic peanut butter jar, so nothing shatters if it gets knocked off the table.
Ages: 3 to 5 | Mess: Low | Time: 15 minutes | Supervision: Hands on (you handle the tea light)
Materials:
- Clean jar (plastic for little hands)
- White gauze or cheesecloth (toilet paper works but tears easily)
- Googly eyes
- School glue or double sided tape
- Battery tea light with a secure battery cover
- A rubber band
Steps:
- Put a rubber band around the jar. It anchors the first strip so your child isn’t fighting the gauze.
- Let them wrap the gauze around and around, overlapping, leaving a small gap for the face.
- Tuck the ends under and secure them with a dab of glue or a piece of tape.
- Stick on two googly eyes in the gap.
- You add the tea light, after checking the battery cover is closed tight.
Trade off: plastic jars glow a little less evenly than glass. For a 3 year old, that’s a trade I’ll take every time.
Handprint & Footprint Keepsakes
These make the sweetest keepsakes because you’ll actually want to save them. Of all the Halloween art and crafts for preschoolers I’ve done, these three are the ones framed in our hallway.
They’re also the easiest place to start with Halloween arts and crafts for preschoolers under 3, since there’s nothing to cut and nothing small to swallow. Write your child’s name and the date on the back of every single print. You’ll think you’ll remember which year was which. You won’t.
Painting tip for all three: brush the paint on quickly with a foam brush. It tickles, and the longer it takes, the more they giggle and curl their fingers into a fist.
14. Handprint Spider
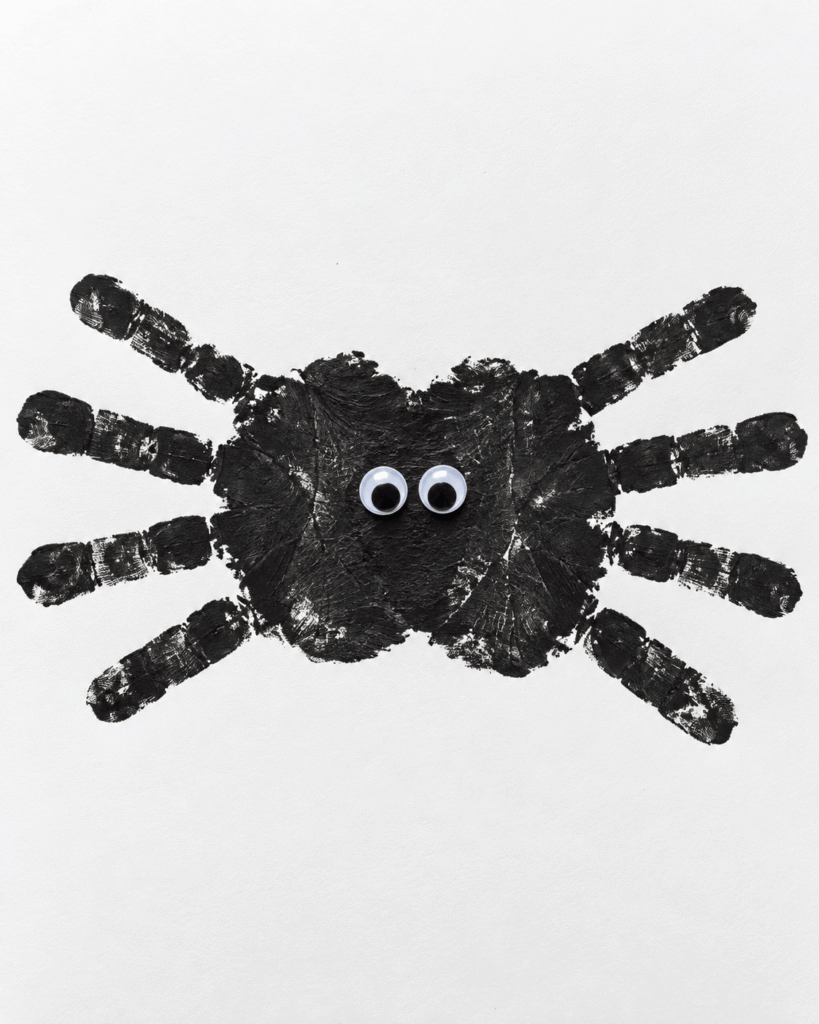
Two overlapping handprints with the thumbs tucked under give you exactly eight legs. That’s the detail most versions miss. Leave the thumbs out and you’ve got a ten legged spider.
Ages: 2 to 5 | Mess: Medium | Time: 10 minutes plus 20 minutes drying | Supervision: Hands on
Materials:
- Black washable paint
- White paper (cardstock holds up better for keeping)
- Foam brush or paintbrush
- Googly eyes
Steps:
- Paint your child’s palm and four fingers black, leaving the thumb bare.
- Press the hand onto the paper with fingers spread wide and the thumb tucked underneath.
- Wipe, repaint, and press the other hand so the two palms overlap in the middle, fingers pointing the opposite way.
- Once it’s dry, add googly eyes where the palms overlap.
Younger vs older: with 2 year olds, press each finger down with your own fingers so the print comes out clean. Four and five year olds can paint their own hand, which they find hilarious.
15. Handprint Ghost

White paint on black paper, and when you flip the page so the fingers point down, they become the ghost’s wispy tail.
White washable paint goes on thin, and a thin print looks see through on black paper. Load the brush heavily, or press twice in the same spot.
Ages: 2 to 5 | Mess: Medium | Time: 10 minutes plus about 15 minutes drying | Supervision: Hands on
Materials:
- White paint (the thicker the better)
- Black construction paper
- Paintbrush or sponge
- Black marker
Steps:
- Paint your child’s palm and fingers white.
- Press the hand firmly onto the black paper with fingers slightly spread, then press each finger down gently with your own.
- Let it dry for about 15 minutes.
- Turn the paper so the fingers point down, and draw two dot eyes and a round “oooo” mouth on the palm.
- Flip it over and write their name and the date on the back.
16. Footprint Bat

Painting a preschooler’s foot is a two adult job, or a one adult job with a very good plan. Sit them in a chair with a towel underneath and a bowl of warm soapy water and a washcloth ready before the paint opens. Painted feet never touch the floor.
Ages: 2 to 4 (older kids’ feet need bigger paper) | Mess: High | Time: 15 minutes plus 20 minutes drying | Supervision: Hands on
Materials:
- Black washable paint
- White or gray paper (a large sheet of cardstock)
- Paintbrush
- Googly eyes
- White paint pen for fangs (most white markers barely show on black paint)
Steps:
- Paint the bottom of one foot black.
- Press it onto the paper at an angle, heel toward the center and toes pointing out like a wing tip.
- Wash that foot, then paint and press the other foot as a mirror image so the two heels overlap in the middle.
- The overlapping heels make the bat’s body. Once dry, add googly eyes and two white fang dots there.
What goes wrong: toddlers curl their toes when the cold paint hits. Press down gently on the top of the foot and count to three out loud; it gives them something to focus on besides the tickle.
No-Cut, No-Mess Sensory Crafts
No cutting, yes. No mess is generous for at least two of these (the spaghetti and the shaving cream), so put a towel down. What they share is that they’re about how things feel rather than what you end up with, which is exactly where Halloween art and crafts for preschoolers should start for 2 and 3 year olds.
Three of the four involve food or food coloring. Each one has a note on keeping it safe if a taste test happens anyway.
17. Orange Spaghetti Sensory Bin

Cold, slippery, orange noodles with plastic spiders hiding inside. Kids who won’t touch paint will happily dig through this for twenty minutes.
Ages: 2 to 5 | Mess: High | Time: 30 minutes prep plus about 20 minutes of play | Supervision: At the table (food and small toys)
Materials:
- Cooked spaghetti (one pound fills a shoebox size bin)
- Orange food coloring (gel gives a brighter orange than liquid)
- A tablespoon of vegetable oil
- A large clear bin
- Plastic spiders and figurines (big ones only for under 3s)
- Fake spider webbing (or a tangle of black yarn instead)
Steps:
- Cook and drain the spaghetti, then rinse it in cold water.
- Toss it in a large zip bag with the food coloring and oil until it’s evenly orange.
- Spread it on a tray to dry for about an hour, in the sun if you can, so it’s slippery instead of sticky.
- Dump it into the bin and hide the spiders and figurines inside.
- Drape webbing or yarn over the top and sides.
Safety note: stretchy fake spider webbing pulls apart into thin wisps that end up in mouths and wrapped around little fingers. Skip it for under 3s and use yarn. Toss the spaghetti at the end of the day, since cooked pasta left out turns sour and gluey. And stay close, because this is a hands in activity, not a hands in mouth one.
18. Shaving Cream Marbled Pumpkins

The reveal, when you scrape the foam away and find swirls underneath, never gets old. It is a high mess craft, so do it on a tray.
Ages: 3 to 5 | Mess: High | Time: 20 minutes plus about 1 hour drying | Supervision: At the table
Materials:
- Plain white foam shaving cream (foam, not gel)
- Orange food coloring (a drop of red or yellow adds depth)
- A shallow tray or rimmed baking sheet
- White cardstock, precut into pumpkin shapes
- A ruler or old gift card for scraping
- Green paper for stems
Steps:
- Spread the shaving cream in the tray about half an inch thick.
- Drop the coloring on top and let your child swirl it with a craft stick. Two or three swirls is plenty; keep going and it turns solid orange.
- Press a cardstock pumpkin flat onto the foam, then lift it.
- Scrape the foam off in one smooth pass with the ruler or gift card to reveal the marbling.
- Let it dry for about an hour, then glue on a green stem.
Trade off: Swirling with a craft stick instead of fingers keeps hands from turning orange for a day, but some kids want the foam on their hands. That’s half the point, so just keep it away from eyes.
19. Eyeball Jiggler Sensory Cups

Wobbly, squishable eyeballs for poking. The original idea uses raisins or black beans for pupils, but dried beans aren’t food until they’re cooked, and raisins are a choking risk for younger kids. If there’s any chance of a taste test, use a halved blueberry instead.
Ages: 2 to 5 | Mess: Medium | Time: 15 minutes prep plus about 3 hours to set | Supervision: At the table (food)
Materials:
- Clear unflavored gelatin (Knox) or a light colored gelatin mix
- Water
- Halved blueberries (edible) or black beans (play only, never eaten)
- Small clear cups or a silicone egg mold
Steps:
- Make the gelatin following the package, using a little less water than it says. Firmer eyeballs survive more poking.
- Pour it into the cups or mold, about two thirds full.
- Wait until it starts to thicken (roughly 30 to 45 minutes in the fridge), then drop in a pupil. Add it straight away and it sinks to the bottom.
- Chill until firm, pop them out, and let your child poke and squish.
Tip: gelatin isn’t vegetarian. Agar agar sets the same way and works as a swap.
20. Frozen Spooky Hands

Freeze a glove of colored water with little spiders inside, peel it away, and you have an icy hand to melt and rescue toys from. It needs a day’s head start.
Ages: 3 to 5 | Mess: Medium (wet) | Time: 10 minutes prep, overnight freeze, then 20 minutes or more of play | Supervision: At the table
Materials:
- Clear nitrile gloves (skip latex)
- Water
- Food coloring
- Small plastic Halloween trinkets (large ones only for under 3s)
- Twist ties
- Warm water in squeeze bottles or cups, a little table salt, and a tray
Steps:
- Drop a few trinkets into a glove, fill it with tinted water over the sink, and twist tie the wrist tightly.
- Lay it flat on a baking sheet in the freezer overnight, with the fingers spread apart so they freeze separately.
- The next day, run it under warm water for a few seconds and snip the glove off with scissors (adult job).
- Give your child warm water and a pinch of salt to melt the hand and rescue the toys.
Tip: salt speeds up the melting and makes little cracks and tunnels in the ice, which preschoolers find fascinating.
Common Mistakes (I Made Most of Them)
Most Halloween arts and crafts for preschoolers go wrong for the same handful of reasons, and almost none of them are about the craft itself.
- Buying glossy coated paper plates. Paint beads up and slides around, so one coat becomes three and your child is done after the first.
- Squeezing liquid glue onto toilet paper, tissue, or cotton. It soaks through and flattens everything. Use a glue stick, or spread school glue thin with a brush first.
- Prepping while your child waits. Cut every piece before they sit down. Eight minutes of waiting is the whole attention span gone.
- Putting out every paint color. Three colors max. Any more and the splatter monster, the pumpkin, and the sleeves all turn the same muddy brown.
- Fixing their work. Moving the eyes “to the right spot” tells a 3 year old they did it wrong. The crooked version is the one worth keeping.
- Letting painted hands or feet leave the chair. Have the wash bowl and towel ready before the paint lid comes off, every time.
- Skipping names and dates on keepsakes. Halloween art and crafts for preschoolers all start to look alike in a memory box by year three.
- Doing food crafts with under 3s and no swap. Pom poms for marshmallows, blueberries for raisins, and big toys instead of tiny plastic spiders.
- Choosing a craft longer than their attention span. Split anything with drying time into two sessions: paint today, assemble tomorrow. Half the Halloween crafts for preschoolers on this list work better that way.
FAQs
What are easy Halloween crafts for preschoolers with no paint?
Pom pom spiders, toilet paper mummy plates, candy corn, cotton ball ghosts, and paper bag pumpkins colored with crayon all skip paint entirely. Each one takes 5 to 20 minutes and uses glue sticks or school glue.
How long should a preschool Halloween craft take?
In my experience, plan on 5 to 10 minutes of active time for 2 and 3 year olds and 10 to 20 minutes for 4 and 5 year olds. Anything with drying time works best split into two short sessions.
Are googly eyes safe for preschoolers?
For kids 3 and up with an adult at the table, yes. For under 3s, use peel and stick googly eyes pressed firmly by you, or draw the eyes on, since loose googly eyes are choking sized.
What are the best Halloween craft ideas for preschoolers in a classroom?
Pick crafts with all prep done ahead and no drying time, like pom pom spiders, toilet paper mummy plates, candy corn, and paper bag pumpkins. Check with the teacher before any food based craft because of allergies.
Which Halloween art and crafts for preschoolers make the best keepsakes?
Handprint ghosts, handprint spiders, and footprint bats on cardstock. Write the name and date on the back and they hold up for years in a frame or memory box.
Can I do Halloween arts and crafts for preschoolers without buying supplies?
Yes. Paper plates, toilet paper, egg cartons, tissue boxes, plastic jars, paper bags, and cereal boxes cover most of this list, and you can draw eyes on with marker instead of buying googly eyes.
Where to Go Next
Planning a classroom party instead? preschool Halloween party games and activities pairs well with any of these Halloween craft ideas for preschoolers, and helps you fill the time between the craft table and the snacks.
My advice: pick one craft tonight, prep it into a zip bag before bed, and do it tomorrow before the late afternoon meltdown window. Then stick it on the fridge, eyes on its chin and all. Of all the Halloween crafts for preschoolers we’ve made at our table, the crooked ones are the ones I kept.
