
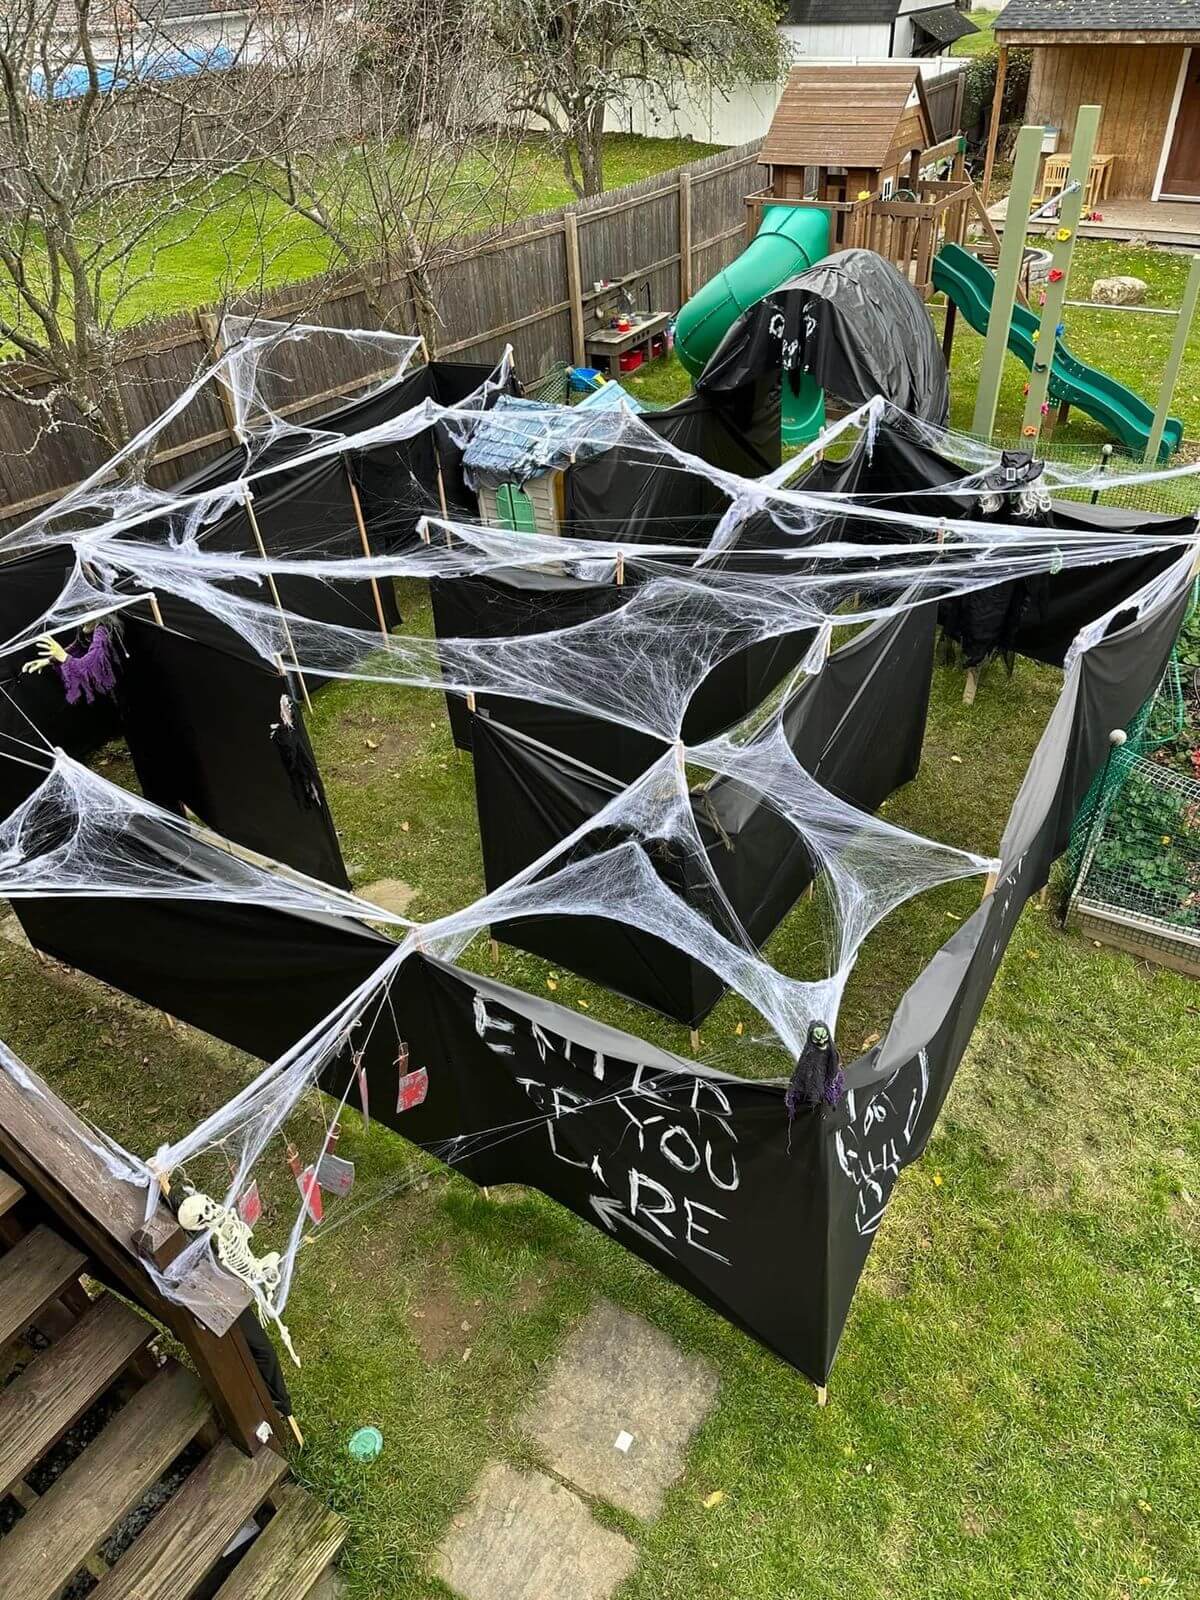
The candy bowls are full, the decorations are up, and twelve kids in costume are standing in your living room with nothing to do until the pizza arrives. That gap is where a Halloween party either turns into a memory or turns into chaos.
Most “best Halloween games” lists recycle the same handful of ideas: apple bobbing, a pin the spider poster, a pillowcase race. Those aren’t bad, but if you’ve hosted more than one Halloween party, your guests have already played them. This list of Halloween party games for kids leans toward games you probably haven’t run before, mixed with a few classics that got a real twist instead of just a new name.
Every game uses stuff you likely already have or can grab cheap, and each one tells you the age it actually fits, how long it runs, how messy it gets, and what tends to go wrong the first time. So you’re not stuck refereeing something too babyish for your 10 year olds or too fast paced for your preschoolers.
One note for this year: Halloween 2026 lands on a Saturday, which means longer parties and bigger groups than a school night usually allows. Plan for more games than you think you need.
Quick answer: The best Halloween party games for kids are Zombie Footsteps (freeze tag with a zombie shuffle), Giants Wizards Trolls, an eyeball cup toss, a pumpkin spoon relay, and mystery guts boxes for the brave. Most cost under $10, use plastic cups, bean bags, and cooked spaghetti, and work for ages 5 to 11 with small tweaks. Plan roughly one game per 10 minutes of party, and always run the messy sensory games last.
Pick a game fast. Prep is your work before guests arrive. Play is roughly how long it holds a group of eight to twelve.
| Game | Best ages | Prep | Play | Mess | Space |
|---|---|---|---|---|---|
| Zombie Footsteps | 5 to 10 | None | 10 to 15 min | None | Living room |
| Giants, Wizards, Trolls | 6 to 11 | None | 15 to 20 min | None | Yard or big room |
| Wink of Doom | 7 to 12 | 2 min | 10 to 20 min | None | Circle on the floor |
| Whispered Warning | 5 to 10 | None | 5 min a round | None | Anywhere |
| Haunted Family Feud | 8 to 12 | 20 min | 20 to 30 min | None | Seated |
| Eyeball Cup Toss | 4 to 11 | 5 min | 10 to 15 min | Low | Table corner |
| Spiderweb Bean Bag Toss | 4 to 11 | 25 min | 15 to 20 min | Low | Wall or fence |
| Candy Corn Chopstick Challenge | 6 to 12 | 5 min | 10 min | Low | Table |
| Broomstick Pumpkin Sweep | 4 to 10 | 5 min | 15 min | None | Long clear floor |
| Pumpkin Spoon Relay | 5 to 11 | 5 min | 15 min | None | Long clear floor |
| Zombie Crawl Obstacle Course | 5 to 11 | 15 min | 20 min | Low | Yard or garage |
| Skeleton Bone Dig | 3 to 9 | 10 min | 10 min a group | Medium | Floor or table |
| Spaghetti Eyeball Dive | 5 to 11 | 30 min plus cooling | 10 min | High | Outside, ideally |
| Mystery Guts Boxes | 5 to 11 | 25 min | 10 min a group | Medium | Table |
| Memory Match Card Duel | 4 to 10 | 25 min | 15 min | None | Floor or table |
Practical note: Before you plan a single game, ask parents about food allergies when you send the invite. Several games here use spaghetti, grapes, and candy corn, and a kid with a wheat or egg allergy can react through touch, not just eating. FARE’s Teal Pumpkin Project (the teal pumpkin you’ve seen on porches) exists for exactly this reason, and non candy prizes like glow sticks, stickers, and temporary tattoos solve most of it for a couple of dollars.
One more thing that catches every first time host: costumes. Long capes, robes, and princess skirts are trip hazards in any running game, and a mask cuts a kid’s side vision to almost nothing. Before the relays, have everyone push masks up onto their foreheads and hitch long costumes with a safety pin or a belt. Nobody runs in a full face mask.
Classic Games With a Halloween Twist
These borrow the bones of games kids already know how to play, so there’s zero learning curve, but the Halloween rules change how they actually feel.
Run these first, while guests are still arriving. None of them need a full group to start, so latecomers can just join the next round.
1. Zombie Footsteps

One adult stands at the front of the room facing away, with a small pile of candy at their feet. The kids line up at the far wall and creep toward the candy like zombies, slow shuffling steps, arms out. Whenever the adult spins around, everyone has to freeze mid shuffle.
Anyone caught still moving gets sent back to the start line. It’s Grandma’s Footsteps, but the zombie shuffle makes freezing genuinely hard, so even kids who are out a few times stay entertained watching everyone else wobble.
Ages 5 and up. No setup. Runs 10 to 15 minutes. No mess. One adult running it, which is all the supervision it needs.
What goes wrong first time: The arguments. Three kids will swear they weren’t moving. Say the rule out loud before round one: the caller’s decision is final, and the caller changes every round. Then let the winner be the next caller, which is the actual prize as far as the kids are concerned.
Tip: Don’t spin at a predictable rhythm. Kids catch a count of five within two rounds and start timing you. Spin after three seconds, then after nine, then after two.
Make the finish line four or five feet short of the wall, because the last few steps turn into a sprint and the wall is right there.
Younger kids do better without eliminations. Everyone caught just freezes in place for one turn instead of trekking back to the start, which kills the momentum for a 5 year old. For 9 and up, make them hold whatever pose they got caught in until the next spin.
It won’t suit a child who hates being singled out. Give them the caller job first and they’ll be fine.
2. Giants, Wizards, Trolls

Split the group into two teams standing at opposite ends of the room. Each team huddles and secretly picks one of three characters. Giants beat trolls, trolls beat wizards, wizards beat giants, like rock paper scissors but with your whole body.
Both teams line up, count to three together, then act out their choice at the same time: giants stomp and roar, wizards cast a spell with jazz hands, trolls crouch and growl. Whichever team loses has to run back to their wall before the winning team tags them.
How to run it without a pile up
- Teach the three moves and the three rules before you split anyone into teams. Do a practice round with no running at all.
- Mark a center line with tape, and a safe wall at each end.
- Give each team 20 seconds to huddle and decide. Longer than that and they start fighting.
- Count to three together, act it out, then chase.
- Anyone tagged joins the other team, which keeps every kid playing instead of sitting out.
Ages 6 and up. No setup. Runs 15 to 20 minutes. No mess. Two adults is much better than one, one at each wall.
This one gets loud fast, so it’s better for a backyard or a big open room than a crowded living room. Move furniture with corners out of the way first, and if you’re indoors on hardwood, socks are how kids skid into walls. Bare feet or sneakers.
Practical note: Two teams sprinting at each other is the one game on this list where kids collide head to head. Make both teams run in the same direction (losing team runs back to their own wall, winners chase from behind) rather than toward each other across a line. It’s the same game, minus the crash.
Younger kids need the rock paper scissors logic simplified. Post three drawings on the wall with arrows showing what beats what. For 10 and up, add a fourth character (a ghost that beats wizards but loses to giants) and watch the huddles get serious.
3. Wink of Doom
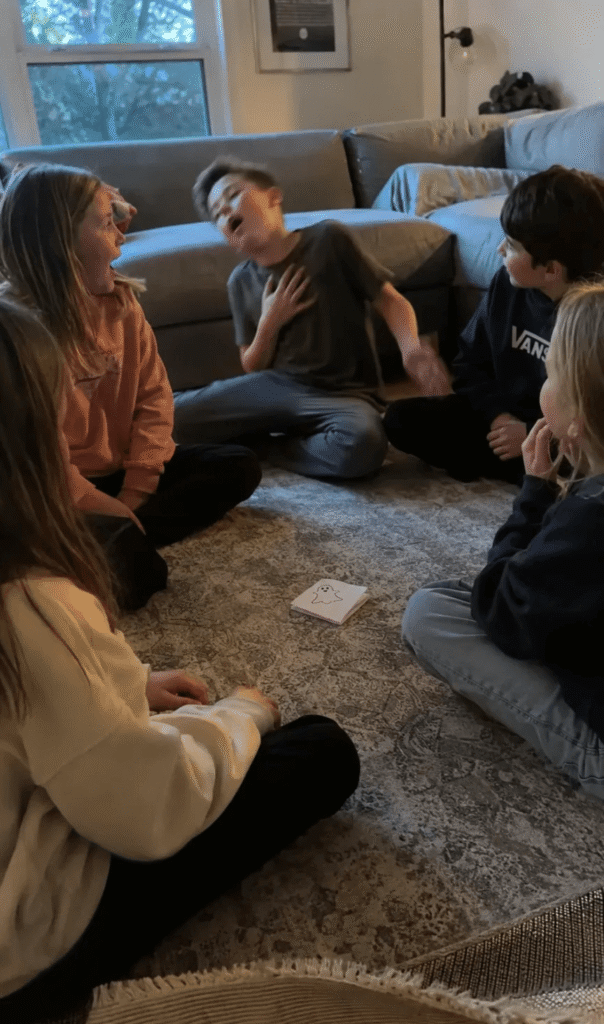
Everyone sits in a circle. One player is secretly the ghost, picked by drawing a card or a folded slip of paper with a ghost drawn on it. The ghost eliminates people by catching their eye and winking at them, and nobody else sees it happen.
Once winked at, a player has to count to five in their head, then collapse dramatically wherever they’re sitting. The rest of the group tries to work out who the ghost is before everyone’s been haunted.
It rewards kids who are good at reading faces, which usually isn’t the same group who wins the running games. That’s exactly why it earns a spot on the list.
Ages 7 and up. Two minutes of prep (writing slips). Runs 10 to 20 minutes across a few rounds. No mess. Light supervision.
Best played on carpet or a rug, since the dramatic collapse is most of the fun and a hardwood floor takes the joy out of it fast.
The thing you learn on round one: plenty of 7 year olds physically cannot wink. They blink with both eyes, hugely, at a specific person, and everyone knows instantly. Swap the signal to sticking out a tongue or a slow nod, which works just as well and saves a kid the embarrassment.
Tip: Make one extra slip with a ghost on it and hold it back, so kids can’t count slips at the end and work out who had it.
To adapt down, play with 5 and 6 year olds as a group game where the adult is always the ghost and kids simply guess who collapses next. For older kids, add a detective who gets one accusation per round and loses the round if they’re wrong.
Younger kids tend to blurt out the ghost’s identity by accident, and a kid who can’t keep a secret will announce it in the first ten seconds. Make that kid the ghost. Problem solved.
Quiet Guessing and Trivia Games
Good for right after a sugar crash, or for mixed ages where you want everyone sitting down and talking instead of running.
Both of these are also your emergency filler. When the pizza is fifteen minutes late and the group is fraying, this is the section you want.
4. Whispered Warning

Line the kids up single file. Whisper a spooky phrase into the first kid’s ear, something like “the pumpkin has three eyes,” and have them pass it down the line, whispering it exactly once to the next person.
The last kid says out loud what they heard, and it’s almost never what you started with. Compare the garbled version to the original and let the group guess where it went wrong.
Phrases that scramble best (long ones with similar sounding words):
- The witch’s black cat lost her striped sock
- Six slick skeletons slipped on the stairs
- The pumpkin has three eyes and one crooked tooth
- Grandma’s ghost bakes bat shaped biscuits
Short phrases survive the trip intact, which ruins the punchline. Aim for six to eight words with at least two tricky sounds.
Ages 5 and up. No setup, no supplies, no mess. About 5 minutes per round. It’s the easiest filler on the list while you’re waiting on food.
Two honest limitations. Kids under 5 usually just repeat one word or say something unrelated, which is funny once and then stops being a game. And a child with any hearing difficulty is set up to fail in front of everyone, so if you know that’s the case, put them near the front of the line or pick a different game entirely.
Tip: Write the original phrase on a slip of paper before you start and hand it to the last kid in line to read out. It settles the “that’s not what you said” argument before it starts.
5. Haunted Family Feud

Split into two teams of four or five and write out Halloween themed prompts ahead of time. One adult plays host and reads the prompts.
Teams huddle and try to guess the most popular answer, points for guesses that match what most people would say. It works because kids get to argue strategy with their team before answering, which turns into its own kind of fun separate from the actual game.
Prompts that work, with the answers kids actually give
| Prompt | Top answers you’ll hear |
|---|---|
| Name something in a haunted house | Ghost, spider webs, bats, creaky stairs |
| Name a Halloween candy | Snickers, Skittles, Reese’s, candy corn |
| Name something a witch owns | Broom, cauldron, black cat, pointy hat |
| Name a costume you’ll see tonight | Skeleton, superhero, princess, ghost |
| Name something that glows in the dark | Stars, glow sticks, skeleton, jack o’lantern |
Here’s the part that makes it work: don’t invent the point values. Text the prompts to five or six adults in your family group chat the week before, tally what they say, and use those as your answer board. It takes ten minutes and it removes every “that should have counted” argument, because the answers came from real people.
Ages 8 and up who already understand the show’s format. Younger kids can play but usually need an adult walking them through each round, so pair a 6 year old with an older sibling as a two person team.
Prep takes about 20 minutes including the texting. Play runs 20 to 30 minutes. No mess. One adult hosting.
Supplies are a pen, paper, and a whiteboard if you have one. Free swap: tape a sheet of paper to the wall and write scores with a Sharpie. Dollar Tree sells small dry erase boards for a dollar if you want it to look like a real game show.
Toss and Aim Challenges
Simple target games that work as a rotating station if you’ve got more than one activity going at once.
Set these up before guests arrive and they’ll run themselves for most of the party. This is the section where a group of eight kids can split into two lines and stop needing you.
6. Eyeball Cup Toss

Set up a small pyramid of plastic cups and give each kid a handful of plastic eyeballs. They take turns tossing eyeballs into the cups from a marked line, scoring more points for cups farther back.
Supplies
| What you need | Where | Free or cheap swap |
|---|---|---|
| Plastic eyeballs | Michaels, Dollar Tree, or Oriental Trading around October | Ping pong balls with a black dot drawn on, or crumpled foil balls |
| Plastic cups | Any grocery store | Cups you already own, or empty yogurt pots |
| A start line | Painter’s tape | A jump rope or a shoe on the floor |
Setting it up
- Tape the cups to each other and to the table so they stop tipping every single throw. This is the whole difference between a game and ten minutes of resetting cups.
- Write point values on index cards in front of each row, higher at the back.
- Tape two start lines, one for little kids and one about three feet farther back for the big ones.
- Give each kid five throws, then rotate.
Ages 4 to 11. Five minutes of setup. Runs 10 to 15 minutes. Mess is low, mostly eyeballs under the couch.
Practical note: Plastic eyeballs are almost exactly the size and shape of things that block a small airway, and they roll everywhere. Keep them away from any child under 3, count them into the bag at the end, and sweep under the furniture before the toddlers come back through. Foam balls are the safer swap for a mixed age party.
Kids under 6 do better underhand from a closer line, and honestly, bouncing the eyeball off the table into the cup is more satisfying than a clean toss anyway. For 9 and up, add a rule that landing in the back cup wins double or you lose all your points, which turns a simple toss game into a gamble.
7. Spiderweb Bean Bag Toss
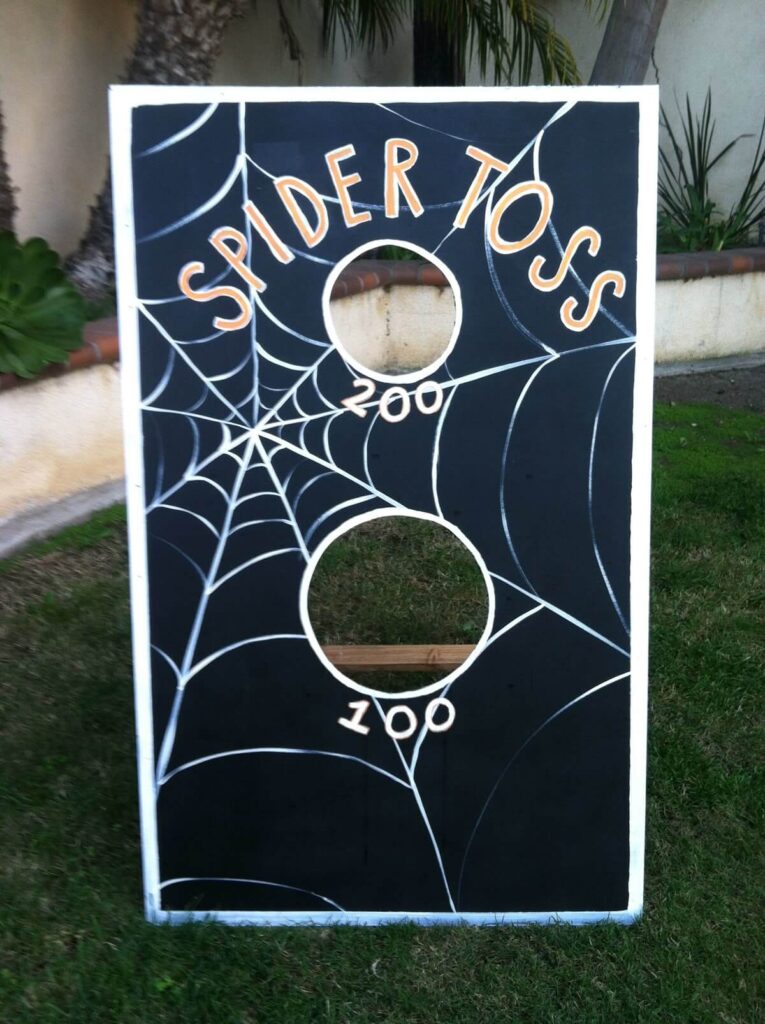
Draw or tape a big spiderweb pattern onto a piece of cardboard or a bedsheet hung against a wall, then cut or mark different sized holes worth different points. Smaller holes near the center score higher. Kids toss bean bags or rolled up socks through the holes.
It plays like a homemade cornhole board and holds attention because kids want another turn to beat their own score, not just to beat their friends.
Making the board (adult job, about 25 minutes)
- Use the flat side of a large delivery box. Appliance boxes are perfect if you have one.
- Draw the web with a Sharpie: a few straight spokes from the center, then curved lines connecting them.
- Cut the holes with a craft knife on the floor, not on your lap, and not with kids in the room. This is the only sharp tool in the article and it’s entirely yours.
- Tape over the cut edges with painter’s tape or duct tape, since cut cardboard edges are sharper than they look.
- Lean it against a wall or fence and weight the base with a couple of books, or hang a bedsheet version from a fence with clothespins.
A stack of five bean bags per kid keeps the line moving without long waits between turns. No bean bags? Rolled up socks are free, they don’t bounce back as far, and they’re softer when a throw goes wide.
Ages 4 to 11. Prep 25 minutes, play 15 to 20 minutes, no cleanup beyond gathering socks. Mess is low. Check in every few minutes rather than standing over it.
The cardboard version takes a beating and sags after a windy hour outside, so it’s a one party board. The bedsheet version lasts for years and rolls up in a closet, which is why I switched.
Younger kids should throw from three or four feet away, and that’s not babying them, that’s the distance where a 4 year old can actually get one through. Older kids can throw from a real distance, or try it with their non dominant hand for double points.
8. Candy Corn Chopstick Challenge
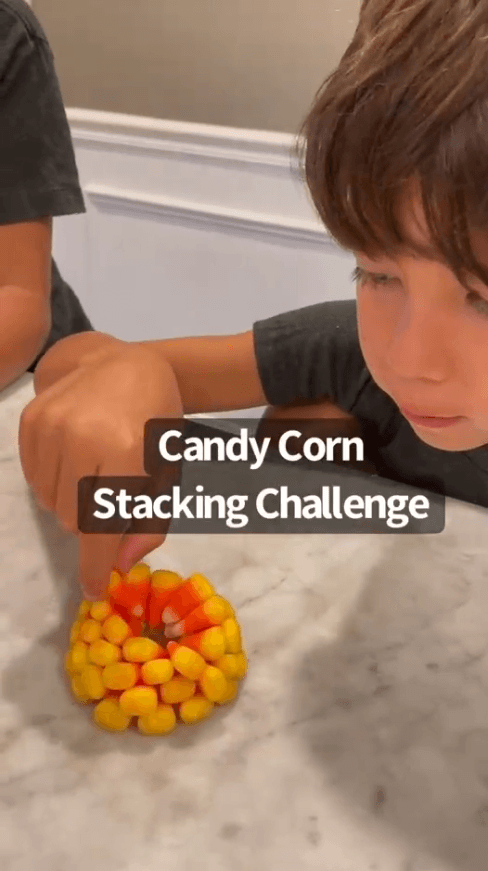
Give each kid two bowls, one full of candy corn and one empty, and a pair of chopsticks. On “go,” they’ve got 60 seconds to move as many pieces as they can from the full bowl to the empty one using only the chopsticks.
Kids who’ve never held chopsticks before end up laughing at themselves more than actually competing, which takes the pressure off entirely.
Ages 6 to 12. Five minutes of setup. Runs about 10 minutes. Mess is low, just candy corn on the floor.
Hand younger kids two forks instead if chopsticks feel impossible. The timed, frantic energy is the same either way. Training chopsticks (the kind held together with a plastic hinge) cost a couple of dollars and let a 5 year old compete properly.
Three things to sort before you start:
- The candy corn nobody eats. Whatever gets transferred has been handled, dropped, and picked up off the floor. Decide up front that this batch is game pieces only, and hand out a fresh wrapped prize to the winner. Brach’s bags are cheap enough to buy one just for playing.
- Allergies. Candy corn typically contains egg white, and plenty of brands are made on shared equipment with nuts and milk. Check the bag against your guest list, and use dried beans or pom poms if that’s simpler.
- Chopsticks are pointed sticks. Sitting at a table only, and nobody walks around with them. That sounds obvious until you watch a 7 year old turn one into a wand.
Tip: Bowls slide all over a smooth table while kids are grabbing. A strip of painter’s tape under each bowl, or a damp paper towel, holds them still.
For 10 and up, make them use their non dominant hand, or add a rule that dropped pieces go back in the starting bowl.
Races and Relays
These need a little more floor space but burn off the energy that builds up after twenty minutes of sitting down games.
This is the point in the party where masks come off and long costumes get pinned up. Take thirty seconds to do that before the first race and you’ll avoid the one injury that actually happens at Halloween parties.
9. Broomstick Pumpkin Sweep

Give each kid a small broom (a toy broom or even a dustpan brush works) and a mini pumpkin or an orange balloon. On “go,” they sweep their pumpkin across the room to a finish line without touching it with their hands.
Lay down a zigzag path with tape or pool noodles to make it trickier for older kids, or keep it a straight line for younger ones. It’s a low cost relay that turns something as ordinary as a broom into the whole game.
What to sweep, and what it changes
- Mini pumpkins (about $1 each at a grocery store in October) roll unpredictably because of the stem, which is the fun part.
- Oranges cost less and roll straighter, so they’re better for younger kids.
- An orange balloon is free if you have a bag, but it barely moves indoors and blows away outside. It’s the right choice for 4 year olds and the wrong one for anybody older.
Latex balloons carry a required choking warning for children under 8, so if you use one, an adult picks up every piece the moment it pops.
Ages 4 to 10. Five minutes to tape a line. Runs about 15 minutes. No mess. One adult watching the finish line.
A full sized kitchen broom is taller than most kids and turns the game into wrestling. Toy brooms, dustpan brushes, or even a rolled up magazine all work better. And a real broom handle at a 5 year old’s eye height is a genuine hazard in a crowd, which is reason enough on its own.
This one doesn’t work on carpet. The pumpkin snags and nobody gets anywhere.
10. Pumpkin Spoon Relay
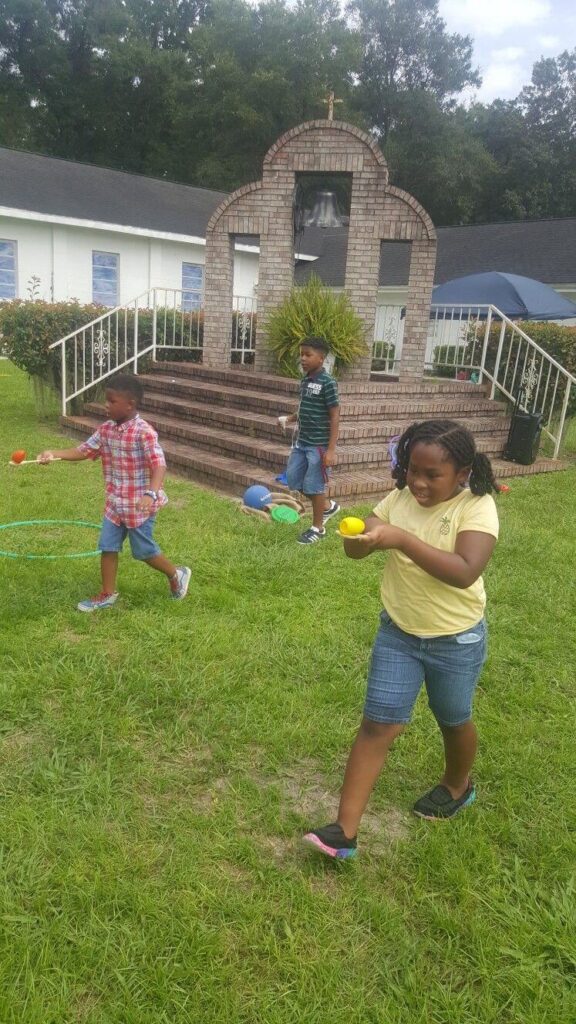
Split into teams and give the first runner on each team a large spoon with a mini pumpkin balanced on top. They race to a cone and back without dropping it, then hand the spoon to the next teammate.
A dropped pumpkin means going back a few steps, not starting completely over, which keeps younger kids from getting discouraged mid race.
Swap the pumpkin for what fits your budget and ages
| Item | Difficulty | Notes |
|---|---|---|
| Mini pumpkin | Hard | Too heavy for a plastic spoon, use a serving spoon |
| Small orange | Medium | The best all round choice |
| Golf ball | Very hard | For 9 and up only, or it’s just frustrating |
| Ping pong ball | Medium | Light enough to blow off outdoors |
| Plastic egg from the Easter bin | Easy | Free, and perfect for 5 year olds |
Ages 5 to 11. Five minutes of setup. Runs about 15 minutes. No mess. One adult as starter and judge.
Use a metal serving spoon or a big plastic ladle rather than a teaspoon. A mini pumpkin on a teaspoon is impossible, and the game dies in the first 20 seconds when nobody can complete a single lap.
Tip: Run it as a relay against the clock rather than team against team if you’ve got a big age gap in the group. Everyone cheers for the total time instead of one team blaming the youngest kid.
Cones are nice to have. Free swaps: a plastic cup upside down, a shoe, or a rolled towel on the floor.
11. Zombie Crawl Obstacle Course
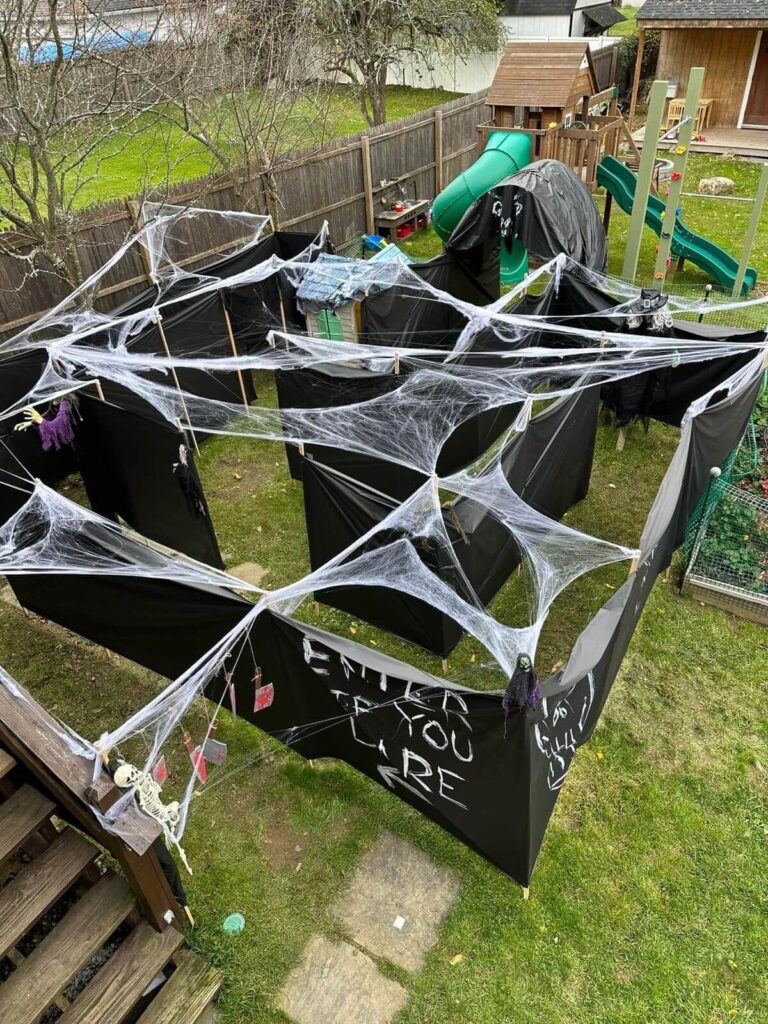
Set up a short course using cones, hula hoops, and a low table or two. Kids have to crawl under, hop through, and weave around each obstacle while shuffling like zombies the whole way, arms stretched out and groaning.
Time each kid or team and post the fastest times somewhere visible. The moaning and the stiff armed crawling make even a simple backyard setup feel like an event.
Five stations that work with what you own
| Station | What to use | Free swap |
|---|---|---|
| Crawl under | A low table or two chairs with a blanket over | A cardboard box with both ends open |
| Hop through | Hula hoops on the ground | Chalk circles, or rolled towels |
| Weave around | Cones | Upside down cups, shoes, or water bottles |
| Step over | Pool noodles on bricks | A broom across two stacks of books |
| Finish | A tape line and a stopwatch | Your phone timer |
Ages 5 to 11. Fifteen minutes of setup. Runs about 20 minutes. Mess is low. One adult at the course, one at the timer.
This one runs best outdoors or in a garage where a little dirt doesn’t matter, and grass beats concrete for a game built entirely around crawling. Long costumes come off or get pinned before anyone starts, because a cape plus a crawl under a table is how a kid gets yanked backward by their own neck.
Build the crawl station with chair backs facing outward. Kids grab the blanket on the way through, and chairs facing in tip straight toward them.
Tip: Let the kids rearrange the course after the first few runs. They’ll make it harder than you would, and they’ll run it four more times to prove their version works.
Younger kids need three stations, nothing above knee height, and no timer, since racing a clock at 5 mostly produces tears. For 9 and up, add a rule that touching an obstacle costs five seconds, or send them through carrying a plastic bone they can’t drop.
Knee pads are unnecessary, but long sleeves and pants are worth mentioning on the invite if you’re on concrete or gravel.
Hands-In Sensory Games
These are the ones kids talk about for weeks afterward, a little gross, entirely optional for squeamish guests, and worth doing outside or over an easy to wipe floor.
Three ground rules before any of them:
- Nothing in this section is food. Say it out loud: we touch, we don’t taste. Everything gets thrown away afterward.
- Everyone washes hands with soap and water after, before anyone goes near the snack table.
- Nobody is made to do these. Sensory sensitive kids find cold spaghetti genuinely unpleasant, not just “ew” funny. Have them hold the timer or guard the towels, and mean it.
Save this for later: If you’re reading this a week or two before the party, pin the image below now. The sensory games are the ones that need actual shopping and cooking ahead, and they’re the first thing you forget on the day.
12. Skeleton Bone Dig

Break a cheap plastic skeleton decoration into its separate pieces and bury them in a bin of dry rice or dried beans. Give each kid a small garden trowel or a plastic spoon and set a timer.
Whoever finds the most bones, or the team that reassembles a full skeleton first, wins. It’s quiet enough to run alongside a louder game across the room, which makes it a good station if you’re rotating small groups.
Ages 3 to 9. Ten minutes of prep. Runs about 10 minutes per group. Mess is medium and it’s the sweepable kind.
Skip the potting soil. It’s a common suggestion for this game and a bad one indoors: bagged mixes often contain fertilizer beads and they carry bacteria you don’t want on a dozen pairs of hands an hour before cake. Dry rice, dried beans, or dried split peas cost a few dollars at any grocery store and pour back into the bag afterward.
Two real hazards worth naming. Dried beans and rice are exactly the size that toddlers put in noses and ears, so this needs an adult sitting with it for anyone under 4. And small skeleton bones (finger pieces especially) are choking hazards, so for young kids use only the big pieces: skull, ribcage, arms, legs.
Tip: Put the bin inside a fitted bed sheet with the corners lifted, or on a shower curtain. You gather the whole thing up afterward and pour the spill straight back in.
For a group of 3 and 4 year olds, tell them how many bones are hidden and let them dig without a timer. For 8 and 9 year olds, hide two complete skeletons in different colors and make it a race to assemble a full one.
Dollar Tree sells poseable plastic skeletons in October, and a cardboard skeleton cut into pieces works just as well for free if you’d rather not buy one.
13. Spaghetti Eyeball Dive

Cook a big pot of spaghetti, let it cool completely, and mix in a handful of plastic eyeballs. Kids reach in with bare hands and try to find every eyeball in 60 seconds.
The cold slippery noodles get more reactions than the eyeballs do. Most kids shriek on the first touch and dig in anyway.
Getting the noodles right (this is the whole game):
- Cook a pound of the cheapest spaghetti you can find, a couple of minutes past al dente, so it’s properly floppy.
- Drain and rinse under cold water until it’s cold all the way through. Warm spaghetti feels like food. Cold spaghetti feels like guts.
- Toss with a spoonful of vegetable oil so it doesn’t set into one solid brick. Skip this step and you’ll be pulling apart a spaghetti loaf at the party.
- Chill in the fridge, covered, for up to a day ahead.
- Tip into a bin right before the game, and drop in the eyeballs.
Ages 5 to 11. Prep 30 minutes plus chilling. Runs about 10 minutes. Mess is high and it’s the worst kind on this list.
Lay towels down first, because noodles end up on the floor no matter how careful everyone is. Do it outside if the weather allows, or in a garage or kitchen with a wipeable floor. Never on carpet: cold oily spaghetti ground into a rug is a genuinely awful hour of your life.
Some real notes before you commit. Spaghetti is wheat, so a guest with a wheat or gluten allergy can’t put their hands in it, and cooked pasta plus bare hands means everyone washes properly afterward. Use plastic eyeballs rather than peeled grapes for this one, because grapes are the classic choking food for young kids and a bowl of them at a party is asking for trouble. And this is a supervise the whole time game, both for the hazard and because one kid will absolutely throw a handful.
The free swap for plastic eyeballs is ping pong balls with a dot drawn on them, which also float to the top and make it slightly easier for little kids.
14. Mystery Guts Boxes

Cut a hand sized hole into the side of a few shoeboxes and fill each one with a different squishy or textured item. Kids reach in one at a time and guess what they’re touching before peeking.
Label each box with a number instead of what’s inside, and keep a written answer key nearby so you can settle arguments once everyone’s had a turn.
What to put in them
| Box label | What’s actually in it | Notes |
|---|---|---|
| Brains | Cold cooked pasta or oatmeal | Same prep as above |
| Guts | Damp yarn or cooked spaghetti | Yarn is the least messy option here |
| Eyeballs | Peeled grapes, cut in half | See the safety note below |
| Teeth | Candy corn or dried corn kernels | Not for under 4s |
| Witch’s hair | Corn silk, or a wet mop head | Free, and weirdly effective |
| Bones | Pretzel sticks or dog biscuits | Pretzels are wheat, so check allergies |
| Dragon skin | A wet sponge or bath pouf | Completely safe and nobody guesses it |
Practical note: Grapes are one of the most common choking foods for young children, and the AAP advises cutting them lengthwise for kids under 4. In a box where nobody can see what they’re grabbing and a 4 year old might pop one in a mouth, halve them or use a peeled boiled egg instead. Peeled whole grapes in a dark box are the single riskiest idea in the standard Halloween party playbook.
Making the boxes (adult job, about 25 minutes)
- Cut a hand sized hole in the end of each shoebox with a craft knife. Adults only, away from the party.
- Tape a slit cut square of fabric or a sock over the hole so kids can’t see in and the contents can’t spill out.
- Line each box with a zip top bag or plastic wrap for the wet fillings.
- Number them in marker and write the key on an index card you keep in your pocket.
- Line them up on a table with a towel underneath.
Ages 5 to 11. Prep 25 minutes. Runs about 10 minutes per group of three or four. Mess is medium.
This works far better as a rotating station for small groups than for the whole party at once, mainly because a group of twelve means the kid at the back hears every answer before their turn.
The first time, someone will look. Have a second adult stand at the boxes, or cut the hole so the opening faces away from the room.
For younger kids, use only dry fillings (pasta shapes, yarn, sponges, pom poms) and tell them what the choices are before they guess. For 10 and up, no hints at all and one guess each, with a point for every right answer.
Craft-Turned-Competition Games
Same materials as a normal Halloween craft table, but with a scoreboard attached, so kids who get bored of coloring quietly stay engaged.
This is your wind down section. Put it after the sensory games and right before food, when everyone’s hands are washed and the energy needs to come down before cake.
15. Memory Match Card Duel

Cut 20 matching squares of card stock and draw simple Halloween images on each pair (a bat, a pumpkin, a ghost), two of each design. Lay them face down in a grid and let kids take turns flipping two cards at a time, keeping any pairs they match.
Because you make the cards yourself, you control the difficulty by how many pairs you include. Ten pairs for younger kids, twenty for a group that wants more of a challenge. Whoever holds the most pairs when the grid clears out wins.
The version that actually works at a party: let the kids make the cards as the craft, then play with them. Hand out blank squares and markers, let each kid draw two matching pictures, and pool them into one deck. It fills the craft slot and the game slot with one set of supplies, and kids play harder for a deck they drew themselves.
Ages 4 to 10. Prep 25 minutes, or none if the kids make them. Runs about 15 minutes. No mess.
The one thing that ruins homemade memory cards: thin paper. You can see the drawing through the back of copy paper, and the whole game collapses. Use card stock, cereal box cardboard cut into squares, or index cards, which cost a dollar for a hundred at Dollar Tree and are the easiest option by far.
Tip: Play in groups of three or four, not twelve. A twelve kid memory game means eleven kids waiting while one flips two cards, and you’ll lose them in about ninety seconds.
For 4 and 5 year olds, use eight pairs and big bold pictures. For 9 and 10 year olds, go to fifteen or twenty pairs and use pairs that match by theme rather than being identical (a bat with a cave, a witch with a broom), which is much harder and gets genuinely competitive.
Crayola washable markers are the right call for a party table, because permanent marker on card stock bleeds through onto whatever’s underneath, and that’s usually your tablecloth.
Common mistakes hosts make (I’ve made every one of these):
- Planning too few games. Each one runs shorter than you think with a real group, often half as long. Have three more ready than you’ll need, and don’t be precious about skipping ones that flop.
- Running the messy games first. Once hands are covered in cold spaghetti, everything else in the house is too. Sensory games go last, right before hand washing and food.
- Explaining rules to a group that’s already excited. Get their attention first, say the rules in one sentence, then demonstrate. Anything longer and half of them are gone.
- Making every game elimination style. The kids who most need to be entertained are the first ones out. Use “join the other team” or “sit out one turn” instead of “you’re done.”
- Prizes that create a fight. One big prize per game means eleven disappointed kids. Small identical prizes for everyone who plays, glow sticks or stickers, and let the winner pick first.
- Forgetting that costumes end the party early. Face paint runs, wings snap, capes get stepped on. Keep safety pins and wet wipes in your pocket, and expect half the costumes to be off by the second hour.
FAQs
How many games do I need for a two hour Halloween party?
Plan on five or six, plus two spares. Games run shorter than you expect with a real group, and you’ll spend a solid chunk of the party on food, cake, and costume repairs.
Which Halloween party games work for a mixed age group of 4 to 10 year olds?
Zombie Footsteps, the eyeball cup toss, and the spiderweb bean bag toss all work with two start lines, one for little kids and one farther back. Skip the elimination rules and pair the youngest kids with an older buddy.
Are these Halloween party games safe for a 3 year old?
A few are, with changes. The skeleton bone dig (big pieces only, adult sitting with it) and the broomstick sweep work fine. Keep 3 year olds away from plastic eyeballs, candy corn, whole grapes, dried beans, and anything with a chopstick, since all of them are choking or insertion hazards at that age.
How do I run Halloween games when a guest has a food allergy?
Ask on the invite, then swap the food based fillings: pom poms and yarn instead of pasta, dried beans instead of candy corn, and a peeled boiled egg instead of grapes. Non candy prizes like glow sticks and stickers keep the prize table safe for everyone.
How do I get cooked spaghetti out of the carpet?
Let it dry fully, then vacuum up what you can before touching it with water. Blot what’s left with dish soap and warm water, working from the outside in. The better answer is not to run that game on carpet at all.
What can I use instead of plastic eyeballs?
Ping pong balls with a dot drawn on in Sharpie, foam balls, or crumpled foil. All three are cheaper, all three are safer around little kids, and the game plays the same.
Read next: If your party runs long or the weather turns, [INTERNAL LINK: 10+ Indoor Physical Activities for Kids That Burn Energy Fast on craftandsteward.com] has more ways to burn energy in a living room. And when the guests have gone and you’re staring at a bucket of candy, [INTERNAL LINK: what to do with leftover Halloween candy on craftandsteward.com] is the next problem to solve.
Pick five games, write the running order on an index card, and stick it to the fridge where you can see it. That card is the difference between a host who’s playing along and a host who’s standing in the kitchen trying to remember what comes next.
Then set the spaghetti to chill the night before. Future you will be grateful.