
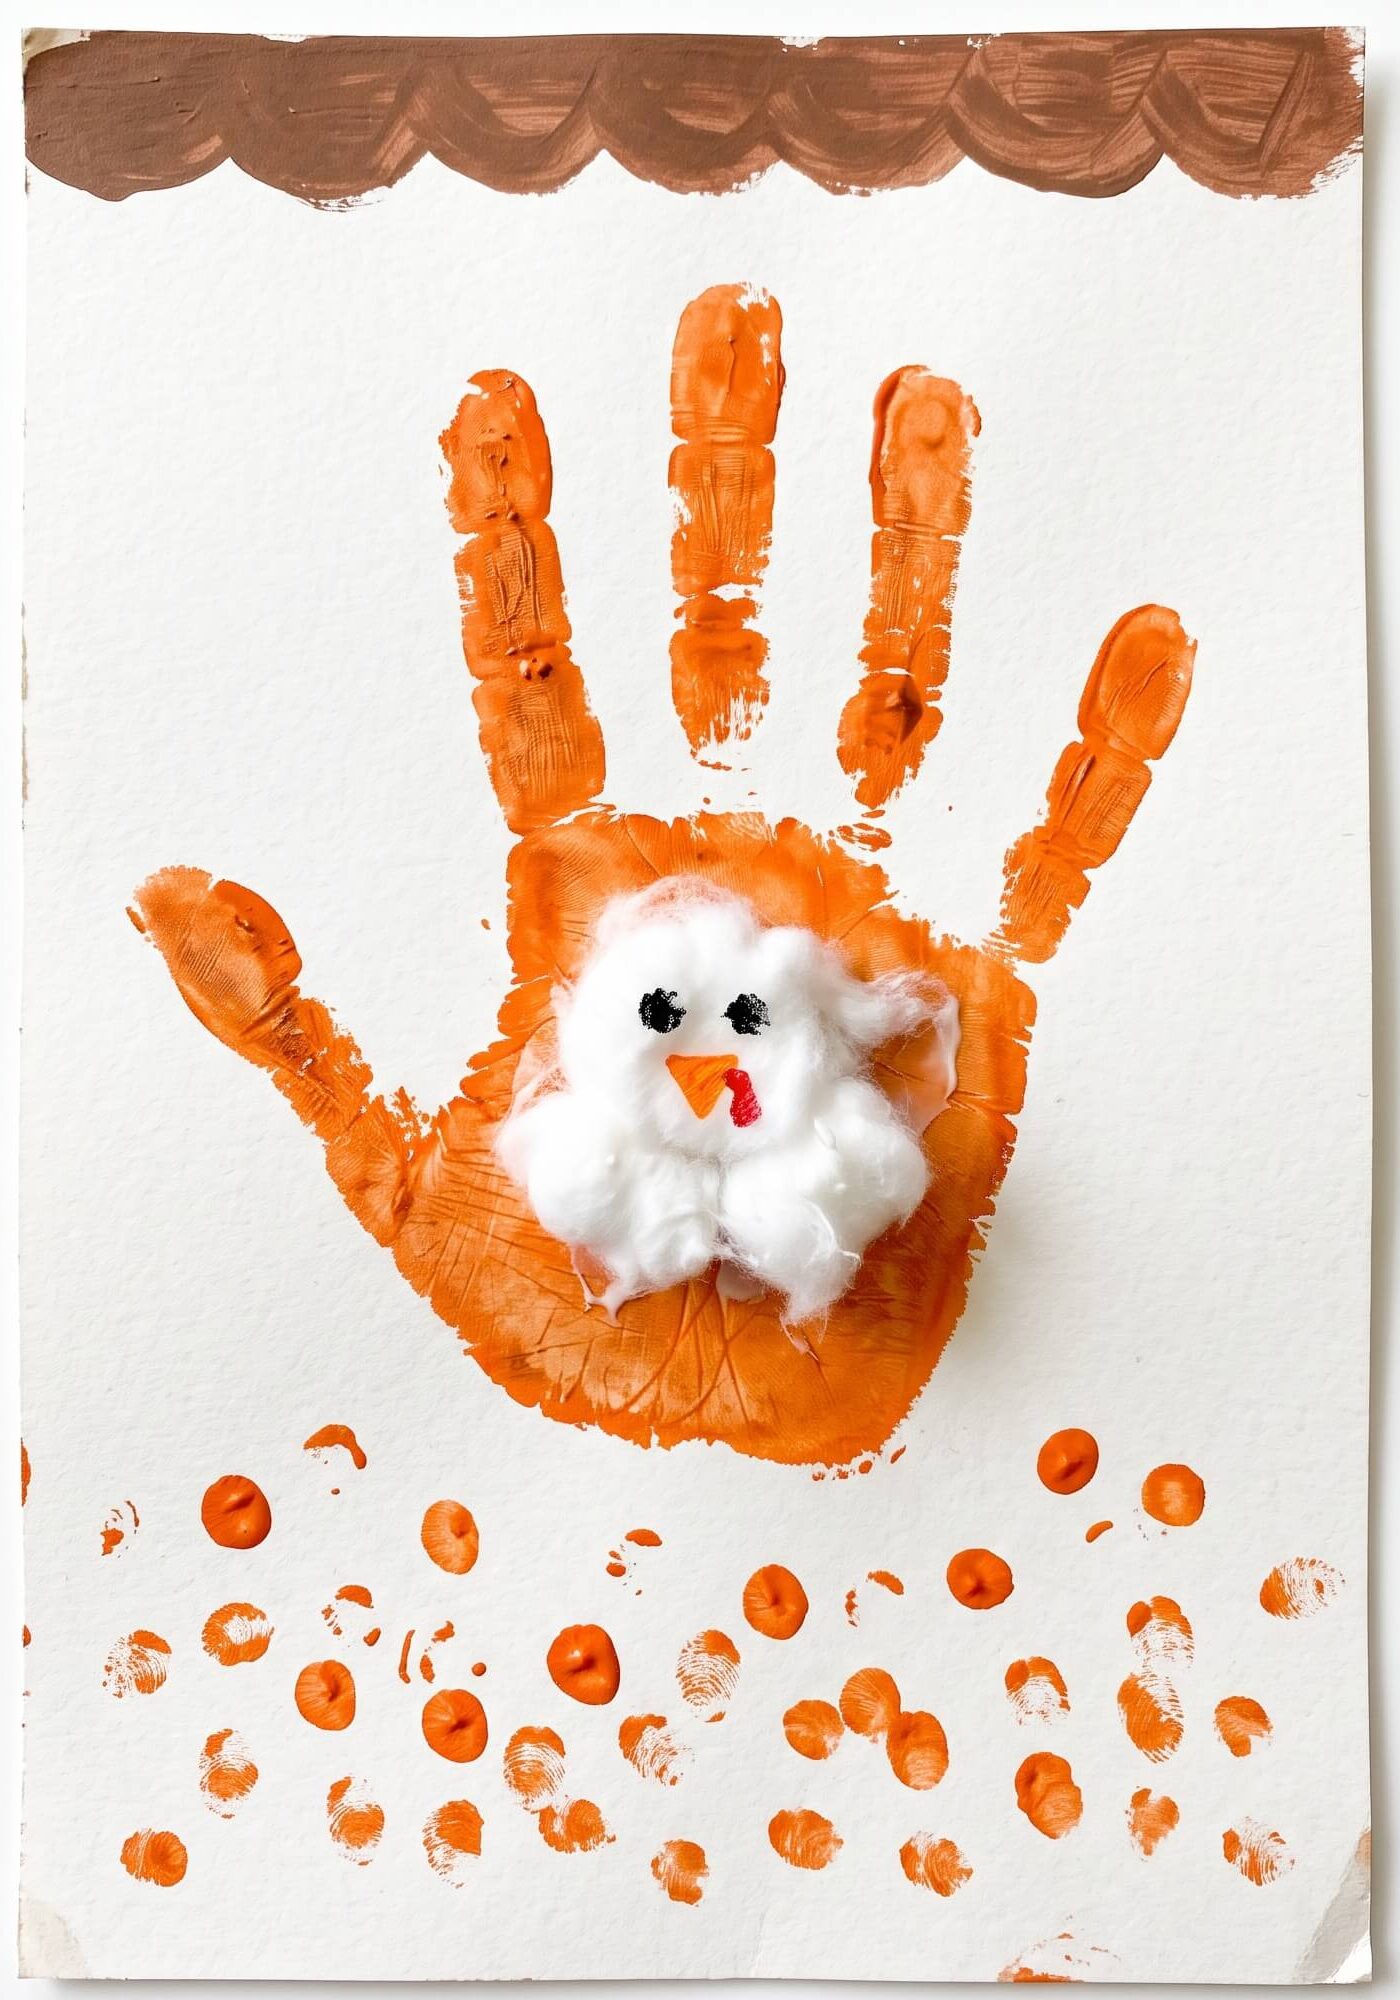
Thanksgiving handprint crafts turn a painted palm into a turkey, tree, pumpkin, or wreath, and they work for any age from a six month old baby to a whole classroom. The trick is applying paint with a brush instead of dipping the hand, pressing the palm down first and rolling each finger flat afterwards, then lifting straight up. Use cardstock instead of printer paper, washable tempera for kids who will squirm, and expect to make two prints to get one you want to keep.
Last November I had a nine month old on my hip, a paint tray on the counter, and about four seconds between getting his palm on the paper and him putting an orange hand directly into his own hair.
I got the print. I did not get the hair back for two days.
Here’s what nobody tells you about handprint crafts: the craft is not the hard part. Getting a clean print is the hard part, and it’s about 90% of whether the finished thing looks like a turkey or looks like a smudge with googly eyes.
So before the 17 projects, three minutes on technique. It’s the part that actually changes your results.
How To Get A Clean Handprint (the part most guides skip)
Do this and every project below gets easier.
- Brush the paint onto the hand. Don’t dip it. A dipped hand comes out with paint webbed between the fingers, and the print bleeds into one blob. A foam brush or a wide flat brush gives you an even coat and clean gaps.
- Warm the paint a little. Cold paint out of a cool cupboard makes babies and toddlers flinch and curl their fingers instantly. Squeeze it out ten minutes early, or work it on the brush until it’s not shocking.
- Press the palm first. Put your thumb on the back of their hand, press the heel of the palm down, then roll each finger flat one at a time. Slapping the whole hand down at once loses the fingertips almost every time.
- Lift straight up. Any sideways drag smears it. Lift from the wrist, not the fingers.
- Have warm water and a towel within arm’s reach. Not at the sink across the room. You have seconds.
Practical note: Do the handprint FIRST, then paint the tree trunk, turkey body, or background around it. Every guide tells you to paint the background first. Then you discover the print doesn’t fit where you planned, and you’ve wasted the paper. Print first, build around it.
For babies under one, this is a two adult job. One person holds the baby and controls the hand, the other manages paper and paint. Trying to do both alone with a baby is how you end up with a print of three fingers and a thumb.
Pick A Thanksgiving Handprint Craft By Age And Time
| Project | Best age | Time | Mess | Prints needed |
|---|---|---|---|---|
| Turkey face with cotton | 1+ | 20 min | Medium | 1 |
| Classic handprint turkey | 2+ | 25 min | Medium | 6 |
| Turkey feather wreath | 4+ | 40 min plus drying | High | 8 to 10 |
| Gratitude tree (single sheet) | 2+ | 25 min | Medium | 5 to 8 |
| Family tree poster | Any, group | 45 min | High | 1 per person |
| Layered handprint wreath | 4+ | 40 min plus drying | High | 10 to 14 |
| Wreath on a ring base | 5+ | 35 min | Medium | 8 to 12 |
| Family photo wreath | Any, group | 30 min | Medium | 4 |
| Gratitude bouquet | 4+ | 45 min | High | 10 plus |
| Corn cob | 3+ | 25 min | Medium | 2 |
| Pumpkin pair | 2+ | 20 min | Low | 2 |
| Pumpkin greeting card | 4+ | 25 min | Low | 2 |
| Sunflower card | 2+ | 15 min | Low | 1 |
| Scarecrow | 5+ | 35 min | Medium | 1 |
| Deer face | 3+ | 25 min | Medium | 2 |
| Fox | 4+ | 30 min | Medium | 5 |
| Squirrel | 3+ | 20 min | Low | 1 |
Under 18 months: stick to single print projects. Sunflower, pumpkin pair, squirrel, turkey face. One print, done, wipe hands, everyone is happy.
Ages 2 to 4: they can handle three to six prints before losing interest. Trees and simple turkeys.
Ages 5 and up: they can do their own prints, cut paper, and write. Give them the wreaths, the scarecrow, and the bouquet.
Whole family or classroom: the tree poster and photo wreath are built for this. One print per person, names written beside them.
Supplies, And The Free Swap For Each One
Cardstock, 65lb or heavier This matters more than you’d think. Printer paper buckles and warps as tempera dries, and the print ends up on a wavy sheet you can’t frame. Free swap: the flat inside panel of a cereal box, or the cardboard backing from a notepad.
Paint Two real options and they serve different purposes.
- Washable tempera (Crayola Washable Kids’ Paint, Sargent Art) comes off skin and out of most clothes. Use this for anyone who squirms. It dries slightly chalky and fades over years.
- Acrylic craft paint (Apple Barrel, DecoArt Americana) is brighter, permanent, and the right call for a keepsake on canvas or wood. It also does not come out of clothing, ever. Free swap for either: mix food colouring into white school glue for a glossy print, though it takes longer to dry.
A foam brush or wide flat brush The single most useful item here. Free swap: a folded paper towel or a clean sponge cut into a rectangle.
Baby wipes Faster than a wet cloth and they don’t drip. Free swap: a damp washcloth in a bowl, sitting right next to you.
Googly eyes Free swap: draw them. Two dots of black marker on a small white paper circle, or just marker straight on. Drawn eyes actually photograph better on painted backgrounds.
Optional but worth it: a shallow paper plate as your paint palette, and a second one under the drying prints.
Mess, Paint Choice, And Skin Safety
Mess level: honest answer, medium to high on all of these. It’s paint on hands. Anyone who tells you a handprint craft is low mess has not done one.
Cover the table. Put the child in a shirt you don’t care about, or nothing at all if they’re a baby, which is genuinely the easiest option and how most of my best prints happened.
On skin: use paint labelled non toxic and washable for anything touching hands. Look for the AP seal from the Art and Creative Materials Institute on the bottle. Acrylic craft paint is fine on skin for the two minutes it’s there, but wash it off promptly, and skip it entirely for babies who put hands in their mouths.
Drying: tempera on cardstock takes about 20 minutes to be touch dry, longer if you laid it on thick. Layered projects like wreaths need each colour dry before the next goes down, or the colours blend into brown. That’s a real 20 minutes between rounds, not a hopeful five.
Small parts: googly eyes and cotton balls are choking hazards for under 3s. Draw the eyes instead and skip the cotton.
Practical note: Make two prints of every keepsake. Always. The first one is usually the practice run and the second is the one you keep. Costs you one extra sheet of cardstock and saves you the moment where you realise the only print you have is smudged.
Turkey Handprint Crafts
The classic. Palm is the body, fingers are the feathers.
1. Classic Handprint Turkey

Brown palm print for the body with five colourful prints fanning out behind it as feathers.
You need: White cardstock or poster board, brown paint, plus red, orange, yellow, green and blue, foam brush, googly eyes, orange paper triangle, red paper teardrop, black marker.
Steps:
- Print the brown handprint in the centre of the board, fingers pointing up and slightly left. Let it dry 20 minutes.
- Print the five coloured handprints fanning out behind and above it. Space them so they radiate like a feather spread.
- Once dry, glue on the googly eyes, orange beak, and red wattle at the base of the thumb.
- Draw two thin legs and feet below the body.
Tip: The thumb becomes the turkey’s head and neck, so point the thumb sideways, not up. If the thumb goes straight up with the fingers, you have six feathers and no turkey.
Trade off: Six prints, so 25 minutes and a drying pause. Best for age 2 and up. Under 2s lose patience around print three.
2. Turkey Face With Cotton
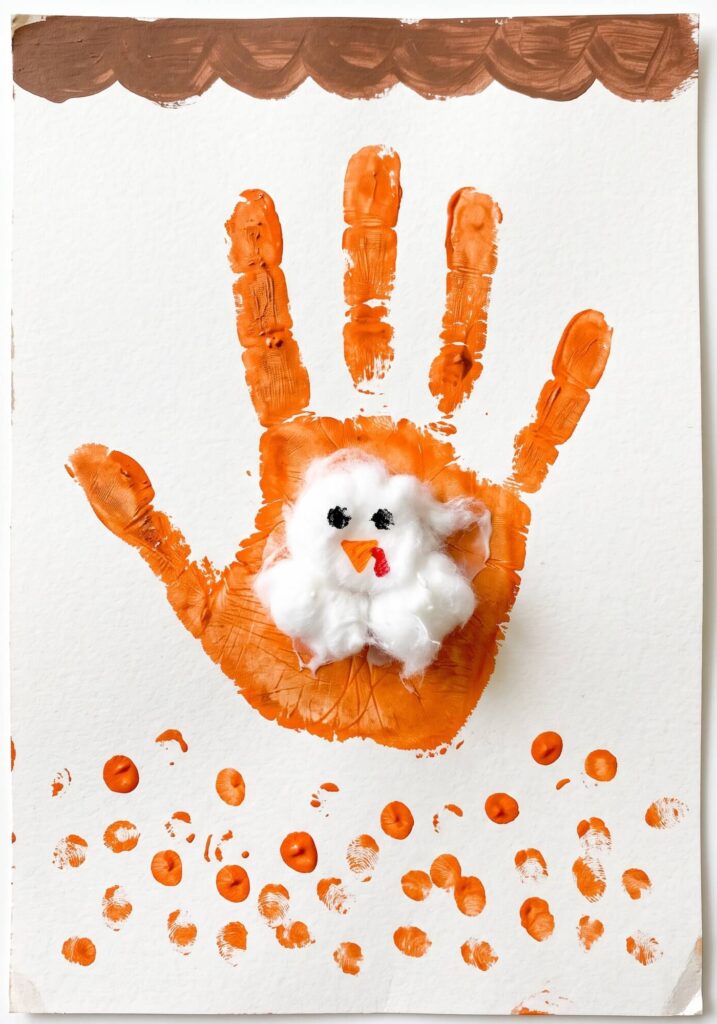
A single large orange print, a brown scalloped band across the top, and a cotton ball cluster in the middle.
You need: White cardstock, orange paint, brown paint, cotton balls, glue.
Steps:
- Print one orange handprint, palm centred, fingers up.
- Paint a brown scalloped band across the top of the page once the print is dry.
- Glue cotton balls in a cluster over the palm area.
- Add small orange finger dots below.
Trade off: One print only, so this is the best turkey for babies and one year olds. Skip the cotton balls entirely for under 3s and paint a white patch instead.
3. Painted Handprint Turkey Wreath

A brown paper turkey body sitting at the centre of a full circle of red and orange prints.
You need: Brown construction paper, red and orange paint, white cardstock, googly eyes, yellow and red paper, twine, glue, black marker.
Steps:
- Print alternating red and orange handprints in a full ring on white cardstock, fingers pointing outward. Let everything dry completely, 30 minutes.
- Cut a brown paper turkey body, add eyes, beak, wattle, and orange feet.
- Glue the body over the centre of the handprint ring.
- Attach twine at the top for hanging.
Tip: Work around the circle in two passes. Do every other print, let them dry, then fill the gaps. Wet prints touching wet prints turn the whole ring muddy brown.
Trade off: The most time consuming turkey here, around 40 minutes with drying. High mess. Worth it as an actual door decoration rather than a fridge piece.
Gratitude Trees, Wreaths, And Bouquets
This group holds up as keepsakes better than anything else on the list, because you can write names and the year on them.
4. Handprint Tree Of Gratitude
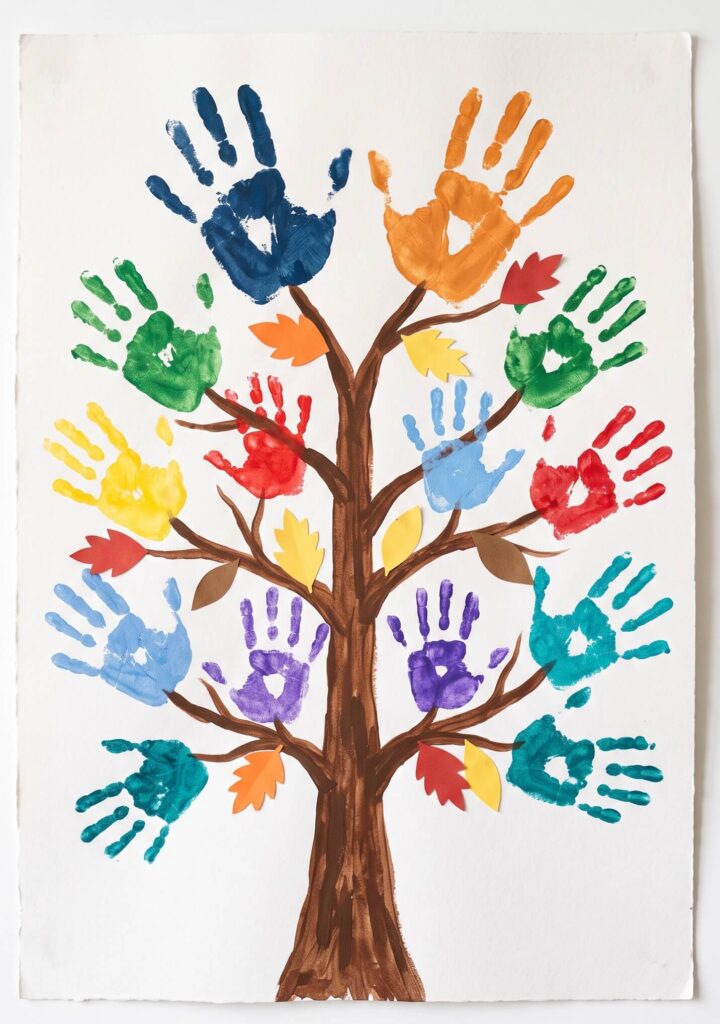
Brown painted trunk with colourful prints as the canopy.
You need: White cardstock, brown paint, red, orange, yellow and green paint, brush, marker.
Steps:
- Print five to eight colourful handprints in a rounded cluster across the top two thirds of the page.
- Once dry, paint a brown trunk and branches rising up into the print cluster.
- Add a few small leaf marks near the base.
- Write a short gratitude message and the date at the bottom.
Tip: Paint the branches so they visibly connect to the base of each handprint. Prints floating unattached above a trunk read as confetti, not leaves.
Trade off: Medium mess, 25 minutes. Great for ages 2 and up.
5. Thankful Handprint Tree Poster
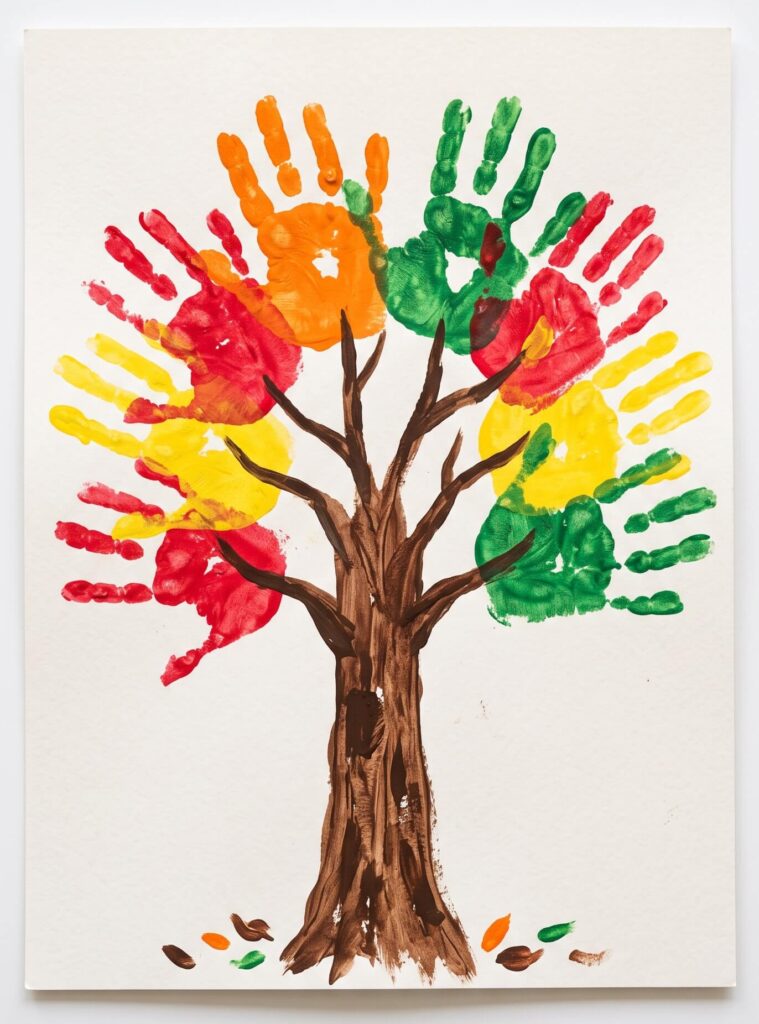
The group version. One print per family member, names written beside each.
You need: Large white poster board, brown paint, assorted colours, marker, paper leaf cutouts.
Steps:
- Print each person’s hand at the branch ends, working from the outside in so nobody leans across a wet print.
- Let everything dry, then paint the trunk and branches connecting the prints.
- Write each person’s name beside their print, plus one thing they’re thankful for.
- Add the year near the bottom.
Save this one. If you’re hosting Thanksgiving this year, pin this section now and pick up a poster board when you do the grocery run. It’s the one craft that gives every guest something to do between the meal and dessert, and you’ll have it framed for years.
Trade off: 45 minutes with a group, high mess, needs a big flat space. Do it before the meal, not after, while everyone still has energy.
6. Layered Handprint Wreath

Overlapping prints in red, orange, yellow, olive and brown forming a ring on flat paper.
You need: White cardstock, red, orange, yellow and brown paint, brown paper bow.
Steps:
- Lightly pencil a circle as your guide. A dinner plate traced on the page works.
- Print in two passes, alternating positions so wet prints never touch. Vary the finger direction so it looks lively rather than mechanical.
- Let it dry fully, then fill the gaps with the second pass.
- Glue a brown paper bow at the bottom of the circle.
Trade off: 40 minutes across two sessions. High mess, 10 to 14 prints. The pencil circle is not optional, freehand wreaths drift into an oval within four prints.
7. Wreath On A Ring Base

Same idea, but built on a cardboard ring so it hangs like a real wreath.
You need: Cardboard ring base (cut from a shipping box), red, orange, yellow and brown paint, brush, twine.
Steps:
- Cut a ring from cardboard, roughly 12 inches across with a 6 inch hole.
- Print handprints radiating outward around the ring, fingers pointing off the outer edge.
- Let dry, then fill any bare cardboard with a second round.
- Tie a twine loop at the top.
Tip: The cardboard soaks up paint and the print comes out dull. Paint the whole ring a base colour first and let it dry. Prints on sealed cardboard are much brighter.
Trade off: More durable than the paper version and it actually hangs. Cutting the ring is an adult job.
8. Thankful Handprint Family Wreath

Four prints around a round family photo in the centre.
You need: White or beige poster board, red, orange, yellow and brown paint, a round photo print, brown paper, paper leaves, marker.
Steps:
- Print four handprints in a circle, leaving a clear space in the middle for the photo.
- Once dry, glue the round photo in the centre and add a brown paper frame around it.
- Glue paper leaves in the gaps between prints.
- Label each print with a name and add the year.
Trade off: Only four prints, so it’s fast at 30 minutes. Needs a printed photo, so plan ahead if you don’t own a printer.
9. Thankful Handprint Bouquet
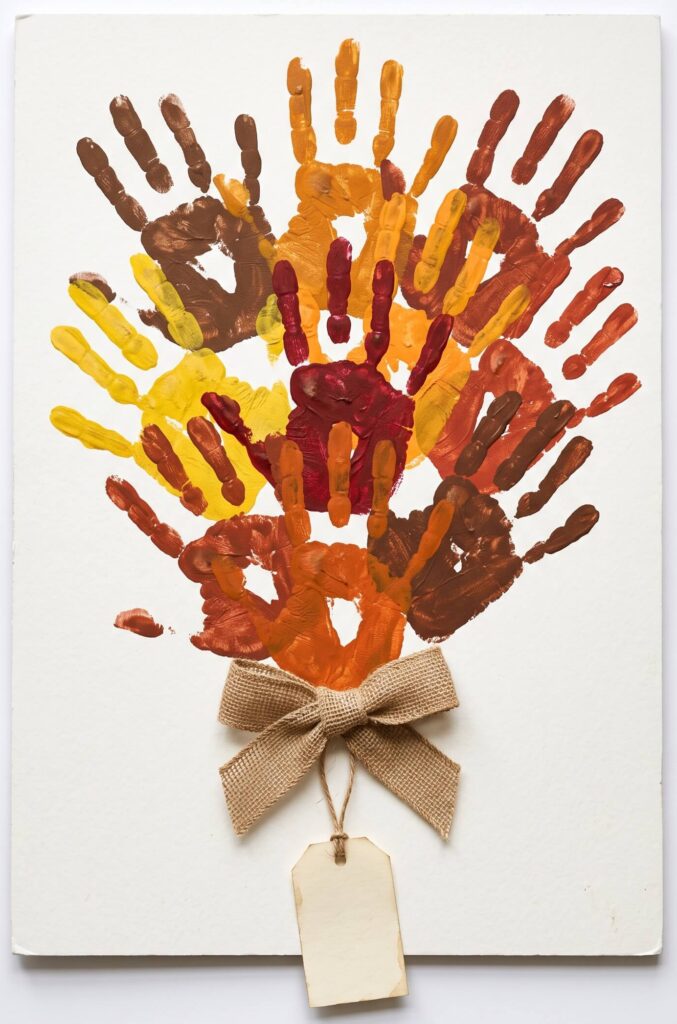
Dense layered prints rising from a narrow base like a gathered bunch of flowers.
You need: Canvas board or stiff white board, brown, yellow, orange, red and rust paint, brush, ribbon, small paper tag and string.
Steps:
- Start at the top and work down, printing overlapping hands that narrow toward the base.
- Work in colour rounds with drying time between, or the overlaps go muddy.
- Paint or glue a ribbon bow at the narrow base.
- Hang a small paper tag from the bow with the year written on it.
Tip: Canvas board takes acrylic beautifully but tempera sits on top and flakes off later. If you want this to last, use acrylic and accept the clothing risk.
Trade off: The longest project here, 45 minutes plus drying rounds, high mess, 10 or more prints. Best for 4 and up, or as a group piece.
Pumpkin, Corn, And Harvest Handprint Crafts
Fast, low print count, good for the youngest hands.
10. Pumpkin Handprint Pair

Two orange prints side by side, palms touching, fingers pointing down.
You need: White cardstock, orange paint, green paint.
Steps:
- Print the first orange hand with fingers pointing down.
- Print the second directly beside it so the palms overlap slightly at the centre.
- Once dry, paint a green stem, a leaf, and a curling vine above.
Tip: Overlap the palms by about half an inch. Leave a gap and you have two hands. Overlap and you have a pumpkin.
Trade off: Low mess, 20 minutes, only two prints. One of the best options for a one year old.
11. Pumpkin Handprint Greeting
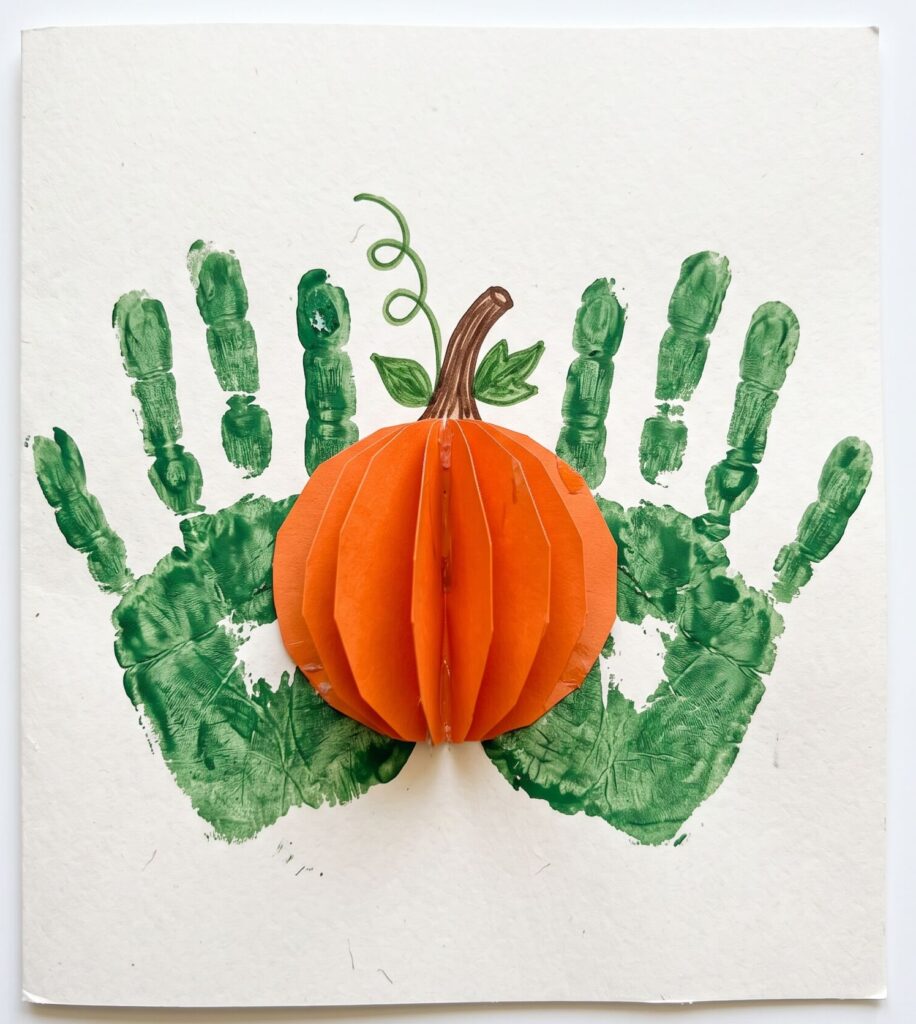
A folded orange paper pumpkin with two green prints spreading either side as leaves.
You need: White cardstock, orange paper, green paint, brown marker, green marker.
Steps:
- Print two green handprints side by side with a gap in the middle, fingers spreading outward.
- Cut and fold an orange paper pumpkin and glue it over the gap.
- Draw the stem and a curling vine above.
- Write a Thanksgiving message below.
Trade off: Low mess since it’s only two prints. The paper folding needs age 4 and up, or an adult.
12. Corn Cob Handprint Emblem

A tall painted corn cob framed by yellow prints as husks.
You need: White cardstock, yellow paint, orange paint, green paint, brush.
Steps:
- Print two yellow handprints on either side of the page, fingers angled up and outward.
- Once dry, paint a tall yellow corn shape between them.
- Add rows of orange dots across the corn. Use a fingertip or a cotton swab.
- Paint two green leaf shapes at the base.
Tip: The dots should sit in rough rows, not scattered. Corn kernels line up, and randomly scattered dots read as spots rather than corn.
Trade off: Medium mess, 25 minutes. The corn painting takes a steadier hand than the print does, so an adult usually does that part for under 5s.
13. Sunflower Handprint Card
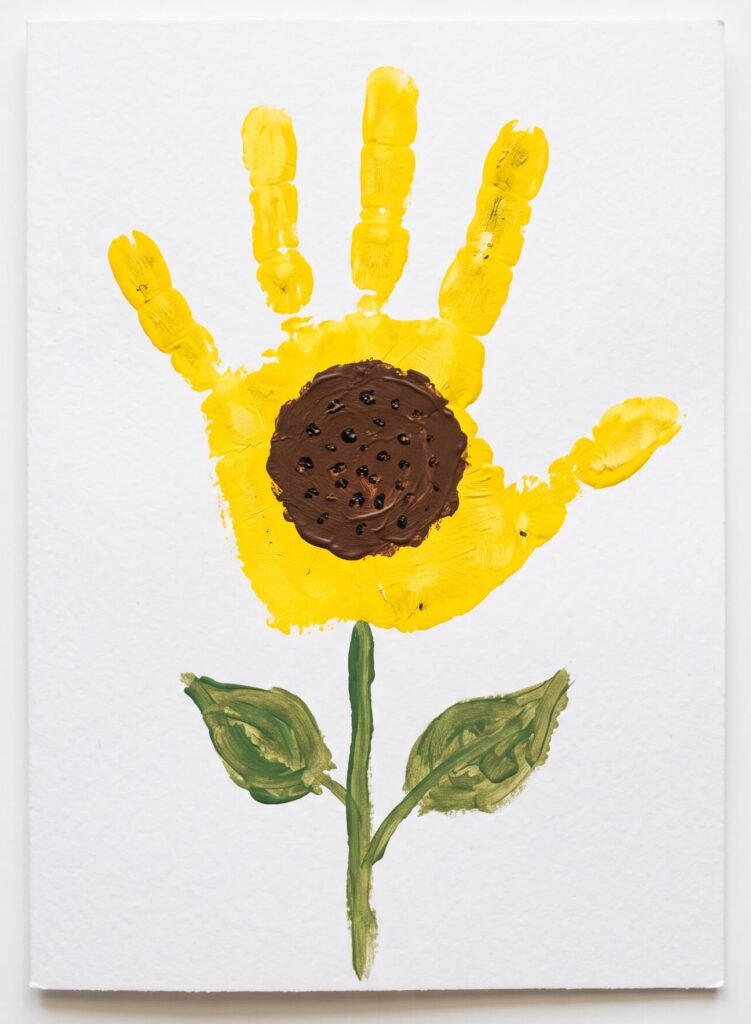
One yellow print as the flower head, brown centre, green stem.
You need: White cardstock, yellow, brown and green paint, brush, marker.
Steps:
- Print one yellow handprint near the top of the page, fingers spread wide.
- Dab a brown circle over the palm centre once dry.
- Paint a green stem and two leaves below.
- Write a short greeting at the bottom.
Trade off: The fastest project on this list. One print, 15 minutes, low mess. My default for a baby’s first fall keepsake.
14. Scarecrow Handprint Character

A brown print as the body, topped with a wide hat and straw details.
You need: White poster board, brown and dark brown paint, orange paint, yellow paper strips, black marker, pink paint.
Steps:
- Print one brown handprint, fingers pointing down as the legs and body.
- Once dry, paint long arms out to each side and a dark hat above with an orange band.
- Glue yellow paper strips at the wrists, neck, and under the hat as straw.
- Draw the stitched mouth, add pink cheeks and an orange nose.
Trade off: The most drawing of any project here, so it suits ages 5 and up who want more control. 35 minutes.
Fall Animal Handprint Crafts
15. Deer Handprint Face

Two dark brown prints as antlers above a tan head.
You need: White poster board, tan paint, dark brown paint, black marker, light tan paper for ears.
Steps:
- Print two dark brown handprints at the top of the page, fingers spread and angled outward, thumbs pointing inward toward each other.
- Once dry, paint a tan oval head below, overlapping the base of both prints slightly.
- Add ears either side and inner ear shapes.
- Draw the eyes, nose and mouth with black marker.
Tip: Spread the fingers as wide as they’ll go. Antlers need gaps between the points. Fingers that touch look like mittens.
Trade off: Two prints, 25 minutes, medium mess. The head has to go on after the prints or the antlers won’t line up.
16. Fox Handprint Autumn Art

An orange fox face with a fan of prints as the tail.
You need: White cardstock, orange, white and black paint, brush, black marker.
Steps:
- Print one orange handprint for the face and body area.
- Print four or five more orange prints fanning out to one side for the tail.
- Once fully dry, add white muzzle and tail tip details.
- Paint black ears, nose, eyes and front legs.
Trade off: Five prints and layered detail work, so this is the most involved animal here. Age 4 and up, 30 minutes.
17. Squirrel Handprint Craft

One brown print, fingers up as the bushy tail.
You need: White cardstock, brown paint, black marker, orange paper leaves, brush.
Steps:
- Print one brown handprint at a diagonal angle, fingers pointing up and slightly curved.
- Once dry, draw a small head, face, and front paws at the base of the palm with black marker.
- Draw an acorn near the paws.
- Scatter a few orange paper leaves around the page.
Tip: Angling the print rather than printing it straight up is what gives the squirrel movement. A vertical print looks like a hand.
Trade off: One print, low mess, 20 minutes. Good for 3 and up because the marker detail needs some control.
Common First Timer Mistakes
Dipping the hand in the paint tray. Gives you paint webbed between the fingers and a print with no definition. Brush it on.
Painting the background first. You will run out of room, or the print will land in the wrong spot. Print first, build around it.
Using printer paper. It warps as the paint dries and you can’t frame a wavy sheet. Cardstock, 65lb or more.
Overlapping wet prints. Layered wreaths and bouquets need drying time between rounds. Wet red on wet orange makes brown, every time.
Forgetting the date. This is the one people actually regret. Write the child’s name and the year in pencil in a corner before you start decorating. In four years you will not remember which November it was.
Only making one print. Make two. The first is a practice run more often than not.
Making prints during the witching hour. A tired toddler will not hold still. Morning prints come out cleaner than 5pm prints, and I say that as someone who has tested this repeatedly against my own better judgement.
FAQs
What paint is safest for handprint crafts on babies?
Washable, non toxic tempera labelled with the AP seal from the Art and Creative Materials Institute. Crayola Washable Kids’ Paint and Sargent Art both wash off skin easily and are the standard choice for children under 3.
How do you get a clean handprint from a baby?
Brush the paint on rather than dipping, press the palm down first with your thumb on the back of their hand, roll each finger flat individually, then lift straight up. It’s a two adult job for anyone under one year old.
What paper should I use for handprint crafts?
Cardstock at 65lb or heavier. Regular printer paper buckles and warps as the paint dries, so the finished print won’t lie flat or frame well.
How long does handprint paint take to dry?
Tempera on cardstock is touch dry in about 20 minutes. Layered projects need that full drying time between colour rounds, or the colours mix into brown.
What’s the easiest Thanksgiving handprint craft for a one year old?
The sunflower card or the pumpkin pair. Both need one or two prints, take under 20 minutes, and don’t require the child to sit still for a long stretch.
Can I do handprint crafts with a whole family at Thanksgiving?
Yes, and the tree poster is built for it. One print per person around the branches, names written beside each. Do it before the meal while everyone still has energy, and work from the outside of the poster inward so nobody reaches across wet paint.
Read Next
If you’re building a full fall craft rotation, Best Halloween Pumpkin Crafts For Easy Fall Decor covers the October half of the season with the same materials.
And once the prints are dry, How To Store And Display Kids’ Art Without Filling Your House is the practical follow up, because the real problem with keepsake crafts starts about three years in.