
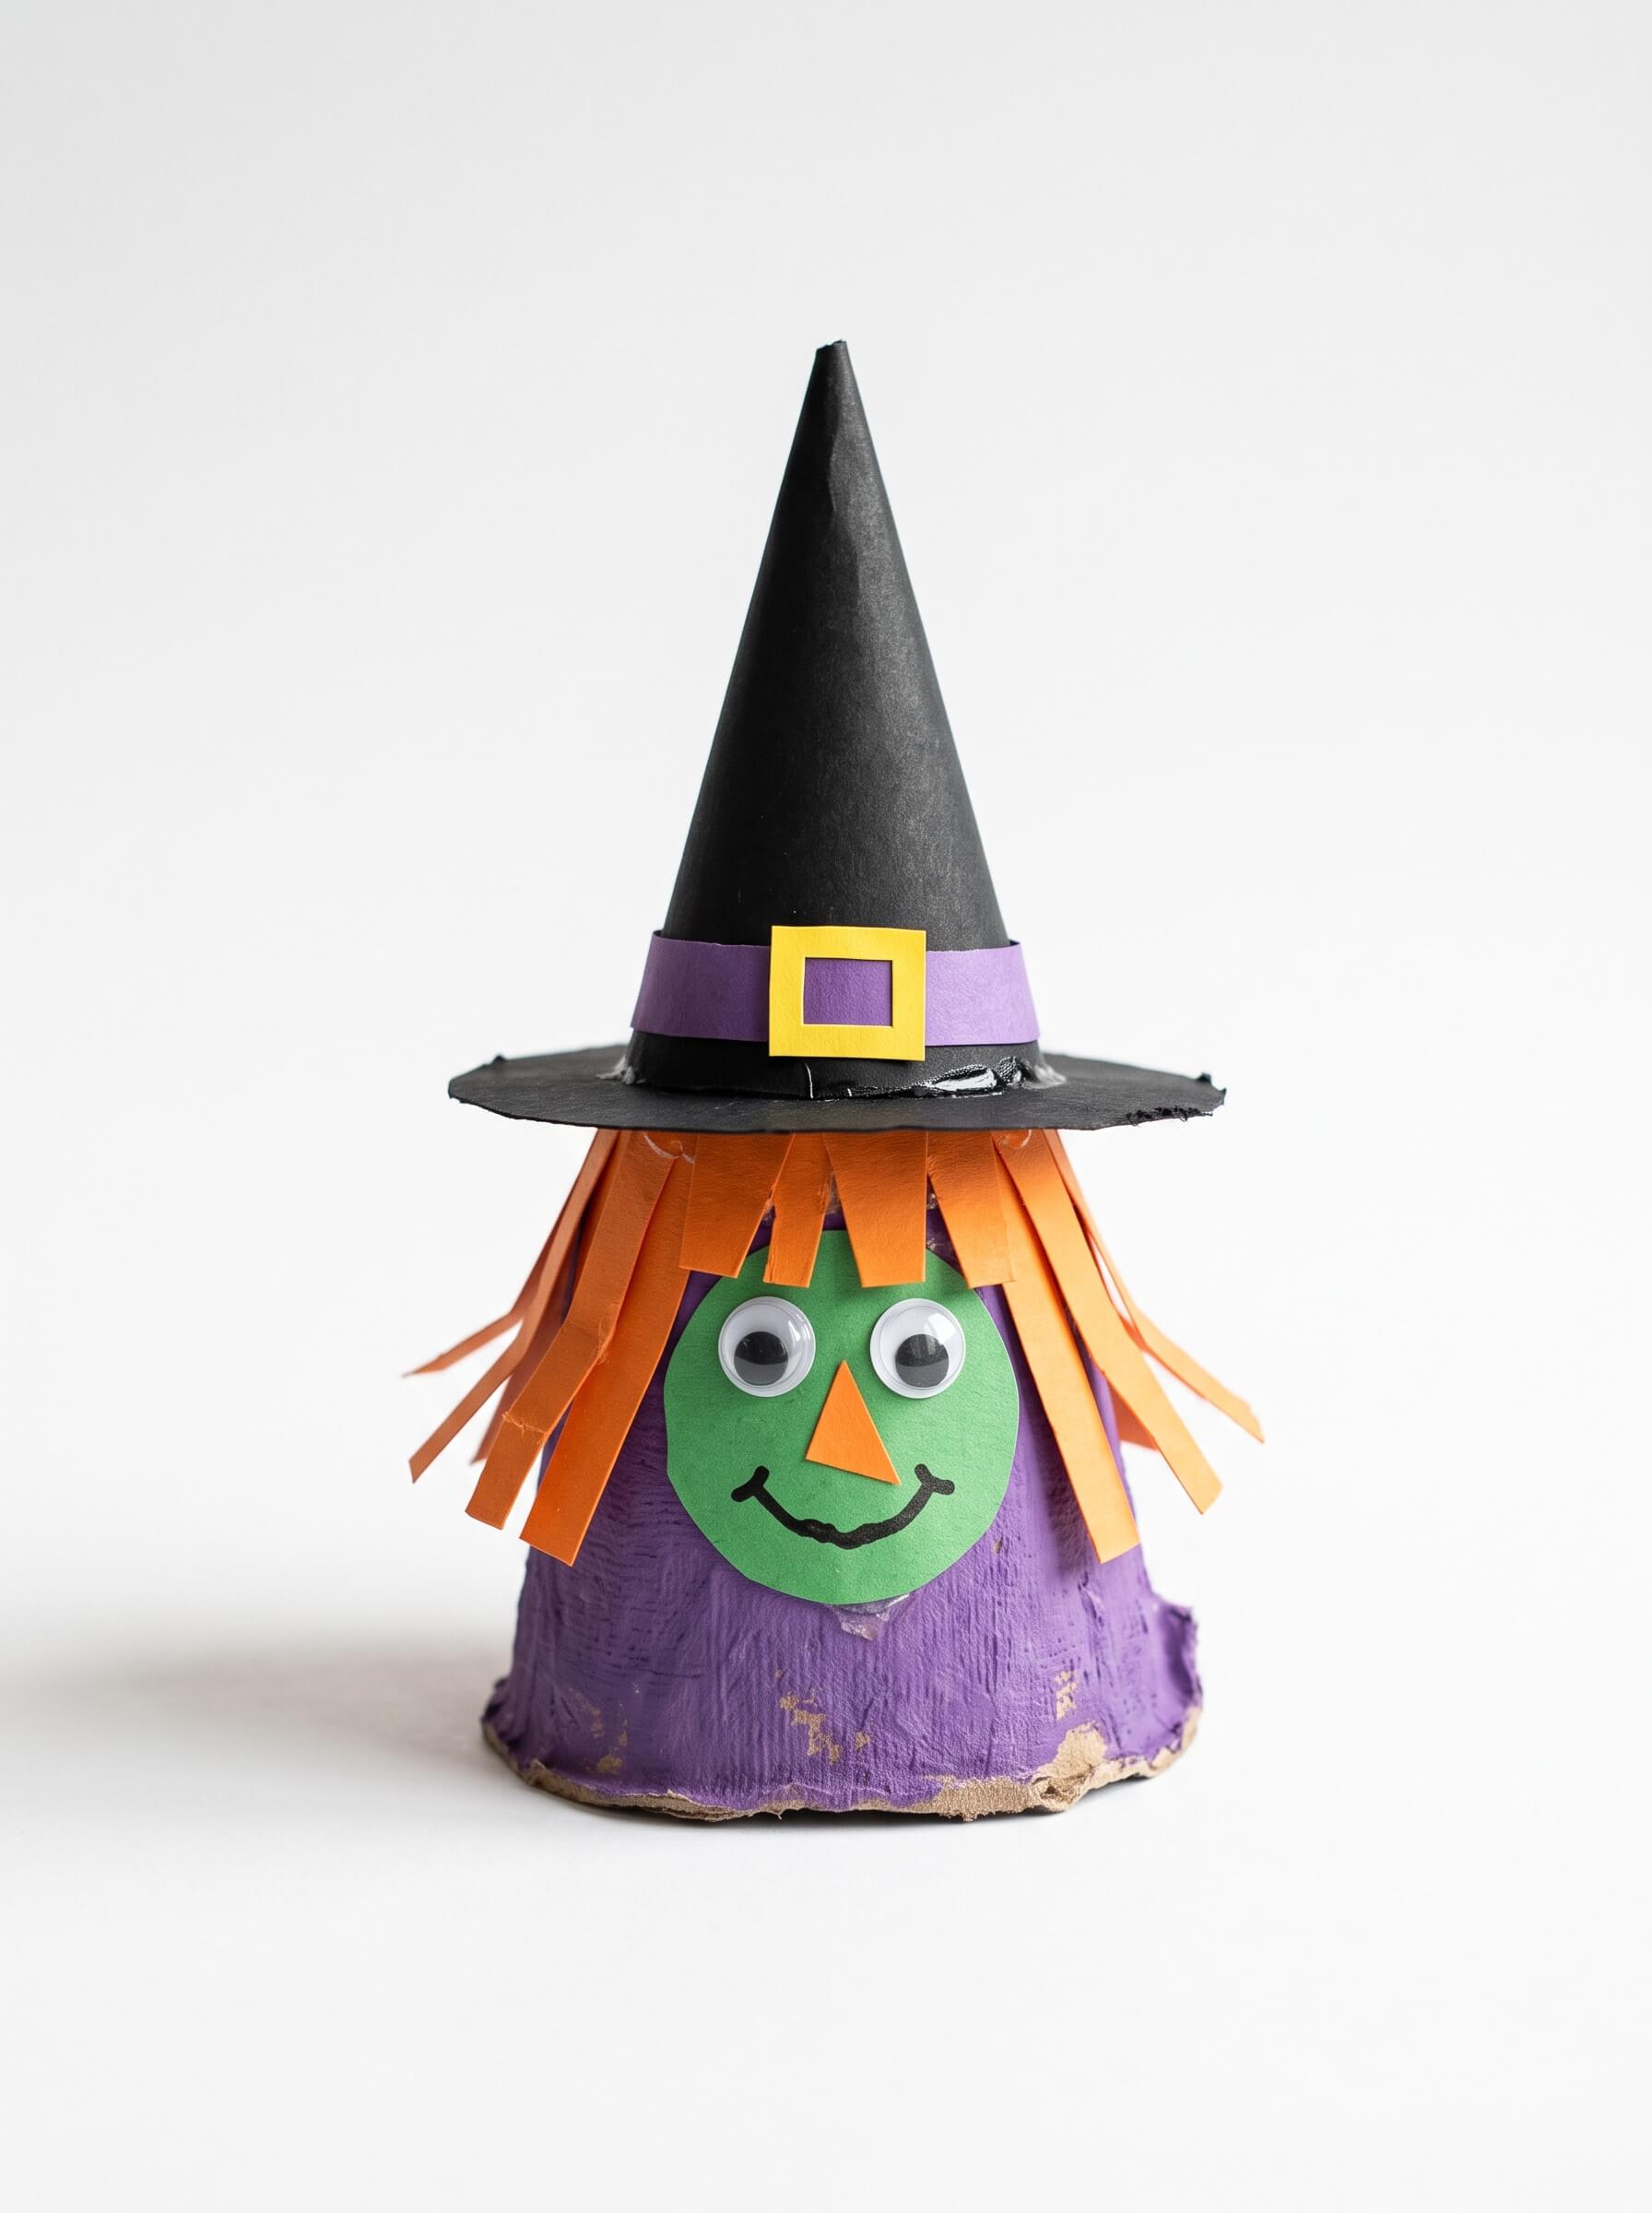
The easiest Halloween witch crafts for kids use a paper plate, a cardboard tube, or a paper bag as the base, plus green paper for the face, black cardstock for the pointy hat, and yarn for hair. Most take 10 to 20 minutes and cost under a dollar per child if you already own scissors, glue, and markers. Kids as young as 3 can do the gluing and hair steps with help, while kids 7 and up can cut and assemble the whole thing themselves.
Every year around the second week of October, my kitchen table turns into a witch factory. Green paint on somebody’s elbow, yarn everywhere, and at least one hat brim cut too small so the cone sits on it like a tiny sad tent.
That last one happens every single time. It’s the single most common failure in witch hat crafts and I’ll show you how to stop it about four paragraphs down.
These 20 projects are the ones that actually survived my house. They use materials you already have, they hold up on a classroom wall for a few weeks, and none of them require you to be good at cutting circles.
How To Pick The Right Project (age, time, and mess at a glance)
The biggest mistake I see is picking by cuteness instead of by how much time you actually have. A pinecone witch is adorable and takes 35 minutes with a lot of small fiddly gluing. If you have 15 minutes before pickup, that is the wrong project.
Here’s the honest breakdown:
| Project | Best age | Time | Mess | Cutting skill needed |
| Paper plate witch face | 3+ | 15 min | Medium (paint) | Low, adult cuts hat |
| Cardboard tube witch | 4+ | 20 min | Low | Medium |
| Craft stick witch | 5+ | 20 min | Low | Low |
| Handprint witch | 2+ | 15 min | High (paint) | None for child |
| Paper bag witch puppet | 3+ | 15 min | Low | Low |
| Egg carton witch | 4+ | 25 min | Medium | Medium |
| Felt cone witch | 6+ | 30 min | Low | High |
| Cup or bucket witch | 4+ | 20 min | Low | Medium |
| Witch hat centerpiece | 6+ | 15 min | Low | High (circles) |
| Clothespin witch doll | 7+ | 30 min | Medium (paint) | High, small pieces |
| Painted stone witch | 5+ | 25 min plus dry time | Medium | None |
| Witch hat garland | 5+ | 25 min | Low | Medium, repetitive |
| Wooden spoon witch | 6+ | 30 min | Low | Medium |
| Pinecone witch | 7+ | 35 min | Low | High, small pieces |
| Clay witch | 4+ | 25 min | Medium | None |
| Paper cone witch doll | 7+ | 30 min | Low | High |
| Paper plate witch, orange hair | 4+ | 20 min | Low | Medium |
| Cauldron treat pot | 4+ | 20 min | Low | Medium |
| Bow witch hat headband | 6+ | 25 min | Low | High (circles) |
| Yarn witch puppet | 5+ | 25 min | Low | Medium |
Practical note: For a group of kids with mixed ages, pick one project and pre cut the hat pieces for the younger half. Do not run two different projects at once unless you have a second adult. I’ve tried. It does not work.
The Master Supply List (and what to use instead)
Buy once, make all 20. Every item here has a free or cheap swap, because a witch made from a cereal box looks exactly as good in a photo as one made from cardstock.
Green for faces Green construction paper or green acrylic craft paint. Free swap: a green cereal box panel, a green paper napkin glued flat, or white paper coloured with a green marker (works better than you’d think for small faces).
Black for hats Black cardstock is stiffer and holds a cone shape. Free swap: a black paper grocery bag, the black backing sheet from a photo frame, or regular paper painted black. Skip flimsy black tissue, the cone will collapse.
Orange yarn for hair Any yarn works. Free swaps: shredded orange paper strips, unravelled twine, or strips cut from an orange plastic shopping bag. Curl paper strips by dragging them over an open scissor blade.
Googly eyes Free swap: draw them on with marker, or punch white circles and dot them with black. Honestly, drawn eyes photograph better than plastic eyes for the yarn and felt projects.
Glue Glue sticks for paper, white school glue for yarn and felt, a low temp hot glue gun for pinecones, spoons, and clothespins. Use hot glue yourself, not the kids, unless they’re 10 or older and you’re standing right there.
Named products worth the money: Elmer’s washable school glue is the one that actually washes out of clothes. Apple Barrel craft paint in Bright Green is the cheapest green that covers a brown paper bag in one coat, which saves you a whole drying round. Regular dollar store green needs two coats over brown.
Mess Level And Supervision, Honestly
Three of these projects involve paint, and paint is the entire mess story. Everything else is glue and paper scraps.
Paint projects (paper plate face, handprint, clothespin, painted stones): Cover the table. Acrylic craft paint does not come out of fabric once it dries, so put kids in something you don’t care about. Washable tempera is the safer call for anyone under 6, though it looks chalkier on the finished piece.
Cutting: Kids under 6 use safety scissors and stick to straight lines. You cut the hat brims and any circle. Circles are genuinely hard until about age 7.
Small parts: Pinecone, clothespin, and clay projects use beads and tiny pieces. Not appropriate for anyone still putting things in their mouth, which in my experience is anyone under 3 and occasionally a distracted 4 year old.
Hot glue: Adult job. It reaches around 250°F even on a low temp gun and it sticks to skin before you can pull away.
Practical note: Give each child a small tray or a paper plate as a work zone. It cuts the cleanup by about half because scraps and glue stay contained, and it stops the yarn from migrating to the next kid’s project.
Paper And Paper Plate Halloween Witch Crafts For Kids
These are your fastest, cheapest wins. All five take under 20 minutes.
1. Paper Plate Witch Face
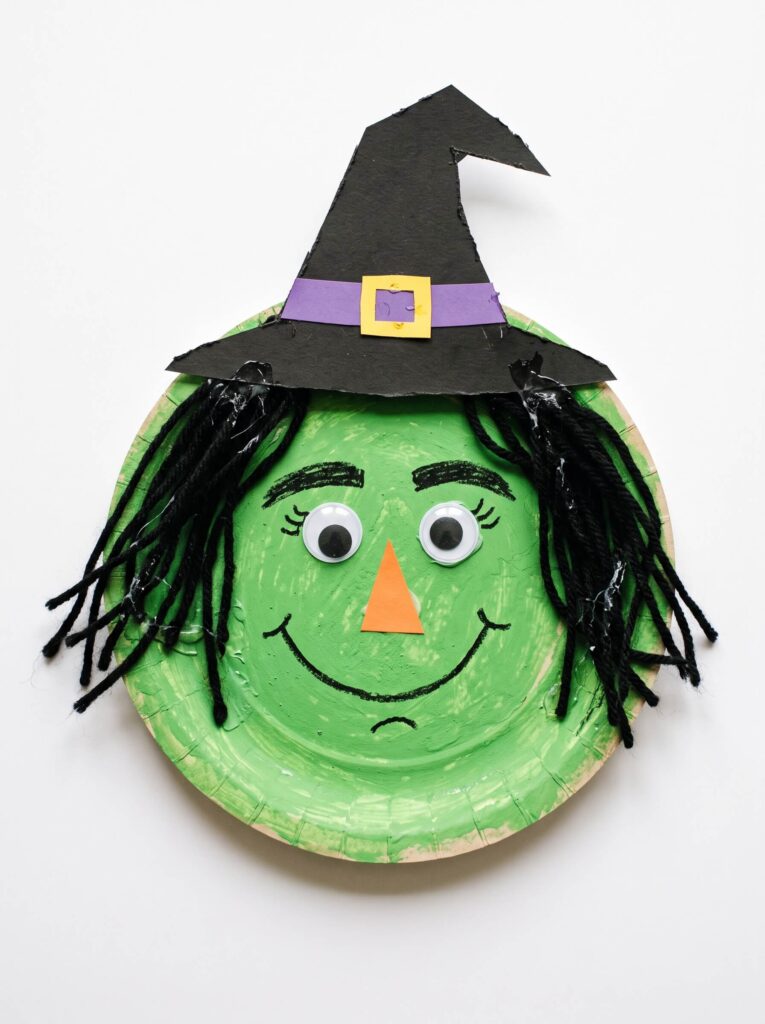
A green paper plate face with yarn hair and a big pointy hat. The one everybody starts with.
You need: 1 paper plate, green paint or green paper, black construction paper, purple paper strip, yellow paper square, black yarn, glue, scissors, black marker, googly eyes.
Steps:
- Paint the plate green or cover it with green paper. If painting, do this first and let it dry fully, about 20 minutes.
- Cut a large black hat shape. Make the brim wider than the plate.
- Glue on yarn hair, googly eyes, and a small paper nose.
- Draw the smile, eyebrows, and lashes with marker.
Tip: Paint the plate’s back side, not the eating side. The rim on the front makes the yarn sit crooked.
Trade off: Medium mess from the paint, and it needs a drying pause in the middle. If you don’t have time for drying, use green paper instead.
2. Paper Plate Witch With Orange Hair

Same base, brighter look. The orange paper strips replace yarn, which makes this the cheaper version.
You need: 1 paper plate, black construction paper, purple construction paper, yellow paper or foam, orange paper strips, glue stick, scissors, googly eyes, pink crayon, black marker.
Steps:
- Trim the paper plate into a round face shape. Cut a wide hat brim and a tall pointed crown from black paper.
- Glue the hat pieces together, then add the purple band and yellow buckle.
- Glue orange paper strips around the sides for hair.
- Add eyes, draw the nose and smile, and rub pink crayon on the cheeks.
Tip: Cut the orange strips about a quarter inch wide and curl them over a scissor blade. Straight flat strips look like a mop.
Trade off: Low mess, no drying time. Slightly more cutting than version one.
3. Friendly Witch Paper Bag Puppet
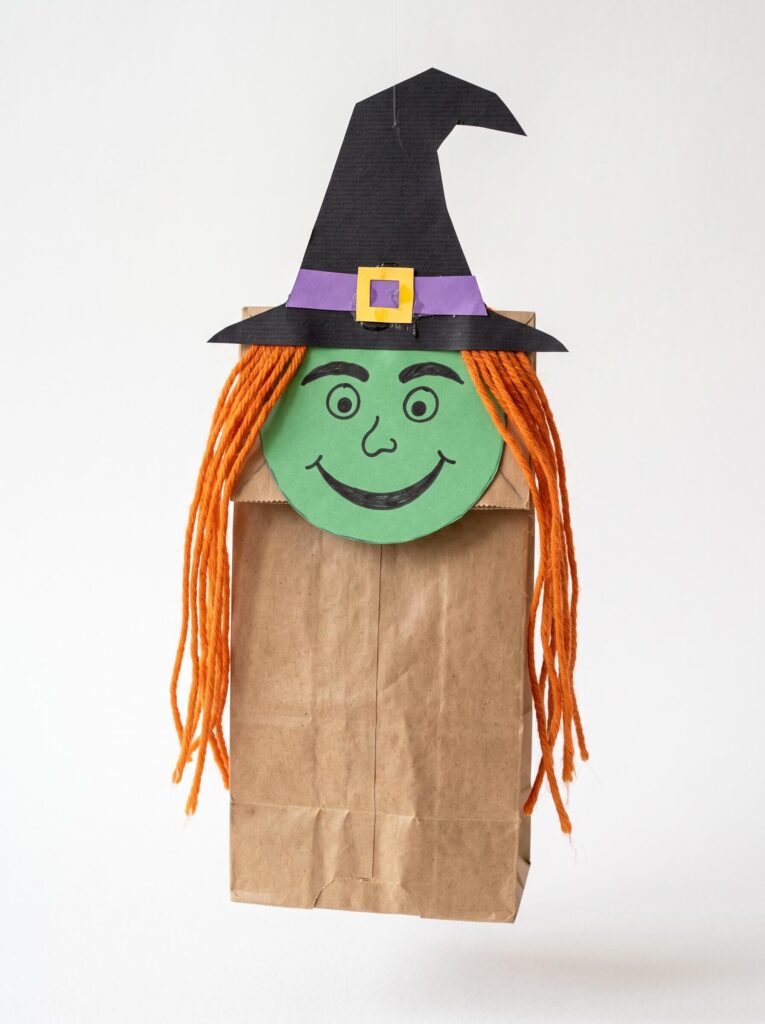
The only one on this list that a kid can actually play with afterwards, which buys you an extra 30 minutes of quiet.
You need: 1 brown paper lunch bag, green paper circles, orange yarn, black paper hat, purple paper band, yellow paper buckle, glue, markers.
Steps:
- Glue the green face circle onto the flat bottom flap of the bag, not the body.
- Add yarn hair along both sides of the face.
- Assemble the hat with the purple band and yellow buckle, glue it above the face.
- Draw eyes, eyebrows, nose, and a smiling mouth.
Tip: Put the mouth right at the fold line so the puppet’s jaw opens when you move your hand. Half the fun is lost if the mouth is above the fold.
Trade off: Low mess, fast. The bag tears if a kid presses too hard while gluing.
4. Scrappy Yarn Witch Puppet
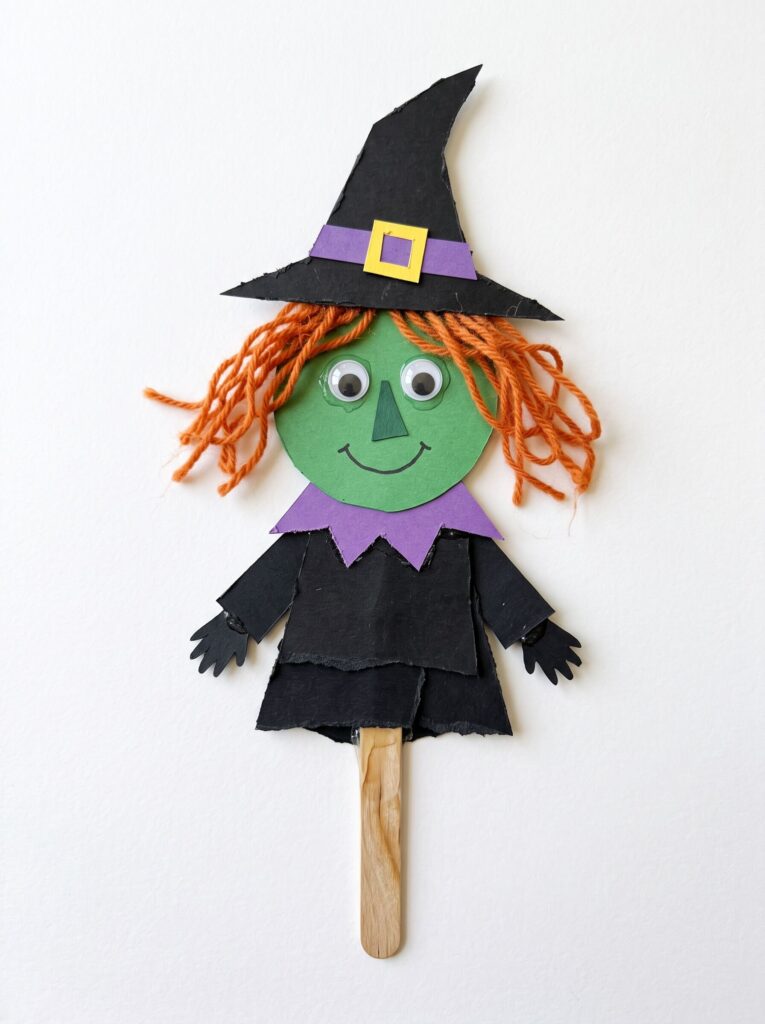
A stick puppet, layered from cardstock scraps. Good use for leftovers from the other projects.
You need: Black cardstock, green paper, orange yarn, purple paper, yellow paper, wiggle eyes, glue stick, scissors, craft stick.
Steps:
- Cut the hat, dress, sleeves, hands, and body pieces from cardstock.
- Trim a green face circle, add eyes, nose, and a smiling mouth.
- Glue orange yarn around the face, add the purple collar and yellow hat buckle.
- Layer the body pieces, glue the craft stick to the back, let it dry flat under a book.
Trade off: Low mess but lots of small cutting. Best for 5 and up, or pre cut the pieces yourself.
5. Paper Cone Witch Doll

Stands up on a shelf. Note: despite the name, this one is built on a cardboard tube with a paper cone skirt, not a full paper cone.
You need: 1 cardboard tube, brown paper, black paper, orange paper, purple paper, yellow paper, glue, scissors, twine, black marker, pink crayon.
Steps:
- Cover the tube with brown paper. Cut a wide quarter circle from paper and roll it into a cone skirt.
- Glue on the black hat, orange paper hair, and a small face circle.
- Add a black cape, round paper hands, and the purple hat band with yellow buckle.
- Tie twine around the waist and glue the skirt in place.
Trade off: The most fiddly paper project here. Give it 30 minutes and expect the cone skirt to need a second glue pass.
Recycled And Upcycled Witch Crafts For Kids
Everything in this group starts in your recycling bin.
6. Cheery Witch Tube Craft
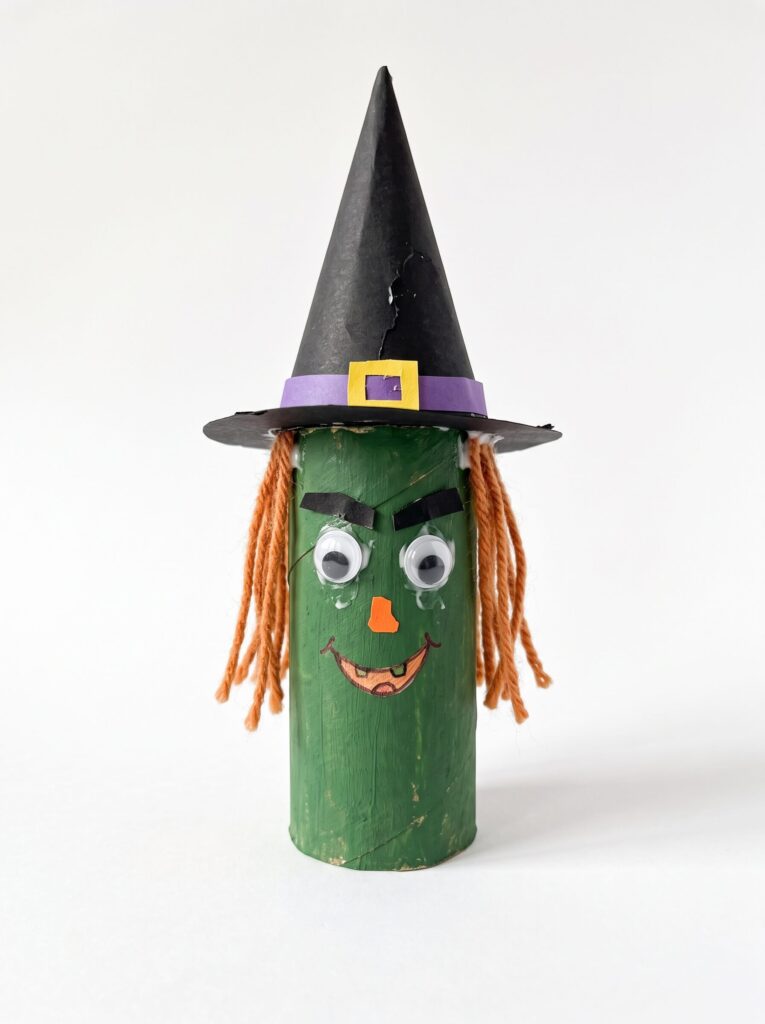
You need: 1 cardboard tube, green paper or paint, black paper, orange yarn, wiggle eyes, purple and yellow paper scraps, glue, scissors.
Steps:
- Cover the tube with green paper or paint it, let it dry.
- Cut a black hat with a purple band and yellow buckle.
- Glue on eyes, eyebrows, nose, and mouth.
- Glue short yarn lengths down both sides for hair, then attach the hat to the top.
Tip: The hat brim needs a hole cut in the middle to sit over the tube, or glue it to the very top rim. Sitting it flat on top looks wrong and kids notice.
Trade off: Low mess. Toilet paper tubes work better than paper towel tubes cut in half, the cut ends crumple.
7. Egg Carton Witch

You need: 1 egg carton cup, green paper circle, black paper for the cone and brim, purple paint or paper, orange paper strips, purple paper band, yellow paper buckle, googly eyes, black marker, glue stick, scissors.
Steps:
- Cut out one egg cup, trim the edges flat, paint or cover it purple, let it dry.
- Glue the black brim and cone together, add the purple band and buckle.
- Attach the green face, eyes, nose, and smile to the front.
- Glue orange paper strips around the face and set the hat on top.
Tip: Trim the ragged top edge of the cup with scissors before painting. It’s the difference between a craft and a piece of trash with a face.
Trade off: Medium mess if you paint. Cardboard egg cartons soak up paint, foam ones don’t, so foam needs a second coat.
8. Bright Bucket Witch Friend
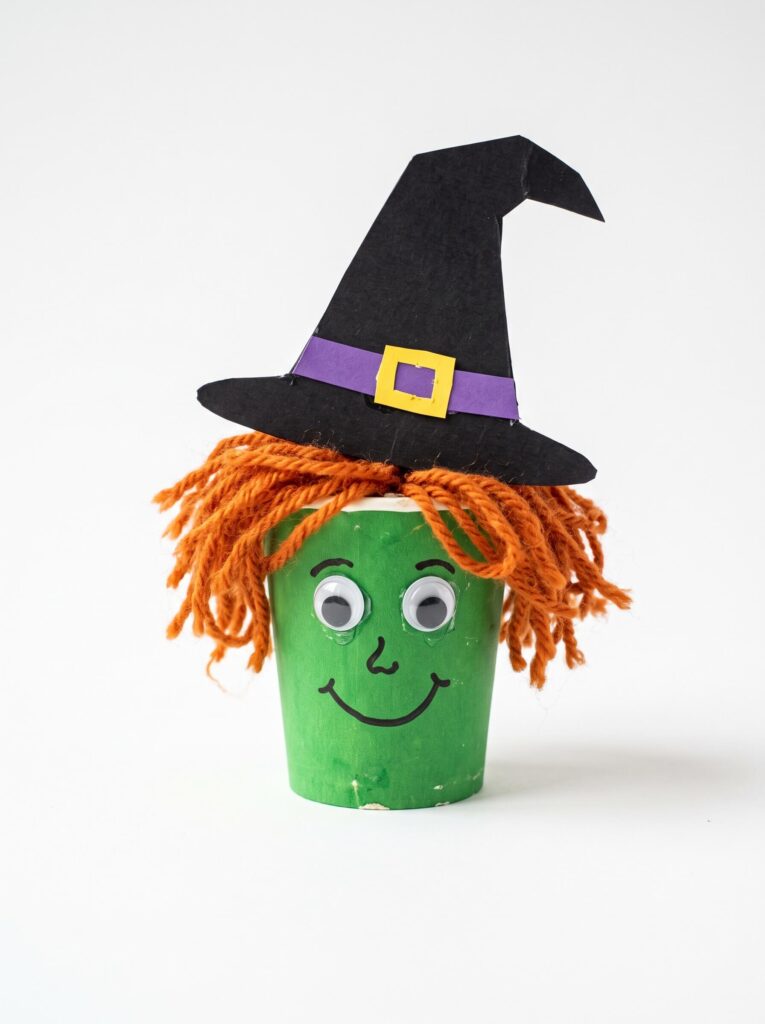
You need: Green paper cup or small bucket, orange yarn, googly eyes, black marker, black paper, purple paper strip, yellow paper buckle, glue, scissors.
Steps:
- Cover the cup with green paper, or start with a green cup.
- Glue on eyes and draw a smile and nose.
- Glue orange yarn around the top rim for hair and trim it even.
- Assemble the black hat with the band and buckle, glue it on at an angle.
Trade off: Low mess, fast, and it doubles as a candy cup. Tilting the hat slightly makes it look intentional instead of lopsided.
9. Green Cauldron Treat Pot

You need: Black paper or a small round container, green paper circles in several sizes, black paper strip for the handle, purple paper strip, yellow paper square, glue or double sided tape, scissors.
Steps:
- Cut the cauldron shape and add a curved paper handle.
- Glue green circles around the rim and inside the top so they look like bubbling potion.
- Cut a small witch hat and decorate it with the purple band and yellow buckle.
- Attach the hat to the front and scatter a few extra green dots.
Tip: Let the top few bubbles stick up above the rim line. Bubbles contained neatly inside look like polka dots.
Trade off: Low mess. Works flat on a wall or wrapped around a real cup for treats.
10. Green Handprint Witch

A keepsake more than a decoration. I still have my daughter’s from when she was four.
You need: Green paint, black construction paper, purple paper, yellow paper, orange and purple yarn, googly eyes, glue, scissors, marker.
Steps:
- Paint the palm and fingers green, press firmly onto paper, lift straight up.
- Cut a tall black hat and a wide oval brim.
- Add the purple band, yellow buckle, googly eyes, and a smiling face.
- Glue on yarn hair and let it dry flat.
Tip: Write the child’s name and the year in pencil in the corner before you decorate. You will not remember which year it was.
Trade off: Highest mess on the list. Have a damp cloth ready before you start, not after.
Felt, Clay, And Keepsake Witch Crafts
These take longer and hold up for years. Worth the extra time.
11. Green Felt Witch Cone
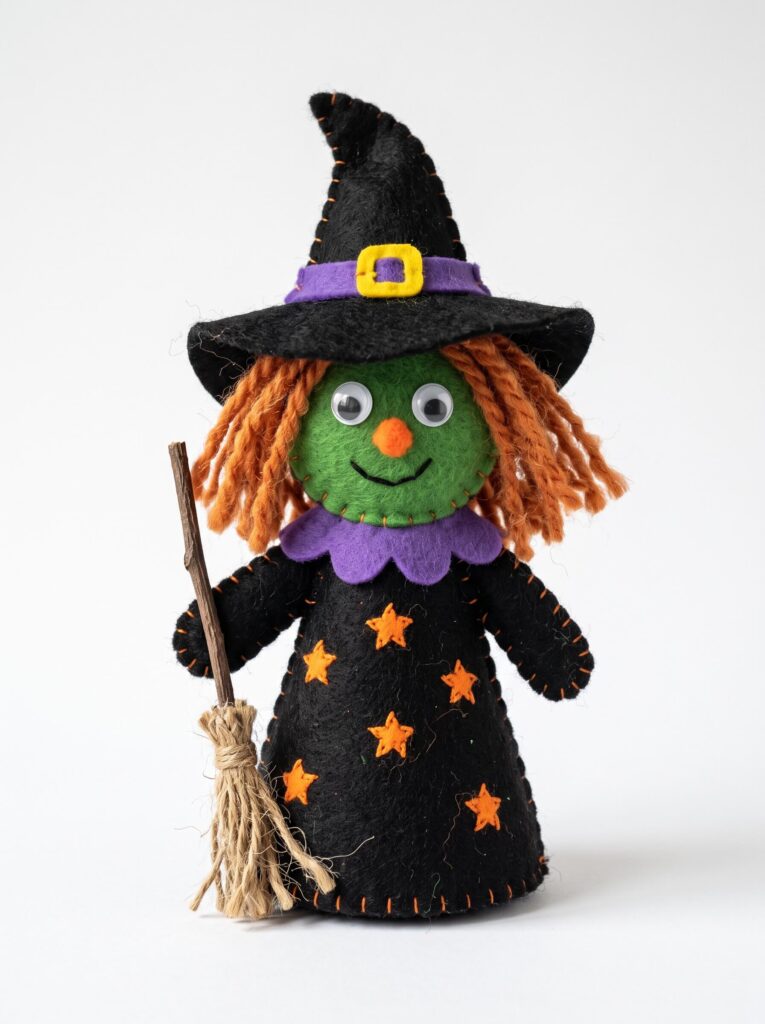
You need: Black felt or craft foam, green felt, orange yarn, purple felt strip, yellow felt, googly eyes, orange felt stars, glue, scissors.
Steps:
- Cut a black cone for the dress and a wide brim, glue them together.
- Add a green round face, eyes, small nose, and smiling mouth.
- Glue on yarn hair, then the purple collar and hat band with the yellow buckle.
- Add orange felt stars to the dress and let it dry.
Tip: Felt fights glue sticks. Use white school glue or fabric glue and give it a full hour, not ten minutes.
Trade off: Cutting felt cleanly is hard for kids under 6. Pre cut the pieces and let them assemble.
12. Clothespin Witch Doll

You need: 2 wooden clothespins, black and green acrylic paint, orange yarn, black felt, purple felt, yellow craft foam, glue, black marker.
Steps:
- Paint the clothespins black, leaving the top section green for the face. Let dry fully.
- Wrap and glue orange yarn around the head.
- Layer felt into a hat with a purple band and yellow buckle.
- Draw the face, add dot details, glue the hat on.
Tip: Stand the clothespins upright in a piece of cardboard with slits cut in it while the paint dries. Laid flat, they stick to the paper.
Trade off: Fiddly, small, and needs drying time. Best for 7 and up.
13. Painted Stone Witch

You need: 2 smooth stones or foam eggs, green and black acrylic paint, purple felt or paper strip, small yellow foam buckle, black yarn, paintbrushes, craft glue.
Steps:
- Wash and fully dry the stones. Paint both green and let them dry.
- Add black dots, a belt, and face details with a fine brush or paint pen.
- Shape the top piece into a pointed hat and wrap it with the purple band and buckle.
- Glue on yarn hair and stack the pieces.
Tip: A damp stone will reject paint in patches. Let them air dry a full hour after washing, or skip washing and just brush them off.
Trade off: Long dry time between coats. Great for kids who can’t cut yet, since there’s no cutting at all.
14. Green Clay Witch Friend

You need: Green, black, and orange modeling clay, brown clay or a pipe cleaner, small stick or straw, plastic shaping tool.
Steps:
- Shape a green head and a black cone body.
- Add a wide black hat with an orange band and yellow buckle.
- Roll thin black or orange clay for hair, press on eyes, cheeks, and a smile.
- Build a small broom from the stick and bristles, add an orange star.
Tip: Air dry clay cracks at the neck where the head meets the body. Keep the head small and press it down into the cone rather than balancing it on top.
Trade off: Medium mess. Air dry clay needs 24 hours before it can be moved safely. Oven bake polymer clay needs an adult and the oven.
15. Felt Spoon Witch Friend
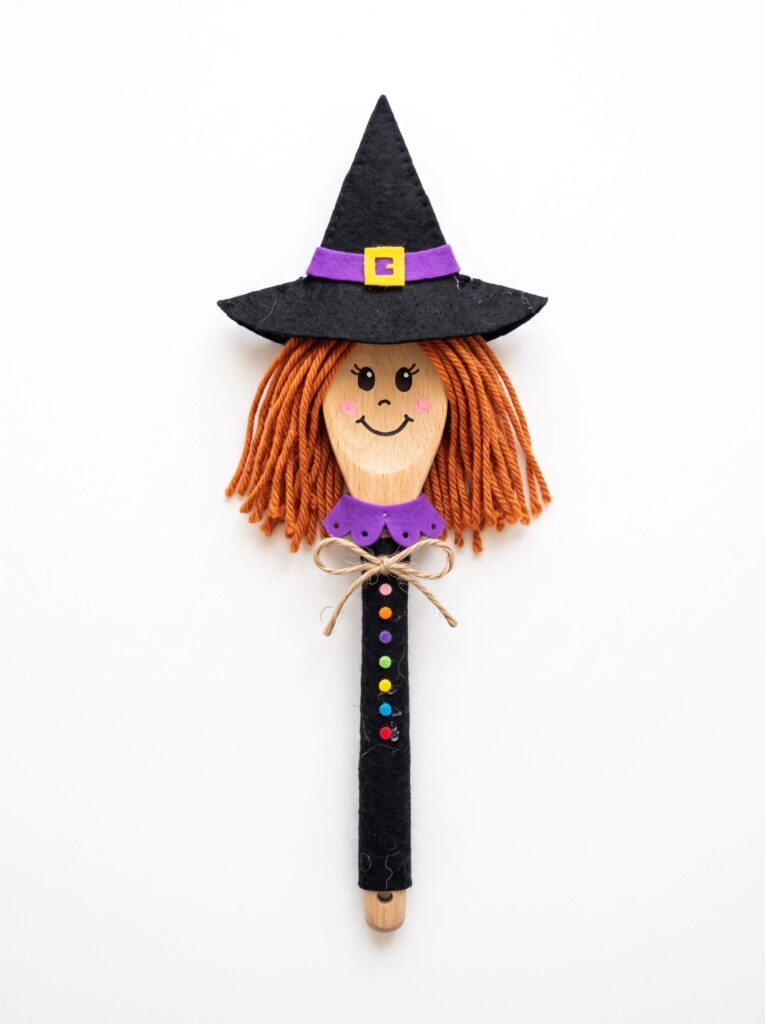
You need: 1 wooden spoon, black felt, purple felt, orange yarn, small felt circles, black and orange twine, glue, scissors, paint pen.
Steps:
- Cover the spoon handle with black felt, trim to fit.
- Cut a wide felt hat and add a purple band with a tiny buckle.
- Glue orange yarn around the spoon head and draw the face.
- Add the purple collar, a twine bow, and felt dots down the handle.
Tip: Draw the face on the back of the spoon, the flat side. The scooped side casts a shadow across the mouth.
Trade off: Needs hot glue or strong craft glue for the felt to stay on the wood. School glue peels off within a week.
16. Pinecone Witch
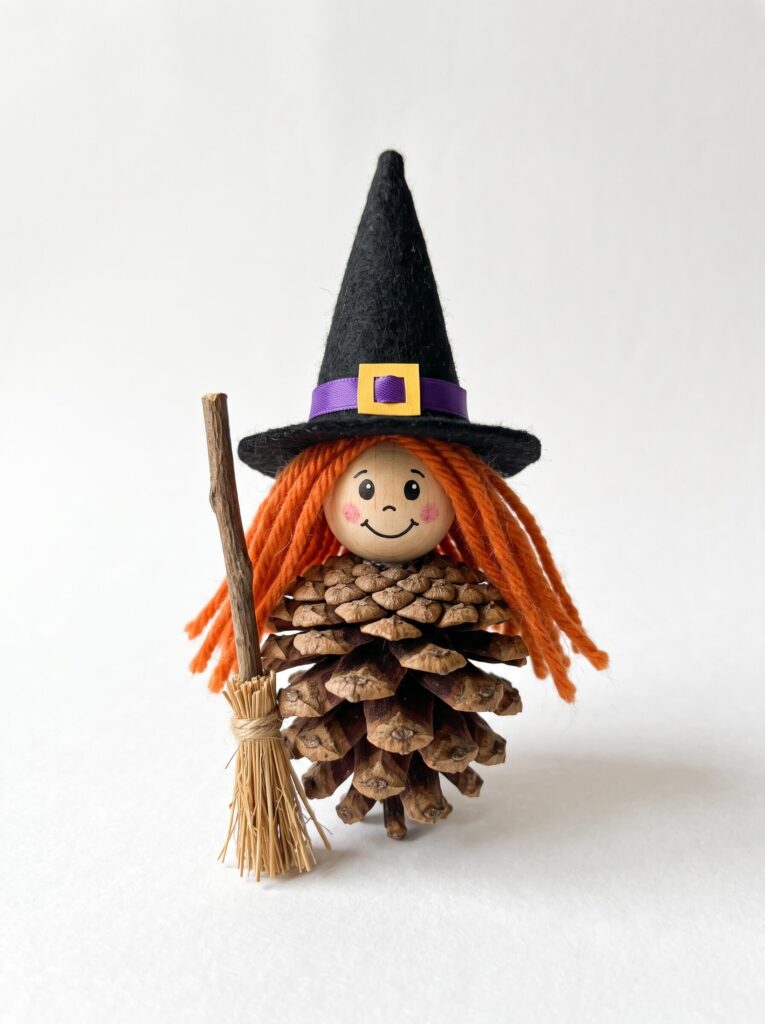
You need: 1 pinecone, black felt or cardstock, purple felt strip, small wooden bead, orange yarn, tiny straw broom, craft glue, black marker, pink crayon.
Steps:
- Glue the wooden bead to the top of the pinecone for the head.
- Wrap orange yarn around the sides for hair and trim.
- Shape a tall black hat with a purple band and buckle.
- Draw a smiling face, add pink cheeks, attach the broom to the side.
Tip: Bake foraged pinecones at 200°F for 30 minutes on foil before you craft with them. They open up, and any bugs living inside do not survive the trip to your craft table. Learned that one the hard way.
Trade off: The most fiddly project on this list. Adult hot glue needed. Allow 35 minutes.
Witch Hats, Garlands, And Halloween Witch Craft Decor
Less character building, more decorating the room.
17. Elegant Witch Hat Centerpiece
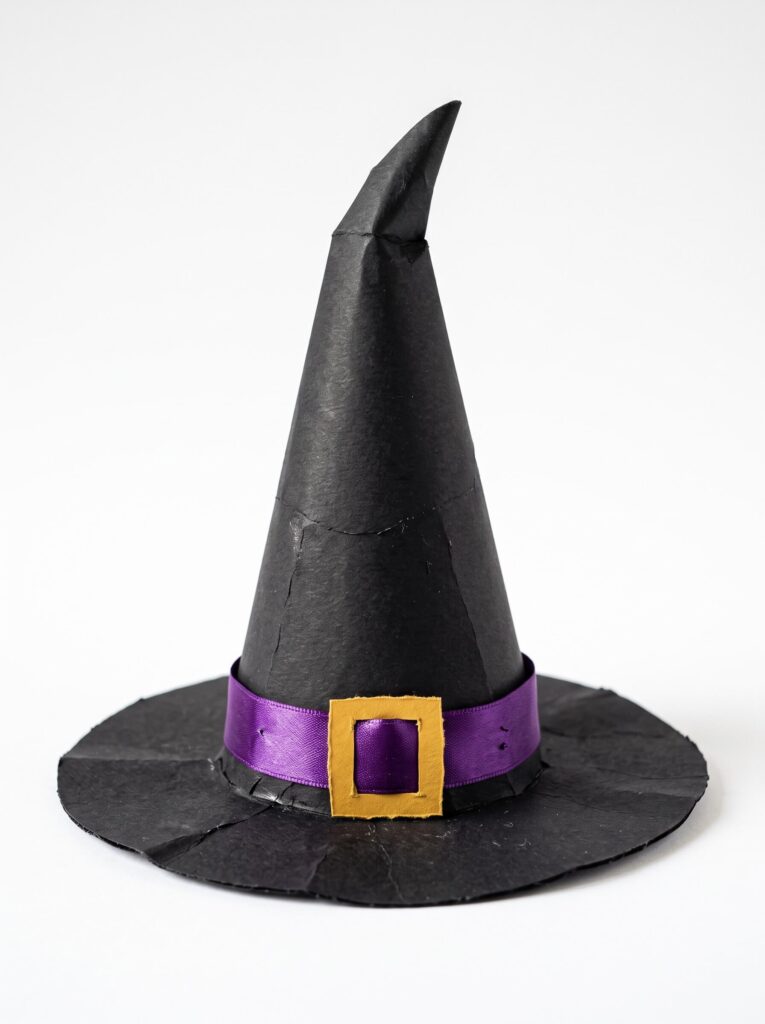
You need: Black cardstock or foam sheet, purple ribbon, yellow paper or foam, glue or tape, scissors.
Steps:
- Roll the black sheet into a tall cone and tape the inside seam.
- Cut a brim circle at least two inches wider than the cone base.
- Cut a hole in the brim’s centre, slot the cone through, tape underneath.
- Wrap purple ribbon around the base and glue a yellow buckle to the front.
Tip: Trace around a dinner plate for the brim circle. Freehand circles are always too small, and this is where the hat craft usually fails.
Trade off: Low mess, but circle cutting is a genuine skill. Cut the brim for anyone under 7.
18. Purple Bow Witch Hat Headband
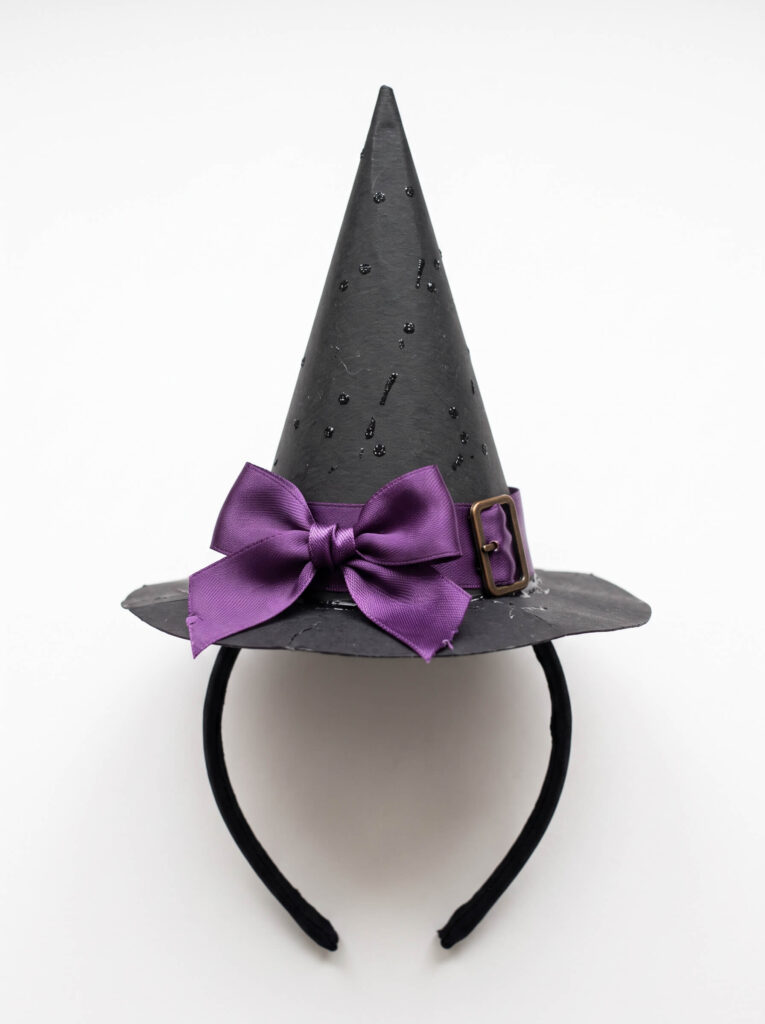
You need: Black craft foam or cardstock, purple ribbon, small glitter buckle, headband or elastic, glue or double sided tape, black dot stickers.
Steps:
- Cut a tall cone and a wide brim from foam.
- Attach the cone to the brim and secure the headband underneath with strong tape.
- Wrap purple ribbon around the band and add dot stickers.
- Finish with a bow and buckle at the front.
Tip: Craft foam beats cardstock here. Cardstock hats crumple the first time a kid takes the headband off and drops it.
Trade off: Wearable, so it takes real abuse. Use foam and hot glue if you want it to last past one party.
19. Cozy Witch Hat Garland
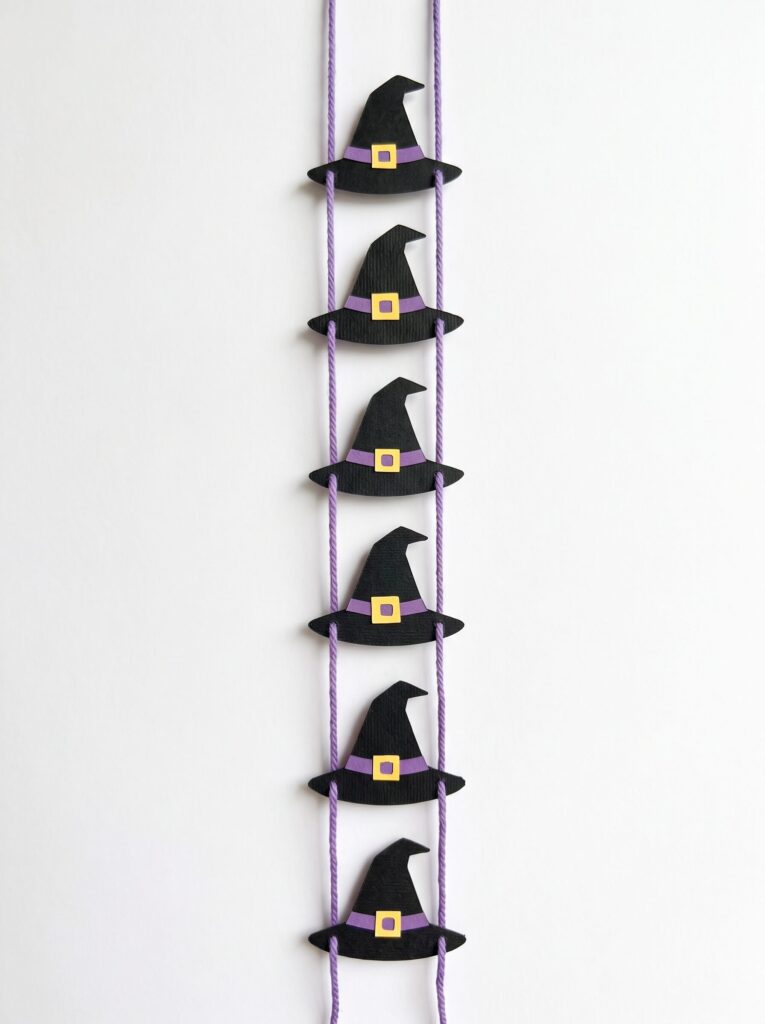
You need: Black cardstock, purple paper, scissors, glue stick, hole punch, purple yarn.
Steps:
- Cut tall witch hat shapes from black cardstock. Make a cardboard template first and trace it.
- Cut purple bands and small square buckles.
- Glue the bands and buckles onto each hat.
- Punch two holes at the brim corners and thread onto yarn.
Tip: Two holes, not one. One hole makes every hat spin sideways on the string.
Trade off: Repetitive, which is either meditative or maddening depending on the kid. Great group project since everyone makes two hats and you get a long garland.
20. Popsicle Stick Witch Smile

You need: 5 green craft sticks, 8 orange craft sticks, black cardstock, purple paper strip, yellow paper buckle, googly eyes, black marker, glue.
Steps:
- Line up the green sticks side by side for the face. Glue a horizontal stick across the back to hold them together.
- Glue orange sticks fanning out on both sides for hair.
- Cut and attach the tall black hat above the face.
- Add the purple band, brim, and yellow buckle, then the eyes and drawn smile.
Tip: That hidden support stick on the back is the whole trick. Without it, the face falls apart into loose sticks the second someone picks it up.
Trade off: Low mess, sturdy, holds up on a classroom wall for a month. Needs white glue and 30 minutes of drying before handling.
Common First Timer Mistakes
The brim is too small. Cut it wider than you think, at least two inches beyond the cone base. Trace a plate. This ruins more witch hats than everything else combined.
Gluing yarn hair to wet paint. The yarn pulls the paint off in strings. Wait for it to dry, all the way, not “mostly.”
Using a glue stick on felt or yarn. It won’t hold. White school glue or fabric glue, and give it an hour.
Cutting hair strands too long. Six inches of yarn on a paper plate face looks like a wig sliding off. Three inches is plenty.
Making the face too small on the plate. Kids draw tiny features in the middle of a huge green circle. Have them place the eyes wide and high before gluing anything down.
Starting a paint project 20 minutes before you need it finished. Drying time is real time. Paint projects need 40 minutes minimum, start to finish.
FAQs
What is the easiest witch craft for a 3 year old?
The handprint witch or the paper bag puppet. Both let the child do the fun part (pressing a painted hand, gluing yarn) while an adult handles all the cutting.
What can I use instead of green paint for witch faces?
Green construction paper, a green paper napkin, a cut up green cereal box, or a green paper cup. Paper skips the drying step entirely, which is why I use it for classroom groups.
How do you make a witch hat that stands up?
Roll a cone from stiff cardstock or craft foam, cut a brim circle at least two inches wider than the cone base, cut a hole in the brim’s centre, and slot the cone through it. Tape the seam on the inside so it doesn’t show.
Are these Halloween witch crafts for kids too scary for preschoolers?
No. Every project here uses a friendly smiling face rather than a scary one. If a child is nervous, let them draw the face themselves, kids almost always draw a happy witch.
How long do these crafts last?
Paper projects hold up a few weeks on a wall. Felt, clay, painted stone, and clothespin witches last for years if stored flat in a box. The handprint witch is the one families actually keep.
What’s the cheapest way to do this for a whole classroom?
Paper plates, brown lunch bags, and one pack of black construction paper covers 24 kids for under ten dollars. Cut all the hat pieces the night before and the session runs in 20 minutes.
Read next
If you’re building out a full Halloween craft station, pair these with Best Halloween Pumpkin Crafts For Easy Fall Decor so you have a two project rotation for a party table.
And if you liked the recycled projects here,15 Cardboard Tube Crafts Kids Can Make In Under 20 Minutes uses the same materials year round, not just in October.
One Last thing
Cut your hat brims first, before the kids sit down. Every single one of these projects has a hat, and the brim is where it goes wrong. Do that one bit of prep and the rest genuinely runs itself.
Then go make the handprint one. That’s the one you’ll still have in ten years.