
Scandinavian Christmas crafts rely on three things: pared back shapes (hearts, stars, trees, horses), visible natural materials (wood, wool felt, twine, unfinished beads), and a restrained palette of muted red, cream, and raw wood. Most of these projects are beginner friendly and take 20 to 60 minutes, though the felt ornaments need hand stitching and the clay pieces need several days to dry. The detail that separates a genuine Nordic look from a generic Christmas craft is the shade of red: use a muted brick or barn red rather than a bright fire engine red.
My first felt heart ornament looked terrible and it took me two years to work out why.
The shape was fine. The stitching was fine. The problem was that I’d bought a bag of cheap acrylic craft felt in bright pillar box red, and the whole thing looked like a cafeteria decoration. The Danish ones I’d been trying to copy were made from wool blend felt in a dull brick red, and that single difference was doing all the work.
So before the 19 projects, two things that matter more than any of the individual instructions: the red, and the felt.
Then we get to the making.
The Two Decisions That Make It Look Scandinavian
1. Get the red right
Traditional Nordic red is closer to barn red than to Christmas red. It comes from falu rödfärg, the iron oxide paint from the Falun copper mine in Sweden that turned every wooden cottage in the country that particular dull, warm, slightly brown red.
If you pick a bright saturated red, the piece reads as generic holiday craft no matter how good your shapes are. If you pick a muted brick red, even a rough first attempt reads as Nordic.
Look for paint named barn red, brick red, or Venetian red rather than true red or cardinal. In felt, the wool blends tend to run naturally muted, which is one more reason to use them.
2. Use wool blend felt, not acrylic craft felt
The stiff square sheets from the craft store bargain bin are 100% acrylic. They pill within a season, the cut edges fuzz, and blanket stitching pulls right through them.
Wool blend felt (National Nonwovens makes the standard 20 to 35% wool blend, and most felt specific Etsy shops sell it) costs roughly three times as much per sheet. It cuts with a clean edge, holds a stitch, and gets better looking as it ages rather than worse.
For ornaments you plan to keep and re box every year, this is the single best place to spend money.
Practical note: If you only change one thing from this whole article, change the red. Muted brick over bright red does more for the Scandinavian look than any technique below.
Skill Level And Time For All 19 Scandinavian Christmas Crafts
| Project | Level | Active time | Dry or set time | Main tool |
|---|---|---|---|---|
| Beaded tree tabletop | Intermediate | 60 min | Paint drying, 2 hrs | Wire cutters, glue gun |
| Wood slice reindeer | Beginner | 20 min | None | Glue gun |
| Woven heart (julehjerte) | Beginner | 20 min | None | Scissors |
| Felt gnome cone | Beginner | 35 min | None | Glue gun |
| Felt heart ornament | Beginner | 30 min | None | Needle |
| Layered wood tree | Beginner | 25 min | Wood glue, 30 min | Sandpaper |
| Bead garland | Beginner | 40 min | None | Needle, cord |
| Felt mushroom | Intermediate | 45 min | None | Needle |
| Stamped clay star | Beginner | 20 min | 2 to 4 days | Rolling pin |
| Felt stocking | Intermediate | 60 min | None | Needle |
| Twig tree wall hanging | Beginner | 30 min | Glue set, 15 min | Secateurs |
| Felt angel | Intermediate | 50 min | None | Needle |
| Embroidered Dala horse | Advanced | 90 min | None | Needle, floss |
| Birch candle centerpiece | Beginner | 15 min | None | None |
| Mini gift box tree | Beginner | 20 min | None | Scissors |
| Twig wreath | Beginner | 30 min | None | Floral wire |
| Wooden snowman | Beginner | 25 min | Paint, 1 hr | Paint marker |
| Painted house ornament | Intermediate | 40 min | Paint, 1 hr | Fine brush |
| Red yarn cone tree | Beginner | 45 min | None | Glue gun |
If you have one evening: wood slice reindeer, woven hearts, twig tree, birch centerpiece. All four in about 90 minutes.
If you’re planning ahead: start the clay ornaments first. Air dry clay needs two to four days, longer in a damp house, and there’s no speeding it up. Everything else can happen the week before.
If you want one showpiece: the embroidered Dala horse. It’s the only advanced project here and it takes 90 minutes, but it’s the one people pick up off the tree.
Materials, Sourcing, And Cheap Swaps
Wool blend felt Etsy felt shops and Benzie sell it by the sheet in good muted colours. Cheap swap: cut up a thrifted wool sweater and felt it in a hot wash. It shrinks dense and cuts clean, and the colour is usually already muted.
Unfinished wood beads Craft stores sell bags of them cheaply. Cheap swap: cut a wooden dowel into short segments and drill through, or reuse beads from a thrifted necklace.
Embroidery floss DMC is the standard and costs under a dollar a skein. Cheap swap: unravel white cotton kitchen twine for a rustic thicker line.
Wood slices Buy kiln dried. Fresh cut slices split radially as they dry, usually within a few weeks, right across the middle of whatever you’ve glued on. Cheap swap: cut your own from a fallen branch, but let them dry indoors for a month first and expect a couple to crack anyway.
Air dry clay Das is the reliable one and it sands well. Crayola Model Magic is softer and lighter but takes stamped impressions poorly. Cheap swap: cold porcelain from cornflour and white glue, though it shrinks more.
Glue Hot glue gun for wood, felt, and twigs. Titebond II wood glue for the stacked wood tree, since hot glue leaves a visible bead line on flush wood joints. Aleene’s Tacky Glue for anything where you don’t want string.
Twigs, pinecones, evergreen Free from outside. See the safety section before you bring them in.
Real Safety Notes For These Materials
These are adult projects. Hot glue, needles, craft blades, and in one case an open flame. Here’s what actually matters.
Hot glue guns. Low temp guns run around 250°F, high temp around 380°F. High temp gives you a much better bond on wood and dense felt. It also causes a real burn instantly, and molten glue sticks to skin, so you can’t just pull away from it. If you burn yourself, cool it under running water and let the glue peel off on its own rather than picking at it. Work on a silicone mat, keep the nozzle away from the edge of the table, and never catch a falling glue gun.
Glue strings. Those cobweb strands between joints are normal. A hair dryer on high for a few seconds melts them away without touching the piece.
Foraged twigs, wood slices, and pinecones. Bake them at 200°F for 30 minutes on foil before they come near your craft table. Anything living inside does not survive that, and it dries out surface moisture that would otherwise go mouldy in a warm house. I skipped this once with a bag of pinecones and found small beetles walking across the mantel in December.
Sanding wood. Fine wood dust is a respiratory irritant. For a couple of small ornaments you’re fine at an open window. For a batch, wear a dust mask and don’t sand over a food surface.
Candles. This is the only genuinely hazardous project here and it deserves more than one line. Dried evergreen is fuel. It ignites fast and burns hot. If you use a real flame, keep all greenery at least four inches from it, sit the candle on a heat resistant barrier rather than directly on bare wood, and never leave it burning unattended or with pets in the room. A wood slice under a pillar candle will scorch. Honestly, a good flameless LED pillar solves this completely and the arrangement looks the same in photos.
Needles and blades. Standard care. A thimble on your pushing finger makes an hour of blanket stitch much less painful, which you learn around minute forty.
One note about small parts: these are decorations, not toys. Wood beads and felt balls on a low garland are a swallowing hazard if there’s a toddler in the house. Hang them high or skip the garland this year.
Felt Ornaments And Figures
Six projects, all hand stitched. Learn one stitch and they all get easier.
The blanket stitch is the whole game. It’s the visible loop stitch running around the edge of every Nordic felt ornament. Bring the needle up through both layers near the edge, loop the floss under the needle before you pull it tight, and keep your spacing even. Uneven spacing is what makes handmade felt look amateur rather than handmade. Aim for about 4mm apart and mark the first few with a fabric pencil until your eye calibrates.
1. Felt Heart Ornament

You need: Wool blend felt in brick red, white embroidery floss, needle, scissors, polyfill, white cord.
Steps:
- Cut two matching hearts. Cut both at once with the sheets stacked so they actually match.
- Blanket stitch around the edge in white floss, leaving a two inch opening on one straight side.
- Stuff lightly through the opening, pushing filling into the point of the heart first with the blunt end of a pencil.
- Close the opening, then stitch a folded loop of cord into the top notch.
Tip: Understuff it. An overstuffed felt ornament goes rigid and pulls the stitches into visible gaps. It should still squish.
Trade off: Beginner level, 30 minutes. The only thing that goes wrong first time is the two halves not matching, which is fixed by cutting them stacked.
2. Embroidered Dala Horse Ornament

Worth naming properly. This is a Dalahäst, the carved wooden horse from Dalarna in Sweden, traditionally painted in that same muted red with kurbits floral scrollwork on the flank. Calling it a horse ornament misses the point of the shape.
You need: Brick red wool felt, white floss, needle, scissors, polyfill, cord.
Steps:
- Cut two horse silhouettes. Make a paper template first, freehand cutting two matching horses is much harder than it looks.
- Embroider the kurbits scrollwork on one side before assembling. Never after.
- Blanket stitch the two layers together, leaving a gap along the back.
- Stuff the legs first using a chopstick, then the body, then close and add the cord.
Tip: The legs are the whole difficulty. Keep them thick, at least half an inch wide. Thin elegant legs will not turn or stuff and you’ll tear the seam trying.
Trade off: The advanced one. 90 minutes with the embroidery. Expect the first attempt to have one leg fatter than the other.
3. Felt Gnome Cone Figurine

A nisse in Denmark and Norway, a tomte in Sweden. Traditionally the household guardian, which is why he stands on the shelf rather than hanging on the tree.
You need: Grey wool felt, brick red felt, white yarn, wooden bead, hot glue.
Steps:
- Cut a quarter circle from grey felt, roll it into a cone, glue the seam. Cardstock inside gives it a firmer shape if it slumps.
- Cut a taller narrower red cone for the hat and glue it closed.
- Glue a bundle of white yarn to the cone top for the beard, then set the hat over it so the hat brim hides the glue line.
- Glue the wooden bead nose so it sits half under the hat brim.
Tip: The hat has to come down far enough to cover the eyes entirely. A nisse with visible eyes looks wrong and you won’t know why until you pull the hat lower.
Trade off: Beginner, 35 minutes. Hot glue means burn risk but no stitching.
4. Felt Mushroom Figurine
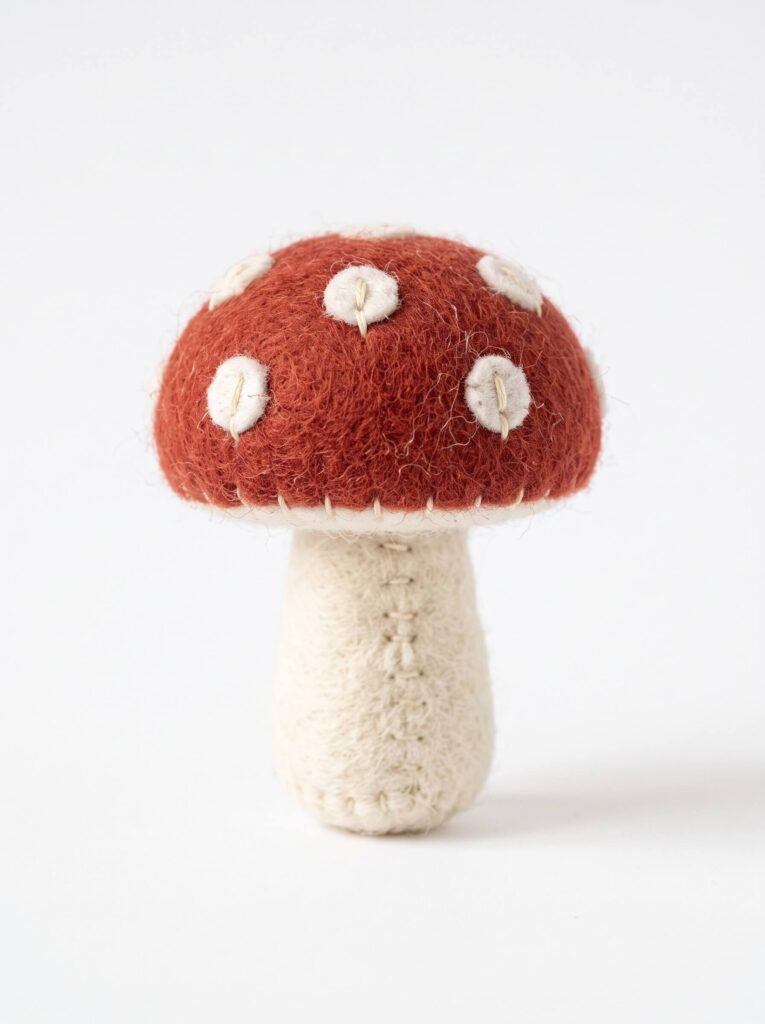
The fly agaric, red cap with white spots, a recurring motif in Nordic folk decoration.
You need: Red and cream wool felt, polyfill, needle and thread, small white felt circles.
Steps:
- Cut a circle for the cap and a rectangle for the stem. Run a gathering stitch around the cap circle edge.
- Pull the gathering thread to cup the cap, stuff it, and tie off.
- Roll and stitch the stem into a tube, stuff it firmly so it stands.
- Stitch the cap onto the stem, then hand stitch the white dots on with a single centre stitch each.
Tip: Glue the dots and they lift at the edges within a month. Stitch them with one stitch through the middle and they stay put and look better.
Trade off: Intermediate, 45 minutes. The gathering stitch is the new skill, and the stem needs firmer stuffing than feels right or the mushroom flops over.
5. Felt Stocking Wall Hanging

You need: Cream wool felt, red floss, needle, fabric scissors, red ribbon.
Steps:
- Cut two stocking shapes from a paper template.
- Blanket stitch in red around the edge, leaving the top open.
- Stitch a small red heart to the front before you close the sides, so you’re stitching through one layer.
- Sew a red ribbon loop inside the top corner.
Trade off: Intermediate mostly because of the length of the edge. 60 minutes of stitching. The curve at the heel is where the spacing goes uneven, so slow down there.
6. Felt Angel Ornament

You need: Cream and white wool felt, wooden bead or disc, beige yarn, red felt scrap, red thread, polyfill.
Steps:
- Cut and roll a cream cone body, stitch the seam closed.
- Glue yarn hair around the wooden bead face, leaving the front clear.
- Attach the face at the cone top, then stitch the wings to the back.
- Add the red heart to the front and blanket stitch the hem in red.
Tip: Stitch the wings on rather than gluing. Glued wings sit flat against the body and the angel loses all its depth.
Trade off: Intermediate, 50 minutes. Fiddly at the neck join where the bead meets the cone.
Wood And Bead Scandinavian Christmas Crafts
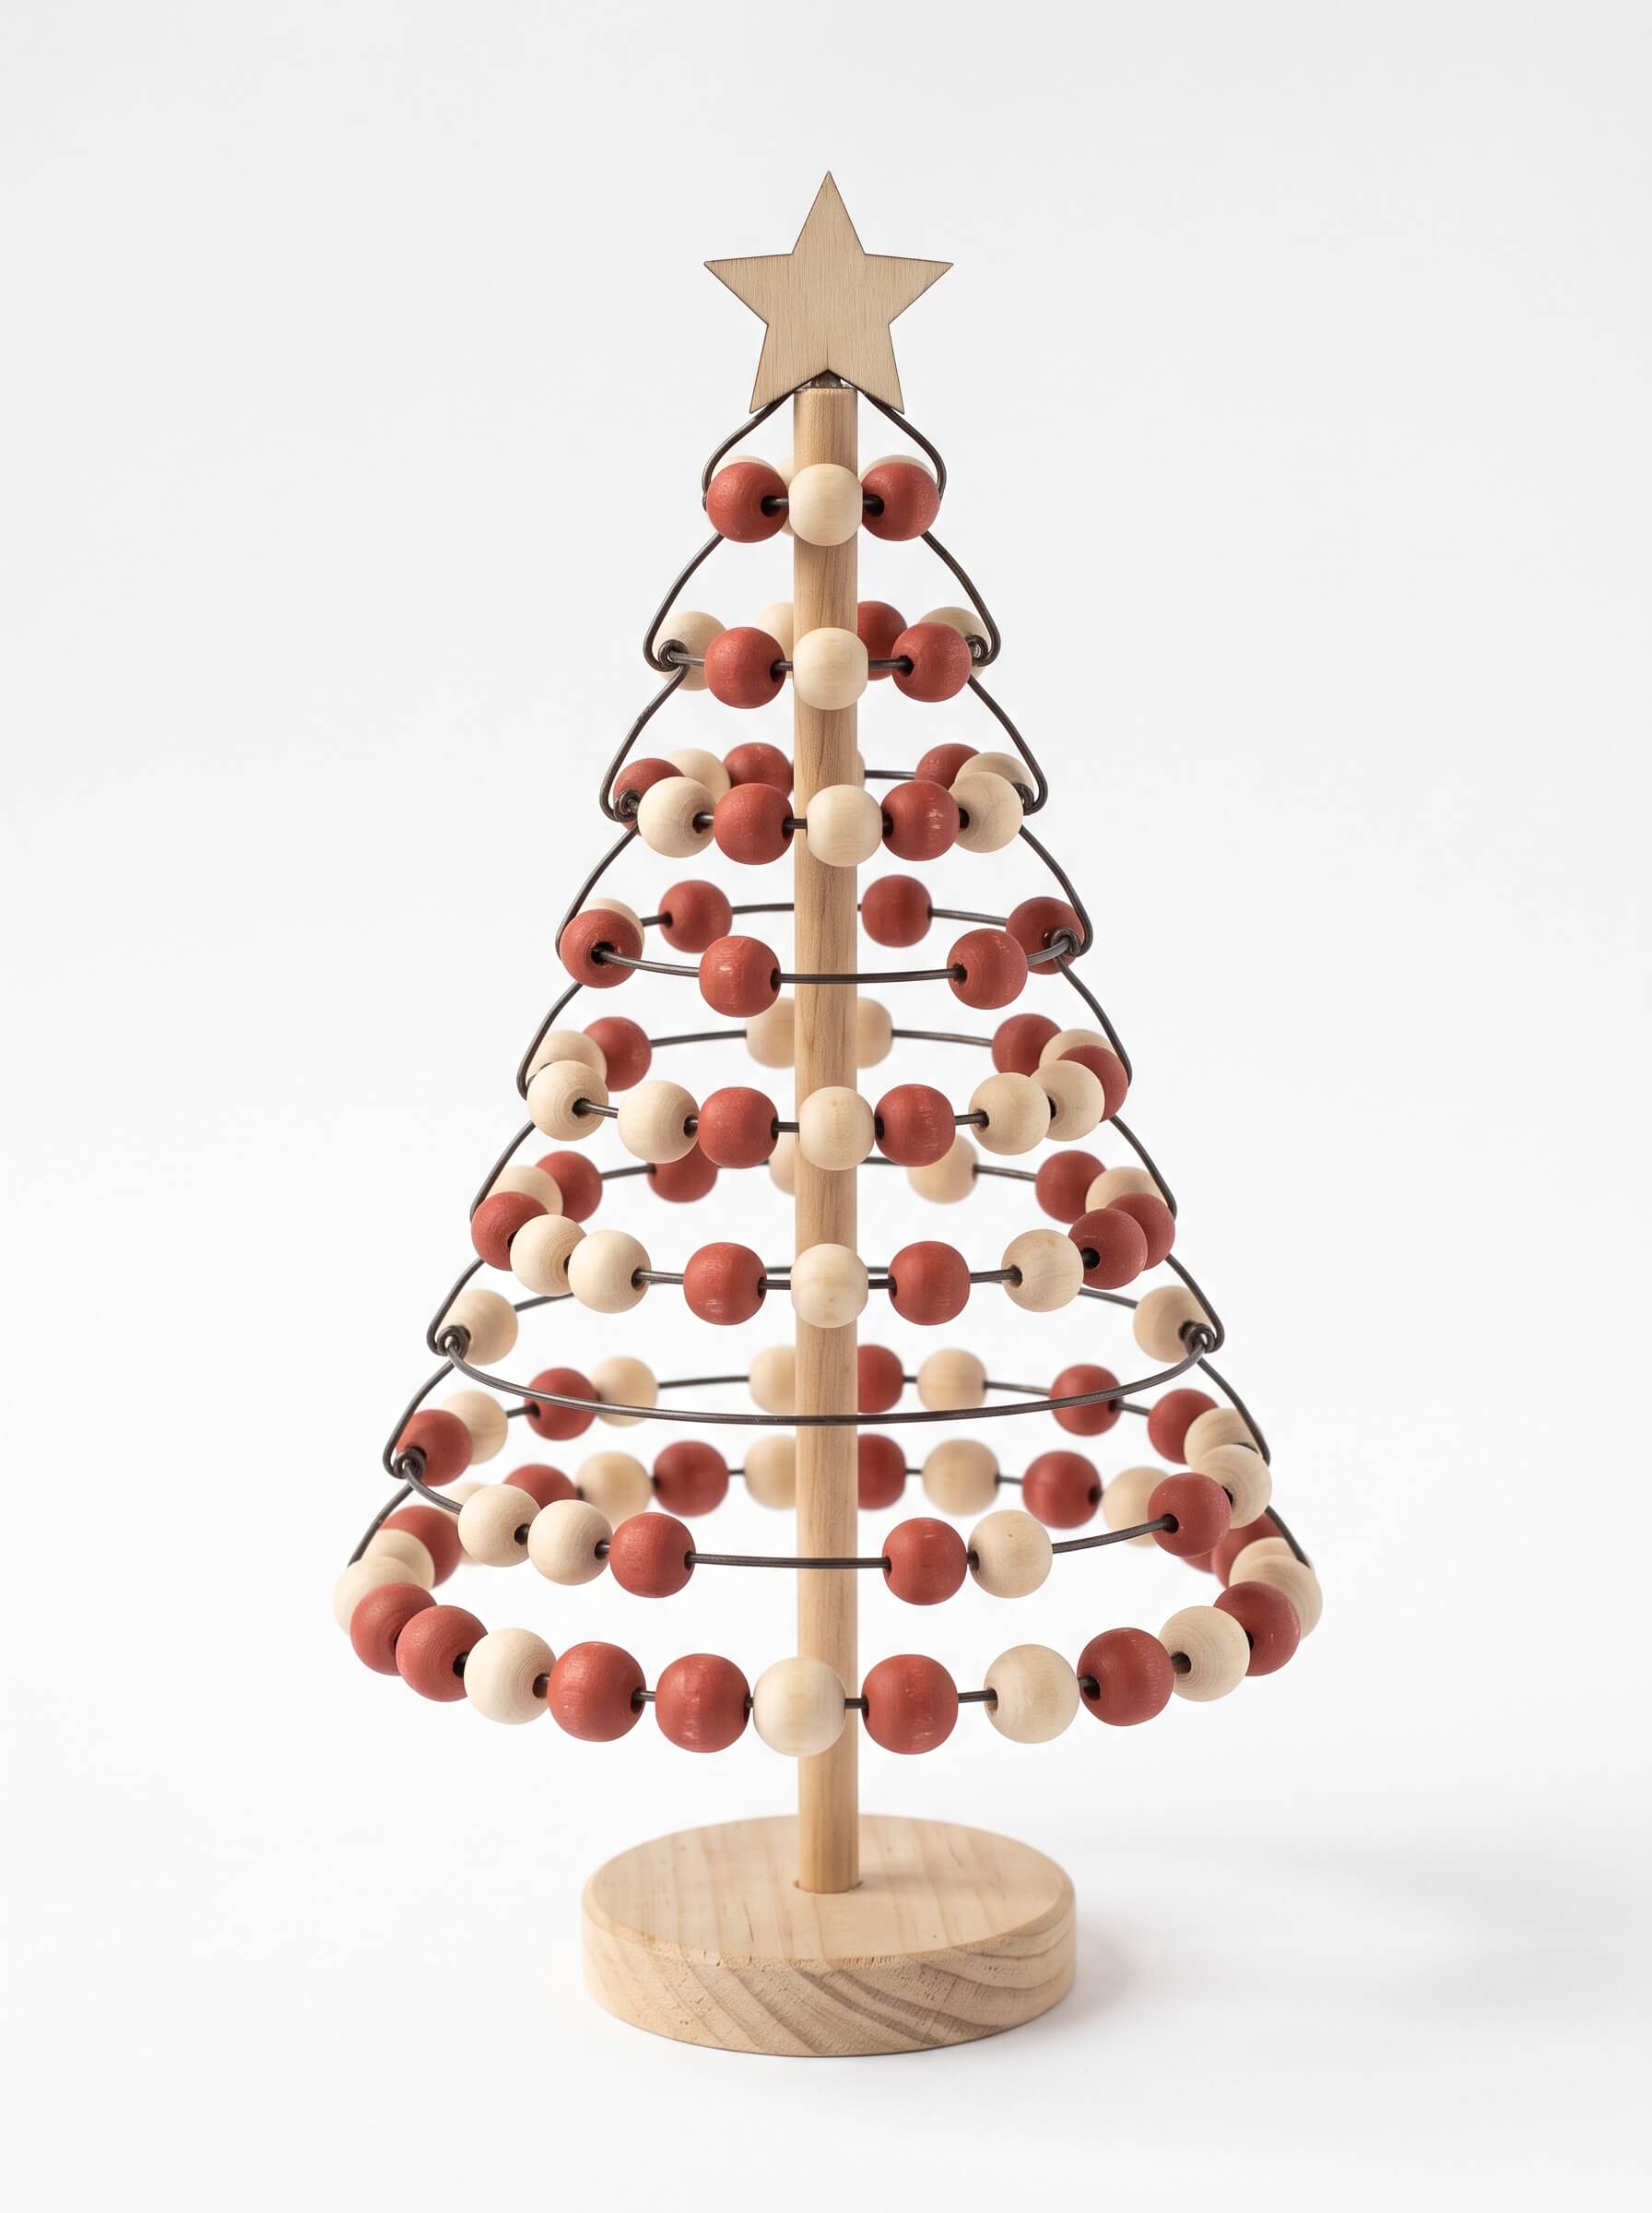
7. Beaded Christmas Tree Tabletop Decor
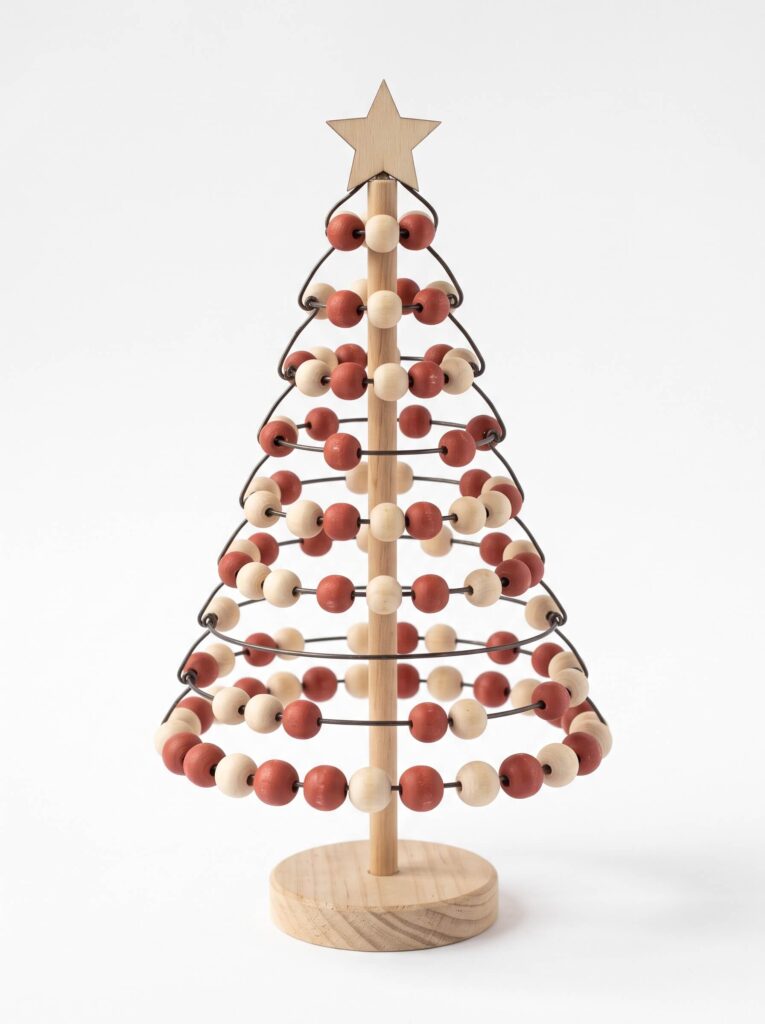
You need: Wood beads, brick red paint, thin craft wire, wooden star cutout, dowel, round wood base, hot glue, flush cutters.
Steps:
- Dye rather than paint the beads. Drop them in a jar with a splash of rubbing alcohol and a few drops of alcohol ink, shake, tip onto newspaper. Painting each bead individually takes an hour and gives you a thick clogged finish.
- Cut wire lengths for each tier, longest at the bottom, decreasing by about an inch each row.
- Thread beads alternating red and natural, then bend each wire into a ring and twist the ends closed.
- Glue the dowel into the base, slide the rings on largest first, and glue the star to the top.
Tip: Tuck every cut wire end inward toward the dowel. Outward facing ends catch on sleeves and are genuinely sharp.
Trade off: Intermediate, 60 minutes plus dye drying. The most fiddly project on this list after the Dala horse.
8. Layered Wooden Tree Ornament

You need: Unfinished wood triangles, round base and dowel, small red bead, wood glue, sandpaper.
Steps:
- Sand every piece, edges included. Unfinished craft wood arrives with fuzzy edges that show badly on a bare wood piece.
- Glue the dowel into the base with wood glue and let it set 30 minutes.
- Stack the triangles largest to smallest, rotating each about 30 degrees from the one below so the tiers read separately.
- Glue the red bead on top.
Tip: Use wood glue, not hot glue. Hot glue leaves a visible bead of plastic between flush wood surfaces and there’s nowhere for it to hide on a piece this minimal.
Trade off: Beginner, 25 minutes plus glue set time.
9. Bead Garland Mantel Strand

You need: Red felt balls, unfinished wood beads, white star beads, strong cord, long needle.
Steps:
- Work out your repeat before threading. Three wood, one felt ball, one star is a good rhythm.
- Thread onto waxed cord with a long needle. Felt balls need the needle pushed straight through the centre.
- Leave slack between groups so the strand drapes rather than sitting rigid.
- Knot both ends and add a loop.
Trade off: Beginner but repetitive, 40 minutes for a six foot strand. Buy more beads than you think, a six foot garland eats about 80.
10. Wooden Snowman Tabletop Figure

You need: Two wooden balls in different sizes, orange bead, black paint marker, red felt strip, craft glue.
Steps:
- Sand a small flat spot on the top of the larger ball and the bottom of the smaller one. Two curves glued together will not hold.
- Glue them stacked and let it cure fully.
- Add dot eyes with a fine black paint marker and glue the orange bead nose.
- Tie the felt strip at the neck as a scarf.
Tip: Sanding those two flat spots is the difference between a snowman and two balls that fall apart in the box in January.
Trade off: Beginner, 25 minutes. Posca paint markers give a crisper dot on bare wood than paint and a brush.
11. Mini Painted House Ornament

You need: Small wood block, cream and brick red paint, fine brush, green detail paint.
Steps:
- Seal the bare wood first with a thin coat of matte medium or watered white paint, or the grain wicks your paint lines into fuzzy edges.
- Paint the roof edges cream and add the chimney.
- Paint two small windows and a red door.
- Add a tiny green wreath dot above the door with the end of a paintbrush handle.
Trade off: Intermediate because of the fine lines, 40 minutes plus drying. That sealing step is what stops the whole thing looking blurry.
Foraged And Natural Projects
Everything here comes from outside. Bake it first, per the safety section.
12. Wood Slice Reindeer

You need: Kiln dried wood slice, small twigs, black beads or paint, red felt ball, high temp glue gun.
Steps:
- Snap twigs into two antler shapes with a few forks each. Snapping gives a better natural break than cutting.
- Glue them to the back top edge of the slice, not the front face, so they appear to grow behind the head.
- Add the two black eyes.
- Glue the red felt ball nose slightly below centre.
Tip: Asymmetric antlers look better than matched ones. Don’t fight to make them even.
Trade off: Beginner, 20 minutes, the fastest good looking project here. Bark can lift off the slice edge; a bead of glue underneath tacks it back.
13. Twig Tree Wall Hanging
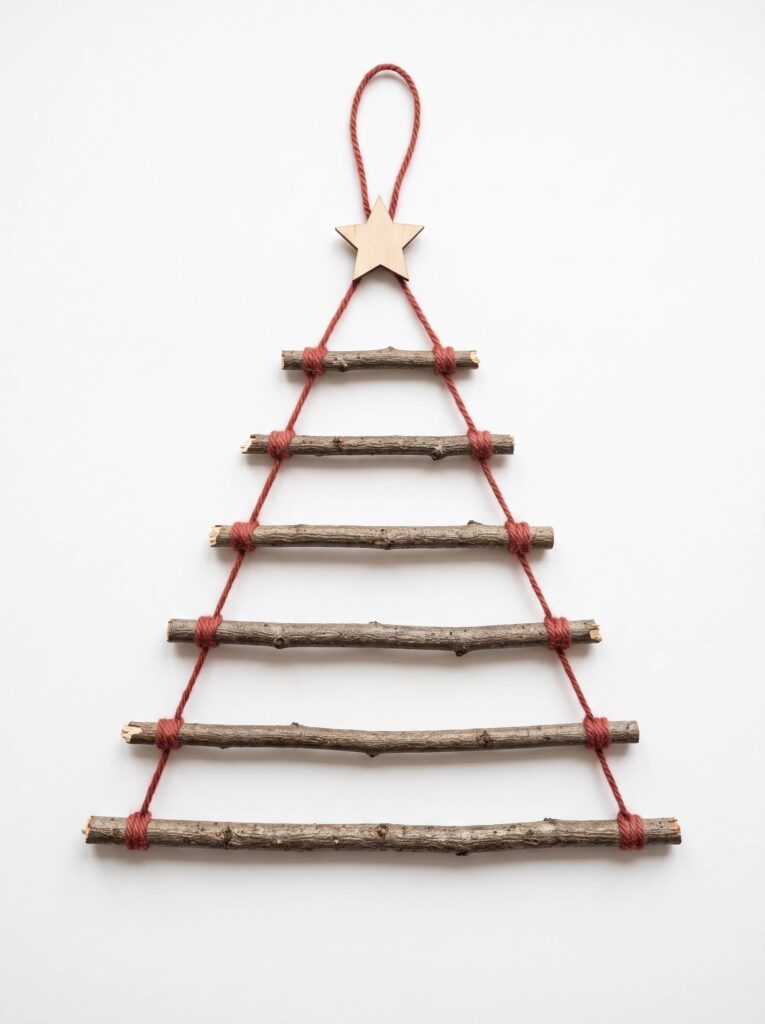
You need: Straight twigs, red yarn, wooden star, glue.
Steps:
- Cut twigs into descending lengths, roughly an inch apart, seven or eight of them.
- Lay them out on the table spaced evenly to check the taper before attaching anything.
- Run two lengths of red yarn down the sides in a V and lash or glue each twig at both ends.
- Attach the star at the top and add a hanging loop.
Trade off: Beginner, 30 minutes. Lashing with yarn looks better than gluing and holds far better, but adds ten minutes.
14. Twig Wreath
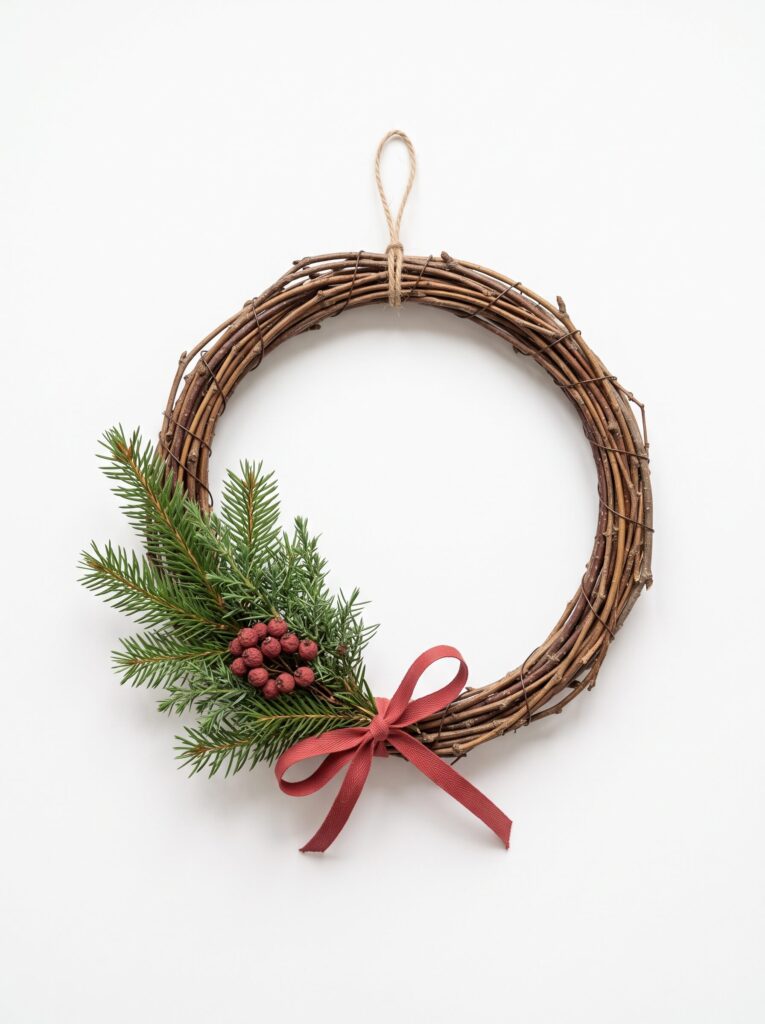
You need: Twig wreath ring, evergreen sprigs, red berries, thin red ribbon, floral wire, twine.
Steps:
- Wire the twine hanger on first, before it’s decorated and awkward to handle.
- Bundle three or four evergreen sprigs and wire the bundle to the lower left curve.
- Add berries in one tight cluster rather than scattered around the ring.
- Tie the ribbon bow below the greenery.
Tip: Keep all the decoration on one third of the ring. Evenly decorating the whole circle is what turns a Nordic wreath into a garden centre wreath.
Trade off: Beginner, 30 minutes. Real evergreen drops within two to three weeks indoors, so make this in mid December, not November.
15. Birch Candle Centerpiece

You need: Wood slice, white pillar candle (or a flameless LED pillar), evergreen sprigs, red berries, heat resistant tile or glass disc.
Steps:
- Set a heat resistant disc on the wood slice and the candle on that. Bare wood under a burning pillar scorches.
- Arrange evergreen around the outer edge of the slice, keeping a four inch clear gap around the flame.
- Tuck berry clusters into the greenery.
- If you want it lit for more than an evening, use the LED.
Trade off: The fastest project here at 15 minutes, and the only one with a real fire risk. Dried evergreen catches quickly. I use LEDs for anything that sits out all month and save real flame for the table on the night.
16. Mini Gift Box Tree
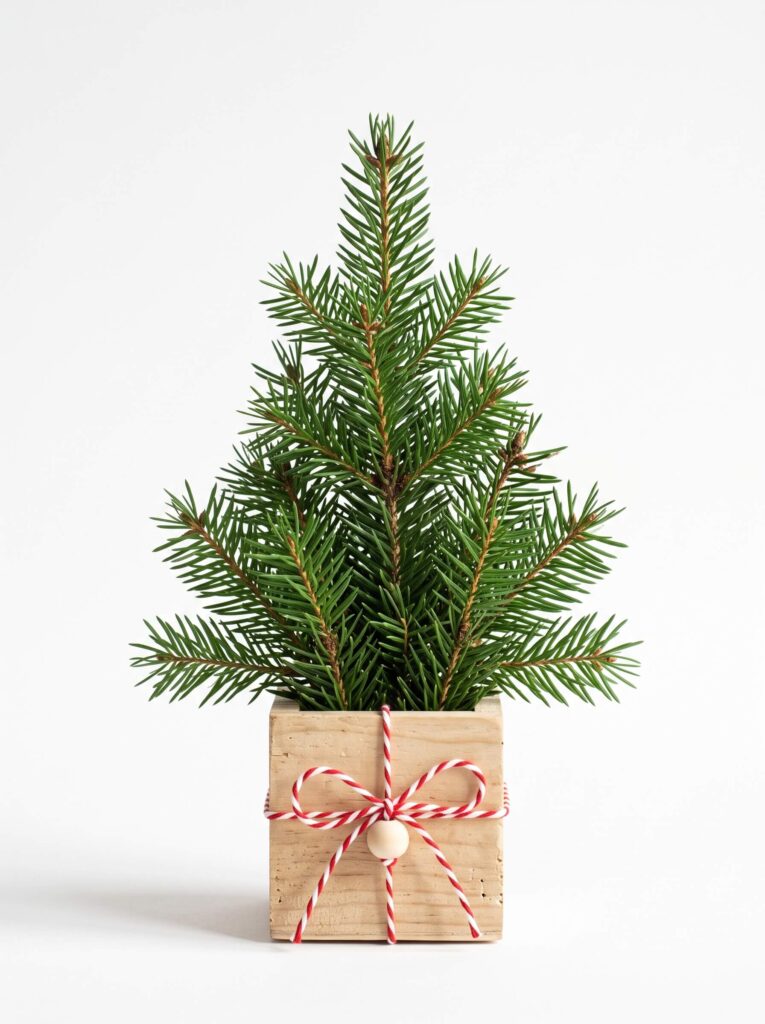
You need: Small wooden box, evergreen sprigs, red and white baker’s twine, wooden bead, glue.
Steps:
- Wrap the twine around the box vertically and tie a bow near the top.
- Push a block of florist foam into the box if you want the sprigs to hold position.
- Insert evergreen upright so it tapers to a point.
- Glue the wooden bead at the twine knot.
Trade off: Beginner, 20 minutes. Without the foam the sprigs splay outward within a day.
Clay, Paper, And Yarn
17. Woven Heart (Julehjerte)

This one has a real name and a real history. The julehjerte is the Danish woven paper Christmas heart, and the oldest known example is attributed to Hans Christian Andersen. They’re traditionally hung on the tree with a sweet inside, because the woven pouch actually opens.
You need: Red and cream cardstock or glossy paper, scissors, a strip of paper for the handle.
Steps:
- Cut two strips, fold each in half, and round off the folded end so each piece is a U shape.
- Cut two or three slits up from the open ends, stopping short of the curve.
- Weave the strips through each other, not over and under as a whole strip but threading each strip alternately through and around each opposing one. This is the step everyone gets wrong on the first try.
- Glue on a handle strip at the top.
Tip: The weave is through and around, not simply over and under. If the two halves aren’t forming a pouch you can open, you’ve done the standard basket weave instead. Undo it and alternate which strip goes inside.
Trade off: Beginner but genuinely confusing the first time. 20 minutes for the first, five minutes each after that. Once the weave clicks you can make a dozen in an evening.
18. Stamped Clay Star Ornament

You need: Das white air dry clay, a small evergreen sprig or a stamp, red cord, green paint, a drinking straw, rolling pin.
Steps:
- Roll the clay to about 6mm on baking parchment. Thinner than that warps as it dries.
- Cut the star, then press a real evergreen sprig firmly into the centre and peel it away.
- Punch the hanging hole with a straw, and make it bigger than you think. Clay shrinks roughly 5% as it dries and the hole closes with it.
- Dry flat between two sheets of parchment with a light book on top. Two to four days.
- Sand the edges smooth, paint the impression green, thread the cord.
Tip: Pressing a real sprig gives a far better impression than a rubber stamp, and the needle detail is what makes people pick it up.
Trade off: Beginner to make, but the drying is the constraint. Start these first if you’re making a batch. Skip the weighted drying and they curl into a dish shape.
19. Red Yarn Cone Tree
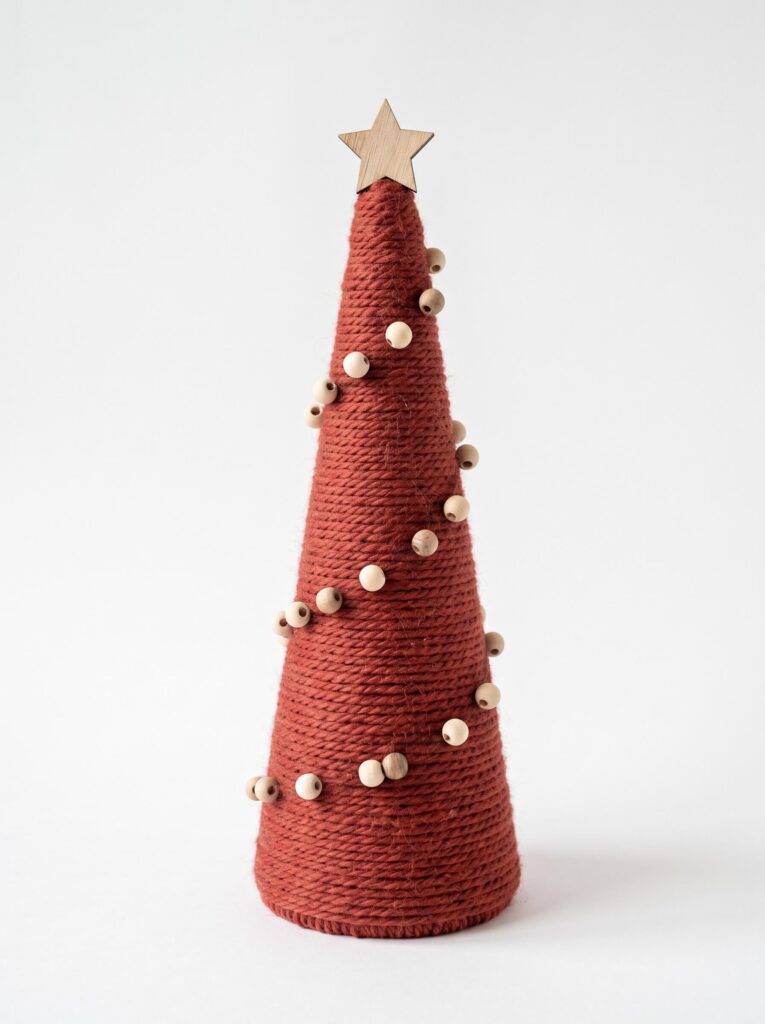
You need: Foam or paper cone, brick red yarn, wooden star, wood beads, tacky glue or hot glue.
Steps:
- Start at the bottom and run a line of glue around the cone, pressing the yarn into it.
- Wrap upward in tight rows, each one snug against the last with no cone showing between.
- Glue the star to the tip, covering the yarn ends.
- Glue beads across the front in a loose spiral.
Tip: Work in short glued sections rather than gluing the whole cone at once. Hot glue skins over in about ten seconds and yarn pressed into set glue lifts off later.
Trade off: Beginner but slow, 45 minutes of wrapping. Tacky glue is more forgiving than hot glue here and worth the longer set time.
Common Mistakes
Buying bright red. Covered at the top, but it’s the number one reason a finished piece doesn’t look how you pictured it.
Using acrylic craft felt for anything you’ll keep. It pills, fuzzes, and won’t hold a blanket stitch.
Overstuffing felt ornaments. The stitches pull apart into visible gaps. It should still give when you squeeze it.
Hot gluing flush wood joints. The plastic bead line shows on minimal wood pieces. Wood glue and clamping pressure.
Using fresh cut wood slices. They split across the middle as they dry, taking your glued antlers with them. Kiln dried, or dry your own for a month.
Skipping the bake on foraged materials. Bugs and mould. Thirty minutes at 200°F.
Painting wood beads one at a time. An hour of your life for a worse finish than a two minute alcohol ink shake.
Decorating a twig wreath evenly all the way round. Cluster it on one third. Asymmetry is the whole Nordic look.
Starting clay ornaments the week of Christmas. They need two to four days minimum and a damp house makes it longer.
FAQs
What colours are used in Scandinavian Christmas decor?
Muted brick or barn red, cream, white, and natural undyed wood, with occasional grey and forest green. The red is traditionally closer to falu rödfärg, the iron oxide paint used on Swedish cottages, rather than a bright saturated Christmas red.
What is the woven paper heart called?
A julehjerte, the Danish woven Christmas heart. It’s traditionally hung on the tree as a small pouch with a sweet inside, and the oldest known example is attributed to Hans Christian Andersen.
What felt should I use for Christmas ornaments?
Wool blend felt rather than 100% acrylic craft felt. Acrylic pills and fuzzes at the cut edge within a season and won’t hold a blanket stitch, while wool blend cuts cleanly and holds up for years.
Is a Scandinavian gnome a nisse or a tomte?
Both, depending on the country. Nisse in Denmark and Norway, tomte in Sweden. Traditionally a household guardian figure rather than a Christmas character, which is why the figures stand on a shelf rather than hanging on a tree.
How long does air dry clay take to dry for ornaments?
Two to four days for a 6mm thick ornament, longer in a humid room. Dry it flat between parchment with a light weight on top or it curls, and make the hanging hole oversized because the clay shrinks about 5%.
Do I need a hot glue gun for these projects?
For the wood, twig, and cone projects, yes, and a high temp gun bonds those materials far better than a low temp one. The felt ornaments are hand stitched and need only a needle and floss.