
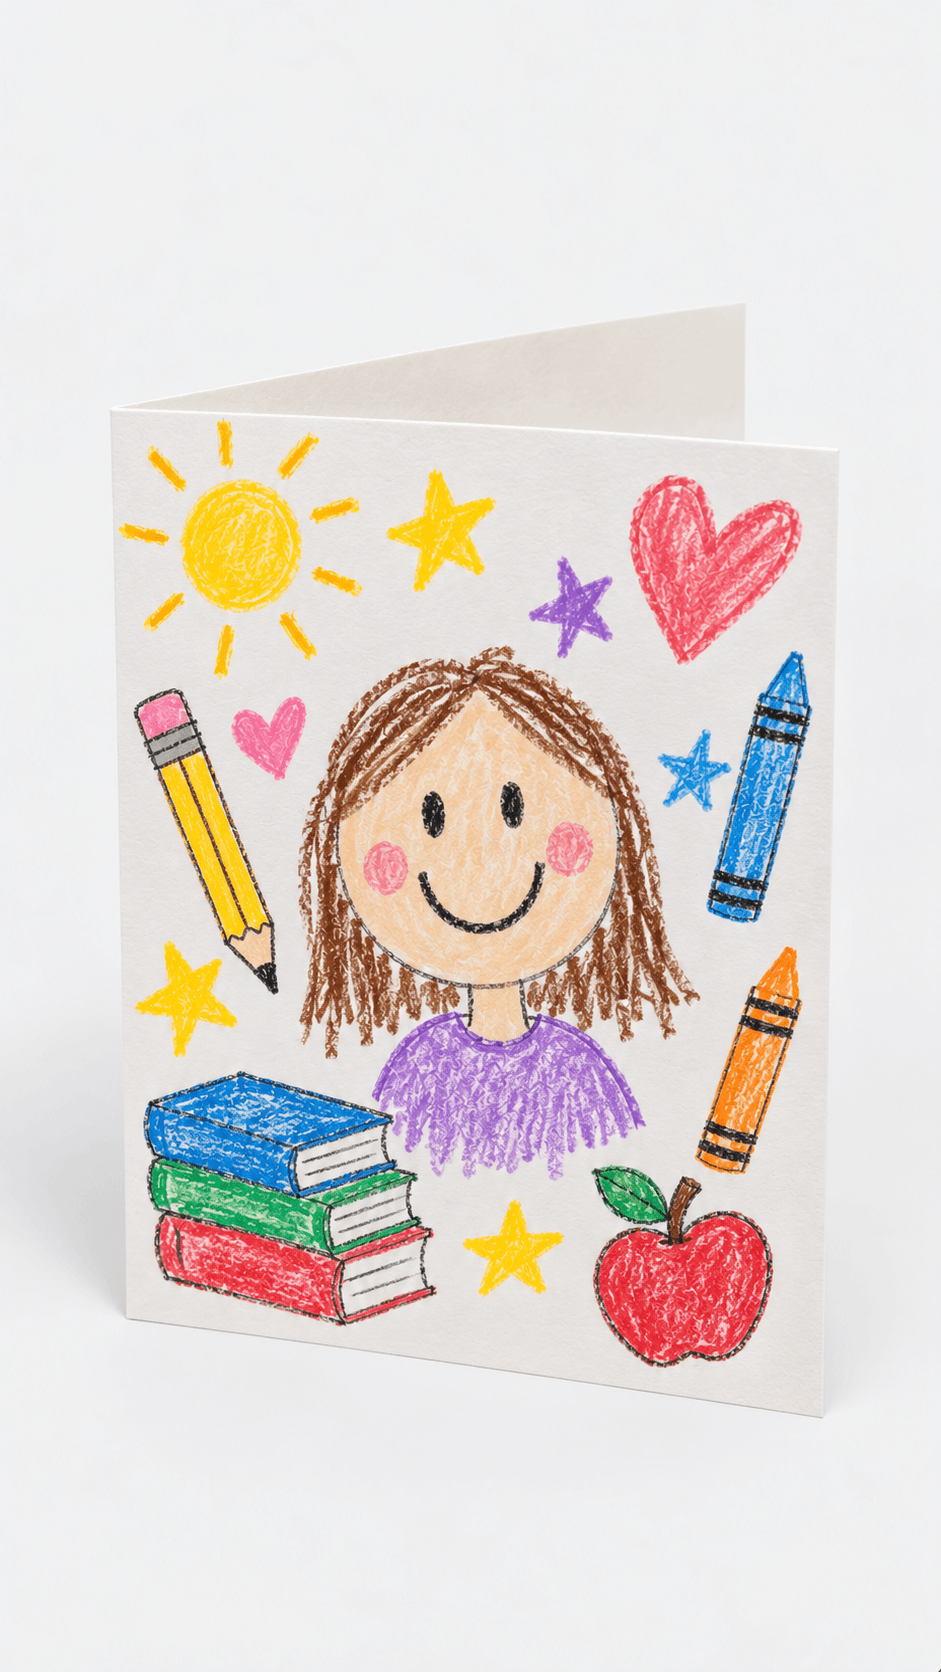
The best first day of school crafts are quick paper projects, like a handprint keepsake, a photo frame, a backpack tag, or a paper crown, that a kid can finish in 15 to 40 minutes with a glue stick and safety scissors. Cut the pieces ahead, use washable paint for anything messy, and write your child’s name, age, and the date on the back so the keepsake is easy to date later. Most of these work for kids from about 3 to 9, with an adult doing the cutting for the youngest.
It’s the night before the first day. Shoes by the door, backpack packed, and your kid, staring at the ceiling, asks whether the teacher will like them. You hand them a glue stick. That’s the honest picture of first day of school crafts. You want something small enough to finish at the kitchen table and kid made enough to be worth keeping. These 20 first day of school crafts are built for that, with paper, a glue stick, and the occasional handful of paint.
Each one has a mess rating, a realistic time, and a note on what to cut ahead. They work for a first day of preschool, kindergarten, or a new school partway through the year, and for teachers prepping a room.
It’s mid October, so most US schools started weeks ago, but first days keep happening: a new school after a move, a January semester, a midyear transfer. Schools in the Southern Hemisphere start in late January or early February. If none of that fits, save this for next August.
How To Choose First Day Of School Crafts By Age, Mess, and Time
Every project here is beginner level for you. What changes is your kid’s age and how much you cut ahead.
- 3 to 4 years (preschool): Handprints, stamping, gluing pre cut shapes, and scribbling. Do the handprint keepsake, the apple print, the layered handprint tree, and the smiling star tag. You do every cut.
- 5 to 6 years (kindergarten and first grade): They can snip with safety scissors, follow two steps, and decide where things go. Most of these back to school crafts work, with you cutting the tricky curves.
- 7 to 9 years (older elementary): They can trace, cut, and layer on their own. Hand over the photo frames, the crayon box pouch, the paper rainbow jar, and the pencil favor, and let them run the whole thing.
Mess ratings mean this. Low is paper and a glue stick, so a wiped table is enough. Medium is liquid glue, tape, and lots of small cut pieces. High is paint, so you want a smock and a washable tablecloth. Time covers cutting, gluing, and decorating, but not drying.
Most first day of school keepsakes are low mess paper crafts, and most first day of school decorations come together in 20 to 30 minutes. If you want easy paper crafts for kids, only two projects here involve paint: the handprint keepsake and the apple print.
Practical note: Paint belongs on the weekend. On the morning of the first day, stick to paper, because a painted sleeve at drop off is a bet you’ll lose.
Safety, Mess, and Classroom Notes Before You Start
Every craft here needs an adult nearby for scissors, paint, and small pieces. Even easy back to school crafts go better with someone at the table.
Practical note: Write your child’s name, age, and the date on the back of every keepsake before you glue the last piece. In a year you won’t remember which first day it was.
- Scissors: Use safety scissors (Fiskars makes a good kids pair) for kids 5 and up. You cut for younger kids and for anything curved or small.
- Small parts: Gem stickers, sequins, and foam bits are choking hazards for kids under three. Skip them, or place the stickers yourself.
- Paint: Use washable paint labeled nontoxic, and wash hands right after. Do the paint crafts on a taped down vinyl tablecloth.
- Real apples: An adult cuts the apple, and a painted apple is not food. Throw it out after.
- Jars: Use a plastic jar for the paper rainbow jar. Glass and a kid on a hard floor is a bad mix.
- Crowns and tags: Tape a crown closed instead of stapling it near a child’s head. Tie tags to the zipper pull with a short loop, not around the strap or the neck.
- Photos: Use a printed copy for frames, not your only original, and keep glue off the face.
- Classroom favors: Check the teacher’s rules before you send anything in. Many classrooms have allergy rules, so keep favors nonfood.
- Posting photos: If you post a first day photo, leave off the school name, the teacher’s name, and anything that shows where your child will be on a given day.
I keep a kid craft kit in one bin so setup takes two minutes. [LINK: How To Set Up A Mess Free Craft Station For Kids]
Supplies, Where To Buy Them, and Free Swaps
Most first day of school crafts need paper, glue, and a few add ons, and it’s all a dollar store, Walmart, Target, or Michaels run. For first day of school decorations, a multicolor pack of cardstock gets you most of what you need. Here are the items that come up most, with a free or cheap swap for each.
| Supply | Where to buy | Free or low cost swap |
| Construction paper and cardstock | Dollar store, Walmart, Michaels | Cereal box cardboard, colored junk mail, and magazine pages |
| Washable paint | Walmart, Target (Crayola Washable Kids Paint) | Plain yogurt stirred with a few drops of food coloring |
| Glue sticks | Walmart, Target (Elmer’s) | Clear tape, for paper projects |
| Craft glue | Walmart, Michaels (Aleene’s Original Tacky Glue) | Double sided tape, for lightweight pieces |
| Foam sheets | Dollar store, Michaels | Thin cardboard or cardstock |
| Safety scissors | Walmart, Target | Your own scissors, with you doing the cutting |
| Gem stickers and sequins | Dollar store, Michaels | Paper dots from a hole punch |
| Twine and ribbon | Dollar store, Michaels | Yarn scraps, or twisted strips of a paper bag |
| Foam or cardboard wreath base | Dollar store, Michaels | A ring cut from a shipping box |
| Crayons and markers | Dollar store, Walmart (Crayola) | Whatever is in the junk drawer |
Practical note: A glue stick holds paper and not much else. Foam, photos, and real crayons need craft glue or double sided tape, so keep a bottle of tacky glue on the table.
I keep one bin of basics for the whole school year.
First Day Of School Crafts At A Glance
The projects below show up in a mixed order, so use this table as your index. It’s sorted from least messy to most messy, and each name jumps to its section.
| Craft | Mess | Time | What you prep | Best ages |
| Rainbow Star Crown for a Happy Back-to-School Look | Low | 20 minutes | Cut the band | 4 to 9 |
| Sunny School Bus Photo Frame with Playful Paper Details | Low | 25 minutes | Cut the window | 5 to 9 |
| Cute Pencil Favor Tag for a Sweet School-Day Surprise | Low | 25 minutes | Cut the foam | 6 to 9 |
| Pastel Crayon Box Pouch with a Rainbow Cloud Front | Low | 30 minutes | Cover the box | 6 to 9 |
| Layered Handprint Tree with Bright Classroom Colors | Low | 25 minutes | Cut the trunk | 3 to 8 |
| Easy Chalkboard Photo Sign for the First Day Picture | Low | 20 minutes | Cut the board | 4 to 9 |
| Smiling Star School Tag with Bright Crayon Charm | Low | 15 minutes | Cut the stars | 4 to 8 |
| Colorful School-Themed Photo Frame with Fun Back-to-School Charm | Low | 30 minutes | Cut the frame | 6 to 9 |
| Rainbow Paper Arc with Fluffy Cloud Ends | Low | 20 minutes | Trace the arcs | 4 to 8 |
| Sweet Folded School Memory Card with Hand-Drawn Charm | Low | 25 minutes | Fold the card | 5 to 9 |
| Cheerful Paper School Faces for a Playful Back-to-School Display | Low | 25 minutes | Cut the pieces | 4 to 8 |
| Pastel Backpack Tag with Sweet School Supplies Charm | Low | 25 minutes | Cut the tag, punch the hole | 5 to 9 |
| Sunny Pencil Paper Craft with a Sweet Back-to-School Look | Low | 20 minutes | Cut the shapes | 4 to 8 |
| Sparkly Apple Photo Frame for a Sweet School-Day Keepsake | Low | 30 minutes | Cut the apple | 5 to 9 |
| Soft Rainbow Balloon Garland for a Happy School-Day Welcome | Medium | 30 minutes | Cut the balloons | 5 to 9 |
| Paper Rainbow Jar for a Sweet Back-to-School Keepsake | Medium | 30 minutes | Cut the strips | 6 to 9 |
| Playful Crayon Wreath for a Sunny School Door | Medium | 40 minutes | Cut the shapes | 5 to 9 |
| Paper Flower Bouquet for a Happy Back-to-School Display | Medium | 25 minutes | Cut the pot | 4 to 9 |
| Bright Handprint School Keepsake with Cheerful Paper Details | High | 25 minutes plus drying | Tape paper down, cut the scene | 2 to 6 |
| Apple Print Back-to-School Art with Bright Crayon Color | High | 20 minutes plus drying | Cut and blot the apple | 3 to 7 |
If you’re planning a few craft nights before the first day, save this page to your back to school board on Pinterest so the table and supply list are easy to find at the store.
The 20 First Day Of School Crafts
Each project lists its mess level, time, and what you prep ahead. Pick the one that matches your kid’s mood and your evening, not the one that looks best online. Back to school crafts work when they get finished, not when they’re perfect.
1. Rainbow Star Crown for a Happy Back-to-School Look
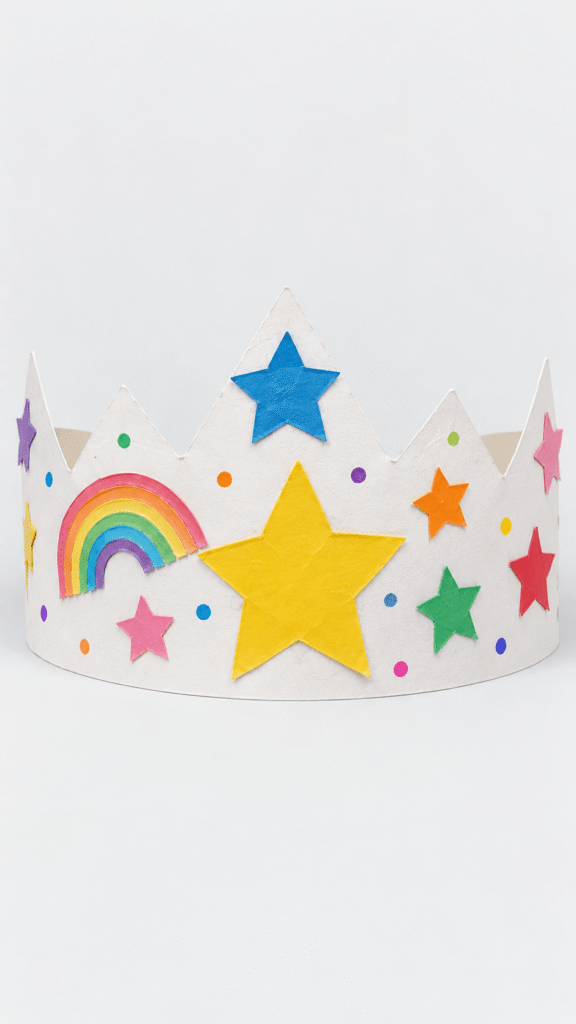
A crown is the one craft here your kid will actually wear to the first day photo. The trade off is fit. A paper crown that’s too tight rips, and one that’s too loose slides over the eyes.
Mess: Low. Time: 20 minutes. You prep: Cut the band. Best for: 4 to 9 years.
What you need
- A white cardstock strip, about 3 by 22 inches (or a ready made paper crown)
- Yellow, blue, and assorted colored stars cut from construction paper
- A rainbow drawing or sticker
- Markers or crayons
- Glue stick or craft glue
- Clear tape
How to make it
- Cut the strip and shape the top into crown points, or use a ready made crown base.
- Wrap the band around your kid’s head, mark where it overlaps, and set it aside. Size it before you decorate.
- Glue the big yellow star to the center front and the blue star at the top.
- Decorate with the rainbow, smaller stars, and dot details.
- Let the glue set, then tape the band closed with clear tape instead of staples.
Tip: Fold the bottom edge of the band up about half an inch. It stops the crown from stretching or tearing at the bottom.
2. Apple Print Back-to-School Art with Bright Crayon Color

A real apple cut in half makes a chunky stamp, and kids love the star shaped core that shows up when you cut it crosswise. The trade off is juice. Apple halves are slippery, and wet paint slides right off them.
Mess: High. Time: 20 minutes, plus about 30 to dry. You prep: Cut and blot the apple. Best for: 3 to 7 years.
What you need
- 1 apple, cut by an adult
- Red, green, and brown washable paint, such as Crayola Washable Kids Paint
- White cardstock (it holds paint better than copy paper)
- A paper plate as a palette
- Paintbrushes or sponge daubers
- Paper towels
How to make it
- Pour the paints onto the paper plate and set out the paper.
- Cut the apple across the middle and blot the cut face on a paper towel for a minute.
- Press the apple into a thin layer of red paint and stamp it onto the paper.
- Paint a brown stem and a green leaf with a brush.
- Add a few green dots or grass marks near the bottom and let the print dry.
Tip: Spread the paint thin on the plate. A thick layer makes a blob with no apple shape in it.
3. Sunny School Bus Photo Frame with Playful Paper Details
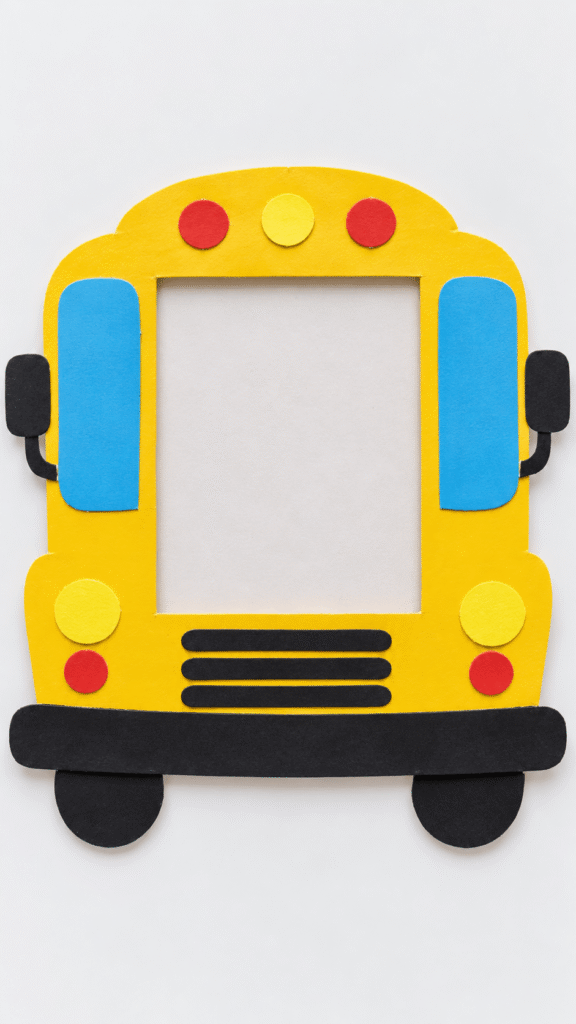
A yellow bus with a photo in the window makes a keepsake that actually lives on a shelf. The tricky part is the window opening, which has to be cut before the photo goes in and has to be smaller than the photo.
Mess: Low. Time: 25 minutes. You prep: Cut the window opening. Best for: 5 to 9 years.
What you need
- Yellow cardstock or foam sheet (or a cereal box covered in yellow paper)
- Blue paper for the windows
- Black paper for the wheels and bumper
- Red and yellow paper circles for lights and accents
- A school photo (print a copy, never use your only original)
- Glue stick or craft glue, and tape
- Scissors
How to make it
- Cut a large bus shape, about 8 by 6 inches, from the yellow base. Cut a window opening in the center, smaller than your photo.
- Cut and glue on the blue window panels, black bumper, wheels, and side mirrors.
- Add the red and yellow circles for headlights and small accents.
- Tape the photo copy behind the window opening so the face sits in the middle.
- Write the name and date on the back.
Tip: Use a loop of tape behind the photo so it’s easy to swap next year.
4. Cute Pencil Favor Tag for a Sweet School-Day Surprise
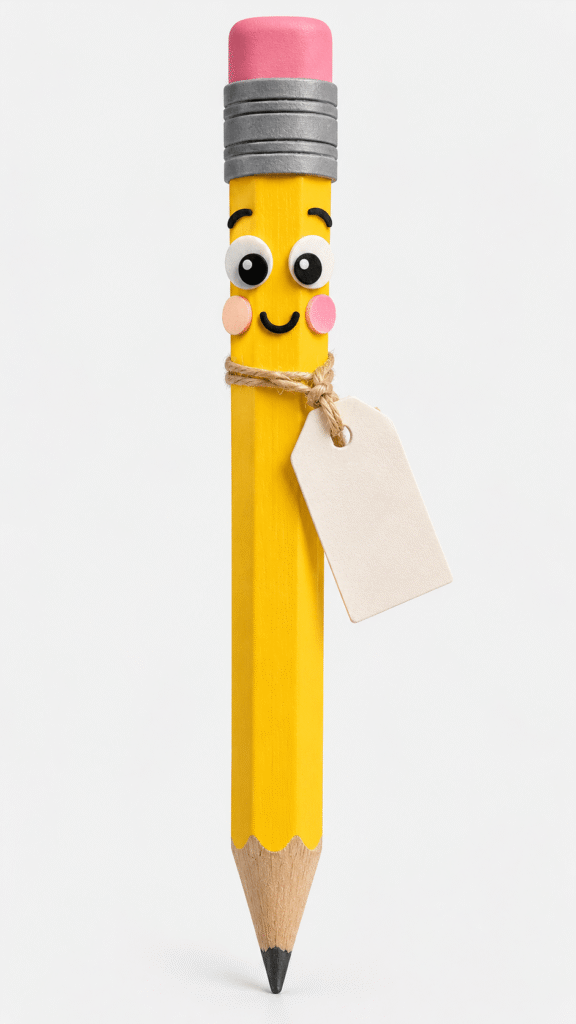
A wooden pencil dressed up with a foam face turns a plain pencil into a favor. It’s the one craft here made for giving, so check the teacher’s rules first, and keep favors nonfood because of allergies.
Mess: Low. Time: 25 minutes. You prep: Cut the foam pieces. Best for: 6 to 9 years.
What you need
- 1 wooden pencil
- 1 piece of yellow foam or cardstock
- 1 piece of pink foam or cardstock
- Gray foam or paper strips
- Black and pink foam or paper scraps
- 1 small tag blank
- A short piece of twine
- Craft glue (a glue stick won’t hold foam to wood)
- Scissors
How to make it
- Wrap the top of the pencil with yellow foam or cardstock to form the pencil body, and glue it in place.
- Add a pink cap, gray bands, and a tan pencil tip with a black point.
- Glue on eyes, cheeks, and a smile to give the pencil a friendly face.
- Punch the tag blank, thread the twine through it, and tie it to the pencil as a name tag or a note.
Tip: Hold the wrapped foam with a clothespin while the glue sets. It saves you from holding it yourself for two minutes.
5. Pastel Crayon Box Pouch with a Rainbow Cloud Front
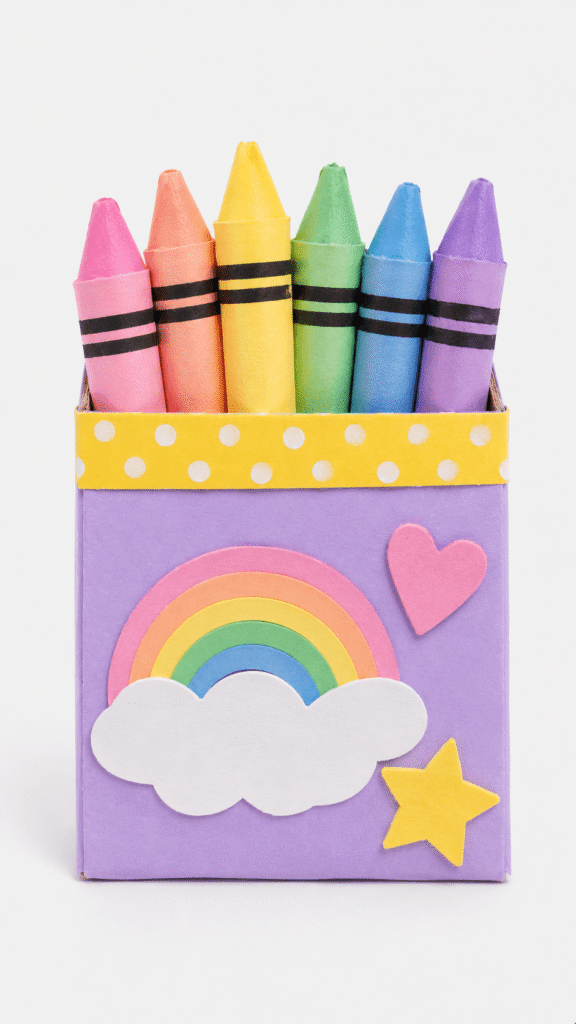
A small box covered in pastel paper with a cloud and rainbow on the front works as a desk organizer or a gift box. The trade off is the covering. Wrapping a box neatly takes more patience than younger kids have, so do the wrapping yourself.
Mess: Low. Time: 30 minutes. You prep: Cover the box. Best for: 6 to 9 years.
What you need
- 1 cardboard box or small gift box
- Pastel purple paper or cardstock
- A yellow patterned paper strip (or a yellow strip your kid doodles dots on)
- Assorted crayon shaped decorations, or real crayons
- White cardstock for the cloud
- Pink, yellow, and rainbow paper cutouts
- Glue stick or craft glue
- Scissors
How to make it
- Cover the box with the pastel paper and trim the edges neatly.
- Glue a yellow patterned strip across the top edge.
- Add the cloud panel, rainbow, heart, and star cutouts to the front.
- Finish by placing crayons or crayon decorations along the top opening.
Tip: Real crayons need tacky glue, not a glue stick. Broken crayons work just as well.
6. Layered Handprint Tree with Bright Classroom Colors

Traced handprints become leaves, so you get a keepsake without paint, and you can compare hand sizes year to year. Trace with the fingers spread and the hand flat on the paper.
Mess: Low. Time: 25 minutes. You prep: Cut the trunk. Best for: 3 to 8 years.
What you need
- Brown construction paper (or a brown paper bag)
- Green, yellow, and orange paper for the handprints
- A pencil
- White glue or a glue stick
- Scissors
- A sheet of poster board for the backing, optional
How to make it
- Cut a simple tree trunk and branches from the brown paper.
- Trace several handprints in different colors, and cut them out. Older kids can cut their own, and you cut for younger ones.
- Arrange the handprints around the top of the tree like full leaves.
- Glue everything in place and let the colors overlap.
Tip: Write your kid’s age and the date on the back of the trunk. Next year you’ll want to see how much the hands grew.
7. Soft Rainbow Balloon Garland for a Happy School-Day Welcome
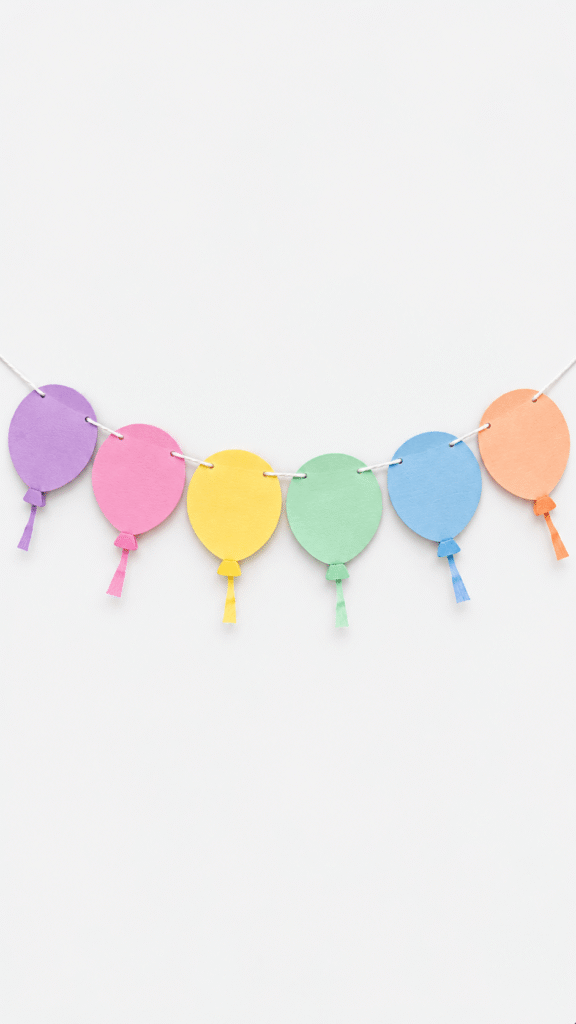
A row of pastel paper balloons makes a soft welcome across a doorway or wall. It’s one of the nicer first day of school decorations, and it’s a lot of small cutting, so it works best as a team project for you and an older kid.
Mess: Medium (lots of small pieces). Time: 30 minutes. You prep: Cut the balloons. Best for: 5 to 9 years.
What you need
- Pastel cardstock in purple, pink, yellow, mint, blue, and peach
- White string or twine, kept short
- Scissors
- Glue or tape
- A hole punch
How to make it
- Cut balloon shapes from each color of cardstock, and trim small matching knots and tails.
- Attach the tails to the bottoms of the balloons with glue or tape.
- Punch a small hole near the top of each balloon and thread them onto the string.
- Space the balloons evenly and hang the garland high across a wall or doorway.
Tip: Keep the string short and out of reach, and never hang it over a bed.
8. Easy Chalkboard Photo Sign for the First Day Picture

Every first day photo gets better with a sign, and a handmade one costs nothing and gets reused each year. Your kid can decorate the border, and you do the lettering. If you post the photo online, leave off the school name and anything that shows where your child will be.
Mess: Low. Time: 20 minutes. You prep: Cut the board. Best for: 4 to 9 years.
What you need
- Black poster board, about 12 by 18 inches (or a cereal box covered in black paper)
- A white chalk marker or white gel pen (or a white crayon, pressed hard)
- A ruler and pencil
- Clear tape, and ribbon or a paper loop for hanging
How to make it
- Cut the board to size and draw a light pencil border an inch from the edge.
- Letter the name, grade, and age in light pencil first, then trace over it with the white pen.
- Add a few favorites, like favorite subject, favorite food, and what they want to be.
- Let your kid doodle stars or swirls around the border.
- Tape a ribbon loop to the back so they can hold or hang it.
Tip: Chalk markers smear on poster board until they dry. Let the sign lie flat for 10 minutes before the photo.
9. Bright Handprint School Keepsake with Cheerful Paper Details

A painted handprint is the classic first day of school keepsake, and the paper school scene gives it a place on the wall. Paint is the catch. Rainbow fingers turn muddy brown fast when the colors touch.
Mess: High. Time: 25 minutes, plus about 30 to dry. You prep: Tape the paper down and cut the scene. Best for: 2 to 6 years.
What you need
- 1 sheet of white cardstock
- Washable paint in pink, blue, green, yellow, orange, and purple
- A paintbrush or sponge
- Colored paper scraps
- Glue stick
- Safety scissors
How to make it
- Tape the cardstock down so it can’t slide.
- Paint the palm with one bright color and press it onto the cardstock.
- Paint each finger a different color, one finger at a time with a brush, in an order that keeps the colors apart.
- Cut simple paper shapes for a school, tree, clouds, and grass, and glue them around the handprint once the paint is dry.
Tip: Press the hand straight down and lift straight up. Sliding smears the fingers into one blob.
10. Paper Rainbow Jar for a Sweet Back-to-School Keepsake

A jar of rolled paper tubes in rainbow colors makes first day of school keepsakes you can display on a shelf. The trade off is the jar. Use plastic instead of glass, since a glass jar and a kid on a hard floor ends badly.
Mess: Medium. Time: 30 minutes. You prep: Cut the strips. Best for: 6 to 9 years.
What you need
- A clear plastic jar with a lid (an empty peanut butter jar)
- Assorted colored paper
- Twine or thin jute cord
- Scissors
- Craft glue or tacky glue
How to make it
- Cut the colored paper into strips about 1 inch by 6 inches and roll them into small tubes around a pencil.
- Glue the rolls against the inside wall of the jar so they sit snugly and show their colors.
- Cut a rainbow, stars, hearts, and leaf shapes from paper and layer them on the front and lid.
- Tie twine around the jar neck in a simple bow.
Tip: Roll each strip around a pencil and glue the tail down before you slide it off. It stays tight and doesn’t unroll.
11. Smiling Star School Tag with Bright Crayon Charm
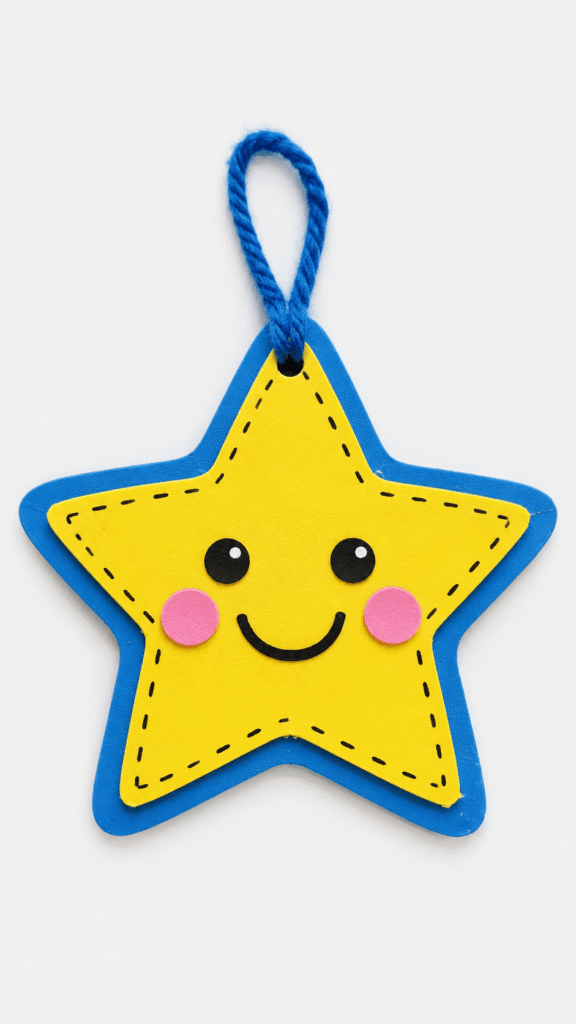
A smiley star tag hangs from a backpack zipper and gives your kid something to show at drop off. Tie it to the zipper pull with a short loop, not around the strap or the neck, so it can’t catch on anything.
Mess: Low. Time: 15 minutes. You prep: Cut the stars. Best for: 4 to 8 years.
What you need
- 1 yellow cardstock star
- 1 blue foam or cardstock star, slightly larger, for the border
- A short loop of blue yarn, about 4 inches
- A black marker
- Pink paper circles or blush stickers
- Glue stick or craft glue
How to make it
- Cut a large star from yellow cardstock and glue it onto the slightly larger blue star.
- Glue the yarn loop to the back at the top so the tag can hang.
- Draw eyes and a curved smile, and add pink cheeks.
- Add dotted accent lines around the star for a stitched look.
Tip: Glue two layers of cardstock together for the back. A single layer bends and creases in a backpack.
12. Colorful School-Themed Photo Frame with Fun Back-to-School Charm

A navy frame covered in tiny school supply cutouts makes one of the easiest first day of school keepsakes for a desk or wall. It’s the most detail heavy of the frames, so give younger kids the gluing and keep the cutting for yourself.
Mess: Low. Time: 30 minutes. You prep: Cut the frame. Best for: 6 to 9 years.
What you need
- Dark blue cardstock or foam board for the frame base
- Bright paper or foam shapes for decorations
- Glue stick or craft glue
- Scissors and a pencil
- Small paper cutouts of school supplies: an apple, pencil, scissors, books, globe, and backpack
- A printed copy of the photo, and tape
How to make it
- Cut a large frame shape from the dark blue cardstock or foam board.
- Trim out a center opening and make the edges neat.
- Cut the school supply decorations in bright colors.
- Glue the decorations around the frame and let everything dry.
- Tape the photo copy behind the opening and write the date on the back.
Tip: Draw each small cutout in pencil on the back of the paper first, then cut. It keeps the shapes from going lopsided.
13. Playful Crayon Wreath for a Sunny School Door

A wreath with a sun, a cloud, an apple, and crayon shapes is one of the more fun first day of school decorations for a classroom door or a homework nook. A foam ring makes it easy, but paper doesn’t stick to foam well, so use craft glue.
Mess: Medium. Time: 40 minutes. You prep: Cut the shapes. Best for: 5 to 9 years.
What you need
- 1 foam or cardboard wreath base (a ring cut from a shipping box works)
- Cardstock in blue, white, yellow, red, pink, purple, and green
- 1 yellow paper circle and small paper strips for the sun
- 1 white paper cloud
- 1 red paper apple with a green leaf
- Assorted colored paper crayon shapes
- Twine or yarn for hanging
- Glue stick or craft glue, and scissors
How to make it
- Cut a ring about 10 inches across with a 5 inch hole from cardboard, and cover it in blue cardstock. If you have a foam ring, use that.
- Cut out the sun, cloud, apple, hearts, and crayon shapes.
- Glue the decorations around the wreath, leaving the center open and balancing the colors.
- Attach a twine loop at the top and let everything dry before hanging it up.
Tip: Press the finished wreath under a heavy book for 10 minutes so the paper lies flat.
14. Rainbow Paper Arc with Fluffy Cloud Ends
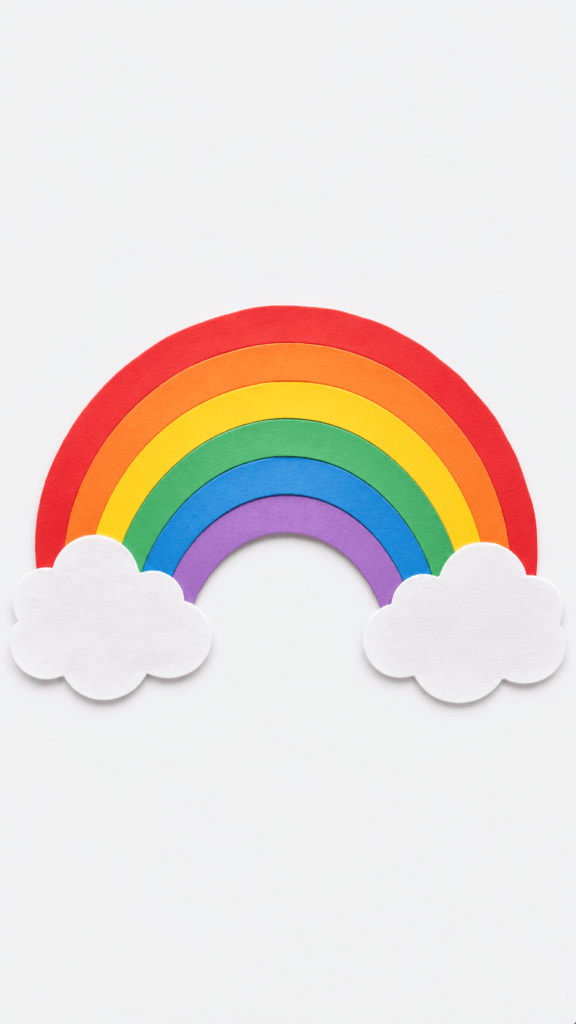
A paper rainbow is one of the easiest paper crafts for kids, and the curve is where first tries go wrong, since freehand arcs come out uneven. Trace a plate and a bowl instead.
Mess: Low. Time: 20 minutes. You prep: Trace the arcs. Best for: 4 to 8 years.
What you need
- Construction paper in red, orange, yellow, green, blue, and purple
- White cardstock or paper for the clouds
- A dinner plate, a salad plate, and a bowl to trace (or a compass)
- Scissors
- Glue stick or craft glue
How to make it
- Trace a half circle on each color, with the red the largest and the purple the smallest, using plates and bowls in graduated sizes. Cut them out.
- Stack the arcs from largest to smallest with the bottom edges lined up, to form the arch.
- Glue the rainbow layers together.
- Add a fluffy cloud at each end and let everything dry flat before hanging.
Tip: Glue the layers while they’re flat on the table. Gluing on the wall makes them shift.
15. Sweet Folded School Memory Card with Hand-Drawn Charm

This is a drawing project in disguise: a folded card with a self portrait on the front and school doodles inside. It’s the best pick here for a kid who hates glue, but it only works for a kid who likes to draw.
Mess: Low. Time: 25 minutes. You prep: Fold the card. Best for: 5 to 9 years.
What you need
- 1 sheet of white cardstock, folded in half
- Colored pencils or crayons
- A pencil for sketching
- A fine black marker for outlines
- A glue stick, optional
How to make it
- Fold the paper into a small card.
- Sketch a simple child face and back to school details on the front panel in pencil.
- Color the drawings in soft, cheerful shades.
- Add little school themed doodles inside each section, then go over the lines with a black marker.
Tip: Pencil first, then marker. Marker mistakes can’t be fixed and kids get upset about them.
16. Cheerful Paper School Faces for a Playful Back-to-School Display

Each paper face shows a different mood, which is a good way to talk about first day feelings: excited, nervous, silly. The trade off is the number of pieces, so give each kid one face and keep the pieces in a cup.
Mess: Low. Time: 25 minutes. You prep: Cut the pieces. Best for: 4 to 8 years.
What you need
- Tan or light peach cardstock, plus other skin tone papers if you have them
- Scraps of brown, black, pink, white, and red paper
- Scissors
- Glue stick
- A black marker or pen
How to make it
- Cut a large circle for each face and smaller pieces for hair, ears, cheeks, eyes, and mouths.
- Glue the hair and ears on first so the face starts to take shape.
- Add the eyes, rosy cheeks, and a smiling or surprised mouth.
- Draw extra features with a black marker and let the faces dry before displaying them.
Tip: Put out several shades of tan, brown, peach, and cream paper so each kid can make a face that looks like them.
17. Pastel Backpack Tag with Sweet School Supplies Charm
A lavender tag with a teal backpack and a yellow pocket is a tiny scene that clips onto a real backpack. The hole punch is the tricky part for kids, so do it yourself and reinforce the hole.
Mess: Low. Time: 25 minutes. You prep: Cut the tag and punch the hole. Best for: 5 to 9 years.
What you need
- 1 lavender cardstock tag base
- 1 teal backpack cutout (or a layered paper shape)
- 1 yellow pocket cutout
- Foam stickers or paper accents such as stars, hearts, an apple, and a pencil
- A clear ribbon or loop for hanging
- Glue or double sided foam tape
- Hole reinforcers, or a piece of clear tape
- Scissors and a hole punch
How to make it
- Cut a rounded tag base from lavender cardstock and punch a hole near the top. Put a hole reinforcer or a bit of clear tape over the hole.
- Layer on the teal backpack shape and the yellow pocket with glue or foam tape.
- Add the school supply decorations, then stick on stars and hearts.
- Thread the ribbon through the hole and tie it to the zipper pull.
Tip: Cover the front of the tag with a layer of clear tape. It keeps the paper from tearing in a backpack.
18. Paper Flower Bouquet for a Happy Back-to-School Display

A green paper pot full of flowers works as a thank you for a teacher or a door decoration, and it’s one of the quicker easy paper crafts for kids on this list. The trade off is the number of petals, so give younger kids the yellow centers and let older kids cut.
Mess: Medium (lots of small pieces). Time: 25 minutes. You prep: Cut the pot. Best for: 4 to 9 years.
What you need
- 1 green sheet of cardstock
- Colored construction paper
- Yellow paper for the flower centers
- Glue stick
- Scissors
How to make it
- Cut one flower pot shape from green cardstock and trim long leaf shapes from the same paper.
- Cut several petal pieces from different colors and round the ends.
- Cut small yellow circles for the centers and glue one onto each flower.
- Arrange the flowers and stems over the pot, then glue everything in place and let it dry.
Tip: Round the petals by cutting off the corners. It’s easier than trying to cut a curve.
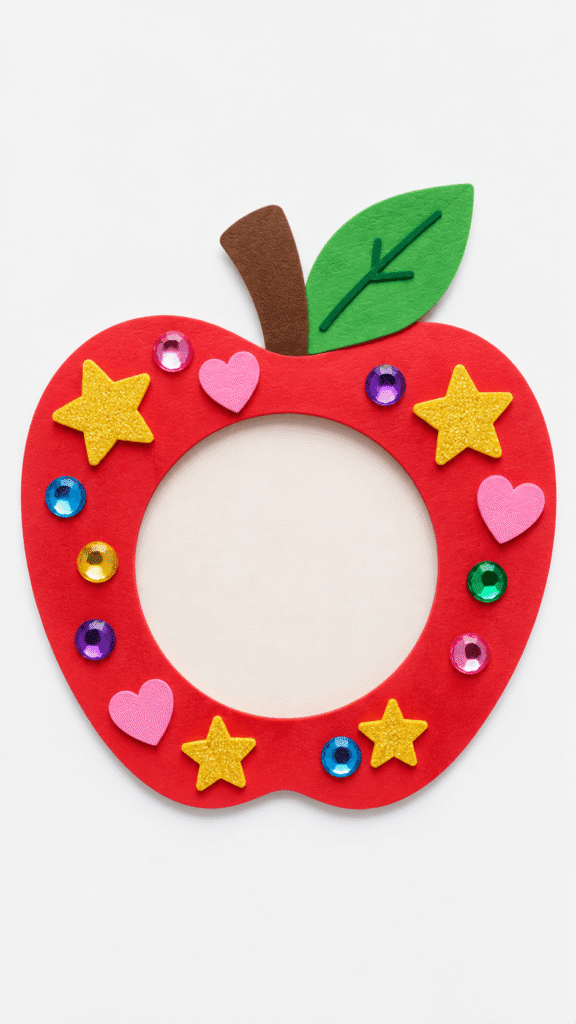
19. Sparkly Apple Photo Frame for a Sweet School-Day Keepsake

A big red apple frame with gem stickers is the one to make when your kid wants sparkle. Loose sequins are small parts, so use gem stickers and skip sequins for kids who still mouth things.
Mess: Low. Time: 30 minutes. You prep: Cut the apple and the opening. Best for: 5 to 9 years.
What you need
- 1 red foam sheet or cardstock
- 1 brown foam or paper stem
- 1 green paper leaf
- A printed copy of a school photo
- Colorful foam or paper shapes
- Gem stickers (or sequins, for older kids)
- Glue, scissors, and tape
How to make it
- Fold the red sheet in half, cut half an apple shape, and open it up so both sides match.
- Cut a round opening in the center.
- Add the brown stem and green leaf to the top.
- Glue on the foam shapes and stick on the gems around the frame.
- Tape the photo copy behind the opening so the face shows through, and write the date on the back.
Tip: Fold the paper in half before you cut. It’s the easiest way to get a symmetrical apple.
20. Sunny Pencil Paper Craft with a Sweet Back-to-School Look
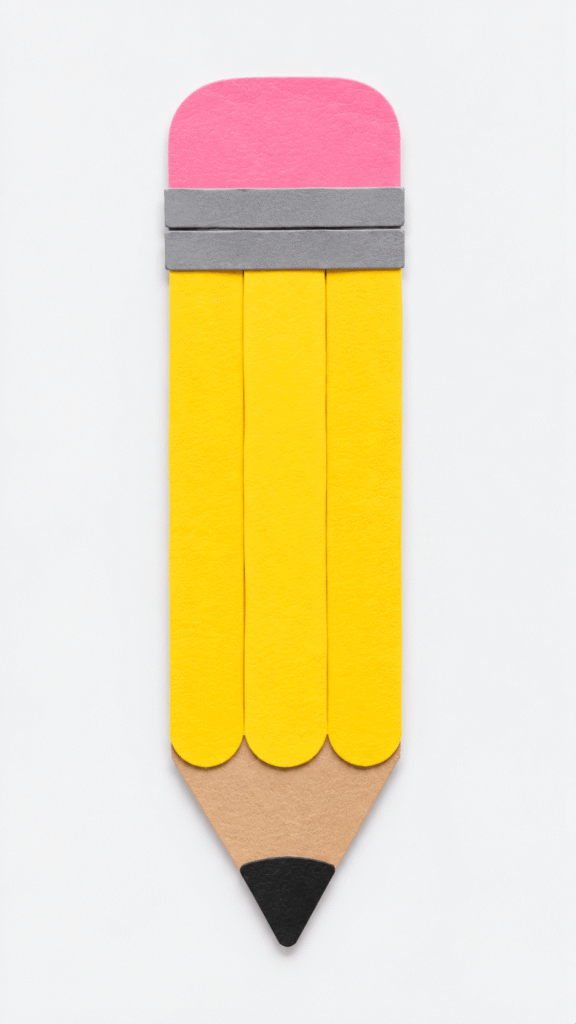
An oversized pencil makes a quick welcome piece for a door, a cubby, or a backpack note. It’s mostly strips, so it goes fast. Cut the body first and add the stripes after.
Mess: Low. Time: 20 minutes. You prep: Cut the shapes. Best for: 4 to 8 years.
What you need
- Tan cardstock or construction paper
- Yellow, pink, gray, and black paper
- Glue stick or school glue
- Scissors
How to make it
- Cut a large pencil shape from tan cardstock with a pointed end.
- Add three long yellow strips down the body and round the bottoms for a neat pencil look.
- Layer gray paper bands across the top and attach a pink rounded eraser above them.
- Finish with a small black paper tip at the point and press everything flat.
Tip: Write your kid’s name down the middle strip. It doubles as a locker or cubby tag.
Common Mistakes First Timers Make
Most first timers hit the same few snags with back to school crafts. Here are the ones that come up most.
- Cutting while your kid waits. Cut everything before they sit down. Once you start cutting at the table, the attention is gone.
- Starting a paint craft on the morning of the first day. Paint belongs on the weekend. A painted sleeve at drop off is not worth it.
- Letting the rainbow fingers touch. Paint one finger at a time, and let the colors stay apart, or they turn brown.
- Gluing in the only original photo. Print a copy for every frame, so a glue smear doesn’t ruin the one you have.
- Forgetting the name and date. Write them on the back before you glue the last piece.
- Using a glue stick on foam, photos, or crayons. It holds paper only. Use tacky glue or double sided tape.
- Using a glass jar. Use plastic for the paper rainbow jar.
- Stapling the crown. Tape it closed, and size it on your kid’s head before you decorate.
- Tying a tag around the strap or neck. Tie it to the zipper pull with a short loop.
- Posting photos with the school name. Leave off the school and teacher names and anything that shows where your child will be.
FAQs
What are good first day of school crafts for preschoolers?
Handprint art, apple prints, the layered handprint tree, and the smiling star tag work well for preschoolers. You do the cutting, and they stamp, press, and glue. Skip gems and sequins for kids under three.
What are some first day of school keepsakes I can make with my child?
A painted handprint, a photo frame, a paper rainbow jar, or a folded memory card all make good first day of school keepsakes. Write the name, age, and date on the back so you can tell them apart years later.
How long should a first day of school craft take?
Plan on 15 to 40 minutes, depending on the craft. Most kids check out sooner than you expect, so cut ahead of time and finish the last steps yourself.
What are easy paper crafts for kids who don’t like paint?
The pencil craft, the rainbow arc, the paper faces, and the handprint tree need only paper and a glue stick. These easy paper crafts for kids work for the handprint tree too, since you trace the hand instead of painting it.
Can I use these back to school crafts in a classroom?
Yes. Cut the pieces ahead and put each kit in a zip bag, which cuts setup to a few minutes, and use the finished pieces as first day of school decorations. Check your school’s rules on favors and allergies, and keep favors nonfood.
Is it okay to post first day of school photos online?
That’s your call, but leave off the school name, the teacher’s name, and anything that shows where your child will be on a given day. Check your school’s photo policy too, especially if other kids are in the picture.
Read Next
If your kid liked the handprints, there’s a whole batch of messy ideas waiting for a rainy weekend. Easy Handprint Art Ideas For Kids.
If you want a quick thank you for the teacher, the same supplies stretch to more easy paper crafts for kids.
