
Clay halloween crafts are small decorations like ghosts, pumpkins, bats, and cats shaped from air dry or polymer clay. Most beginner projects take 20 to 45 minutes of shaping, then air dry clay needs 24 to 72 hours to harden, depending on thickness. Polymer clay projects, like the witch hat and cauldron below, are baked in a home oven following the package directions.
It’s 4 pm on a Sunday, the pumpkins are already carved, and someone asks what else you can make before dinner. That’s when a block of white clay earns its spot in the craft drawer.
Clay halloween crafts work for exactly this kind of afternoon. You get deep orange, inky black, and ghostly white, and a few simple shapes turn into shelf decorations, magnets, garlands, and gifts. These easy clay crafts need no kiln and very few tools. I’ve included skill ratings, honest time estimates, and the mistakes that ruined my first batches, so yours turn out better. If you’ve been hunting for halloween clay ideas that don’t need special equipment, this list is built for you.
Before You Start: Supplies And Budget Swaps
You can make every project here with a small pile of basics. Most of it costs less than a takeout lunch.
| What you need | Where to find it | Free or low cost swap |
|---|---|---|
| White air dry clay (Crayola Air Dry Clay, DAS, or similar) | Craft stores, big box stores, online | Homemade salt dough, baked low and slow (keep it away from pets, since it’s very salty) |
| Colored clay (orange, black, green, purple, pink) | Same as above | Knead acrylic paint into white clay, or paint the pieces after drying |
| Black clay | Same as above | Black acrylic paint and a toothpick for dots and lines |
| Polymer clay (Sculpey or Fimo) | Craft stores, online | Air dry clay painted with acrylics |
| Clay tools | Craft stores | Toothpick, bamboo skewer, butter knife, or an old pen cap |
| Rolling pin | Craft stores | A smooth glass jar or a marker barrel |
| Craft glue (Aleene’s Tacky Glue works well) | Craft stores | School glue for light pieces |
| Sealer (Mod Podge Gloss or Matte) | Craft stores | Skip it, or use clear nail polish on tiny details |
| Twine, magnets, keychain rings | Craft stores, dollar stores | Cotton string, thread, or a paper clip bent into a loop |
Practical note: Make your white pieces first, then wipe your hands and work surface before touching black clay. Black transfers to white faster than you’d think, and it leaves gray smears you can’t fully remove.
Saving this page now means you’ll have the supply list on your phone when you’re standing in the craft aisle. Pin it to your Halloween board so it’s easy to find again.
Skill Level, Ages, and Time
Air dry clay is forgiving, which is why it suits easy clay crafts for mixed ages.
- Ages 4 to 6: Pick the ghost, the pumpkin magnet, or the eyeball. Let them shape and press while you handle cutting and gluing.
- Ages 7 to 10: Most projects work with light help. The cat, monster, and mummy are good stretch goals.
- Teens and adults: The potion bottle, Frankenstein plaque, and polymer clay pieces reward patience and small tools.
Hands on time runs 20 to 60 minutes per piece. Drying is the long part. Small pieces usually need a day or two, and thick ones can need three or more.
Mess, Safety, and Supervision
Air dry clay is a low to medium mess. It gets on tables and under fingernails but wipes up with a damp cloth. Check the label for an AP seal, which means it’s been reviewed for toxicity.
A few things need real attention:
- Small parts: Beads, googly eyes, and small magnets are choking and swallowing hazards for kids under 3 and anyone who mouths things.
- Polymer clay: An adult should handle the oven. Bake only at the temperature on the package, in a well ventilated kitchen, and don’t use baking tools for food afterward.
- Candles: Air dry clay is not flame safe. Use LED tealights only.
- Glue and sealer: Strong glues like E6000 and spray sealers belong in an adult’s hands with a window open.
Easy Clay Halloween Crafts for Beginners and Little Hands
These six are the quickest wins. If you’re new to clay halloween crafts, start here.
1. Pumpkin Magnet Clay Charm
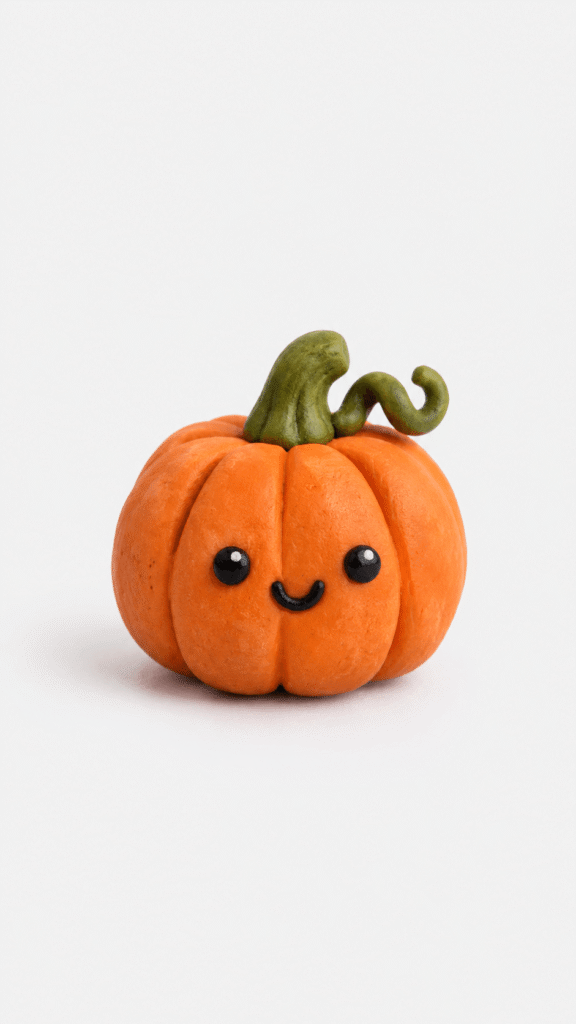
Skill: Beginner | Hands on time: 20 minutes | Clay: Air dry
These are tiny, about an inch across, so you can make a whole batch in one sitting. The trade off is that small pieces dry fast but break easily if you press hard on the stems.
What you need
- Orange and green air dry clay
- Black clay or craft paint (paint dots work fine)
- Small flat magnets
- Clay tool or toothpick
How to make it
- Roll small orange balls and press shallow ridges down the front with a toothpick.
- Add a short green stem and a curled vine on top.
- Press in tiny black eyes and a smiling mouth.
- Let the pumpkin dry completely, then glue the magnet to the back.
Tip: Glue the magnet on after drying, not before. Wet clay slides it out of place.
2. Clay Ghost Friend

Skill: Beginner | Hands on time: 20 minutes | Clay: Air dry
This is the one I hand to anyone who says they aren’t crafty. White clay shows every fingerprint and speck of dust, so wipe your table first.
What you need
- White air dry clay
- Black clay or black acrylic paint
- Rolling pin or your hands
- Craft knife or small shaping tool (a toothpick works, and is safer for kids)
How to make it
- Shape the white clay into a rounded mound about the size of a golf ball and pull the bottom edges into soft folds.
- Flatten two tiny black ovals for eyes and a small curved piece for the smile.
- Press the face onto the front and smooth the edges lightly.
- Let it dry for 24 to 48 hours before displaying it on a shelf, tray, or windowsill.
Tip: A barely damp fingertip smooths fingerprints away. Too much water turns the surface gummy.
3. Cute Black Clay Spider

Skill: Beginner | Hands on time: 25 minutes | Clay: Air dry
The body is easy. The legs are where first timers struggle, because thin legs snap at the joints.
What you need
- Black air dry clay
- Small black beads or tiny clay balls for eyes
- Purple clay for cheeks
- Budget swap for legs: pipe cleaners cut to length
How to make it
- Roll one large ball for the body and a smaller one for the head.
- Roll eight legs about as thick as a pencil, bend them gently, and press them into the body.
- Attach the head, eyes, and tiny cheek dots.
- Let the spider dry completely before displaying it.
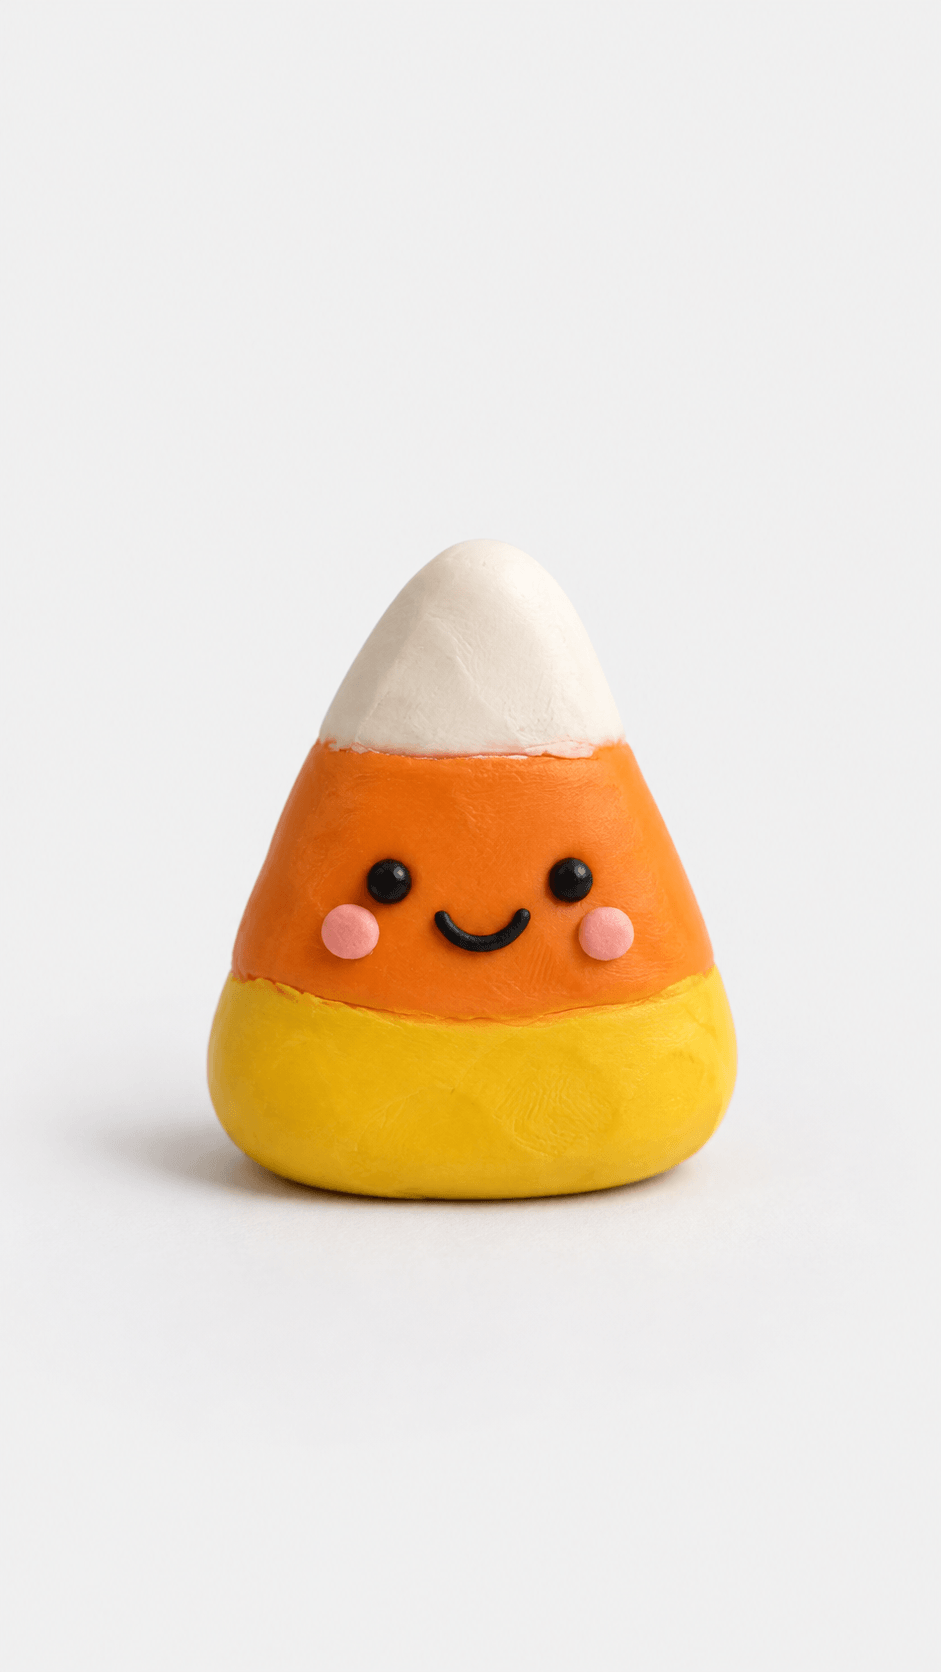
4. Candy Corn Cutie

Skill: Beginner | Hands on time: 25 minutes | Clay: Air dry
Three colors means three chances to blend them by accident. Keep the layers separate and smooth only the seams.
What you need
- Yellow, orange, and white air dry clay
- Small black and pink clay pieces for the face
How to make it
- Shape the yellow clay into a rounded base.
- Add the orange layer above it and smooth the seam with your thumb.
- Press a white top piece into place.
- Add tiny eyes, pink cheeks, and a smiling mouth.
Tip: Make each layer slightly flat, then stack them. A candy corn silhouette is easier to get from stacked slabs than from one lump.
5. Mummy Clay Cutie
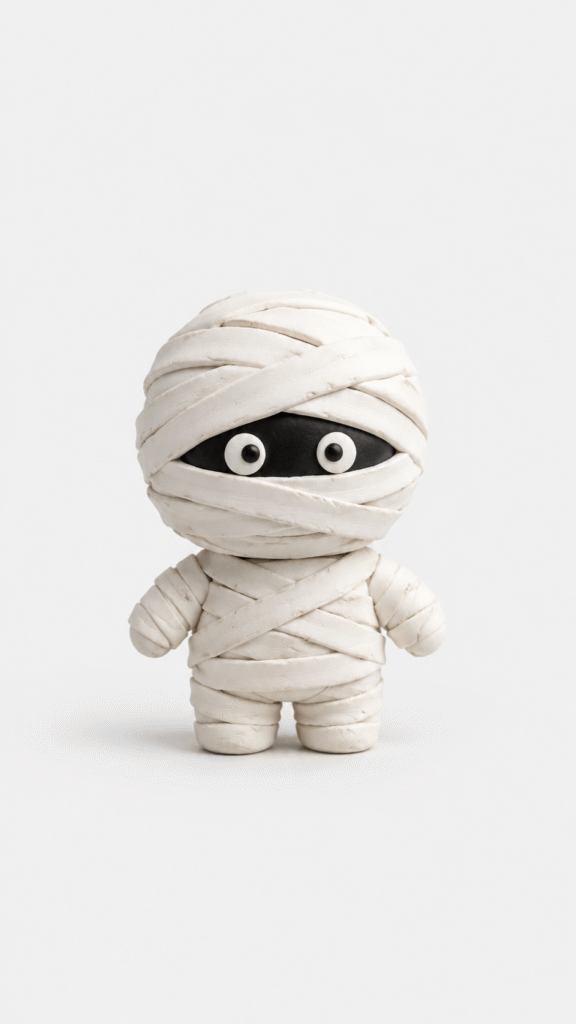
Skill: Beginner to intermediate | Hands on time: 30 minutes | Clay: Air dry
The bandage strips are the fussy part. Uneven strips look better than perfect ones, so don’t fight it.
What you need
- White air dry clay
- Black clay for the eyes
- Craft knife or clay tool
- Small rolling pin
How to make it
- Shape the body, head, arms, and legs from white clay.
- Roll the clay out thin, cut long strips, and wrap them around the figure at slight angles.
- Leave a gap for the face, add a black face area, and press in two round eyes.
- Smooth the pieces gently and let the clay dry completely.
6. Minimal Skull Clay Decor

Skill: Beginner | Hands on time: 30 minutes | Clay: Air dry
This one looks modern on a shelf. For clean black lines, paint the details after drying rather than using black clay, which smudges on white.
What you need
- White air dry clay
- Black acrylic paint or black clay
- Small sculpting tool
How to make it
- Shape the clay into a rounded skull and flatten the base so it stands.
- Press in two large eye sockets and a tiny nose shape.
- Roll thin black clay pieces or paint the eyes, nose, and stitched mouth.
- Let the skull dry completely before setting it on a shelf or table.
Projects With More Detail
These take a little longer, and they’re where halloween clay ideas get more personality.
7. Sweet Black Clay Cat

Skill: Intermediate | Hands on time: 45 minutes | Clay: Air dry
A cat has a lot of separate parts, and the ears are the first thing to fall off. Press them on firmly, and score the spots where they join.
What you need
- Black air dry clay
- Pink and white clay
- Small round beads or googly eyes
- Clay tools or toothpick
How to make it
- Shape a rounded body, a separate head, ears, legs, and a tail from the black clay.
- Add pink inner ears and press the pieces onto the head.
- Attach the eyes, nose, smile, and whiskers with small clay details.
- Smooth the seams and let the cat dry fully before displaying.
8. Purple Monster Clay Buddy

Skill: Intermediate | Hands on time: 45 minutes | Clay: Air dry
Lots of tiny pieces, so it’s a good project for a longer, calmer session. The payoff is that no two monsters ever look the same.
What you need
- Purple air dry clay
- Orange clay for horns and tongue
- Black and white clay for eyes and hair
- Small green clay bits for spots and claws
How to make it
- Shape the purple clay into a rounded body and add four small ball feet.
- Press on short arms, then add green spots across the body and hands.
- Build oversized eyes, a wide mouth, white teeth, and an orange tongue.
- Finish with black hair tufts and curved orange horns.
9. Ghoulish Eyeball Orb
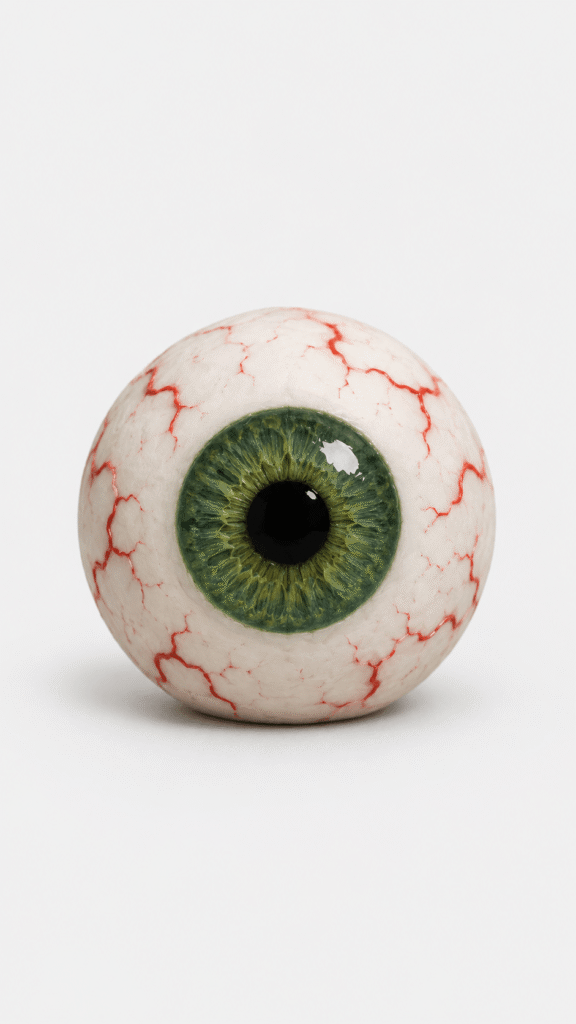
Skill: Beginner | Hands on time: 25 minutes | Clay: Air dry
Simple shapes, big effect. The flattened side keeps it from rolling off the table.
What you need
- White, green, and black air dry clay
- Thin red clay strips
- Clay tool or toothpick
How to make it
- Roll white clay into a smooth ball and flatten one side for stability.
- Press a green circle onto the front for the iris.
- Add a black pupil in the center and a tiny white highlight.
- Attach thin red lines around the ball and press in vein marks with a tool.
Tip: A coat of Mod Podge Gloss on the iris makes it look wet. It’s the one spot where shine really pays off.
10. Playful Bat Clay Friend

Skill: Intermediate | Hands on time: 40 minutes | Clay: Air dry
Thin wings curl as they dry. Support them while they set.
What you need
- Black air dry clay
- Small amounts of pink and white clay
- Craft glue
- Clay tools or a toothpick
How to make it
- Shape a round head, a small body, and two pointed ears from black clay.
- Flatten and curve two wing pieces, then press soft fold lines along the edges.
- Add pink inner ears, white eyes, and a tiny smile.
- Glue the wings to the sides, prop them on a crumpled paper towel to hold the curve, and let the bat dry fully.
11. Frankenstein Clay Wall Plaque
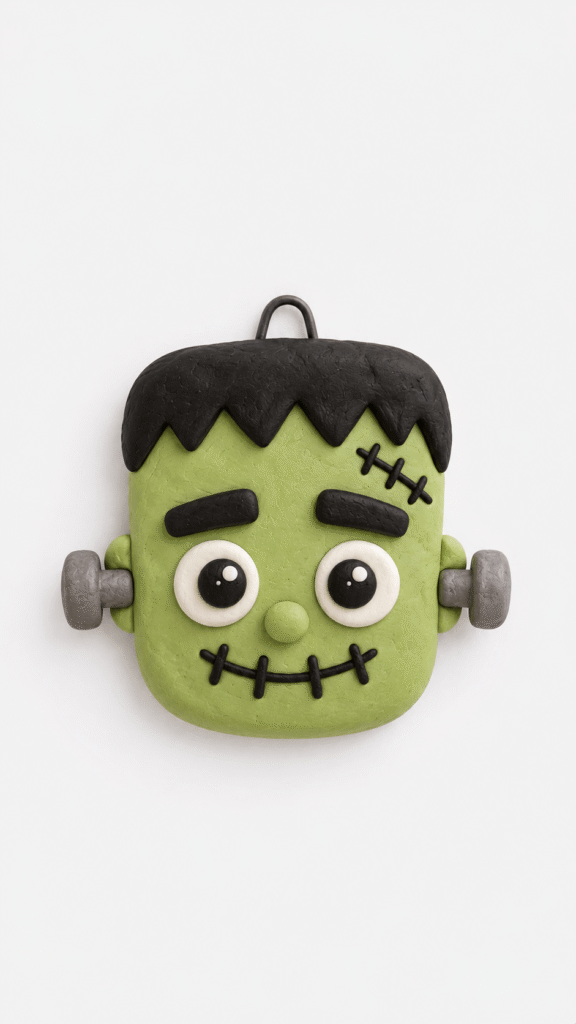
Skill: Intermediate | Hands on time: 45 minutes | Clay: Air dry
Plaques warp if they’re too thin. Aim for about a quarter inch thick.
What you need
- Green, black, gray, and white air dry clay
- Small round clay tool or toothpick
- A small paper clip or loop for hanging
How to make it
- Shape the green clay into a rounded rectangle for the face.
- Add black clay hair, brows, mouth, and stitched details.
- Press on white and black circles for the eyes and a small nose.
- Finish with gray side bolts, press a paper clip loop into the back, and let the plaque dry fully.
12. Cheerful Jack-O’-Lantern Pumpkin
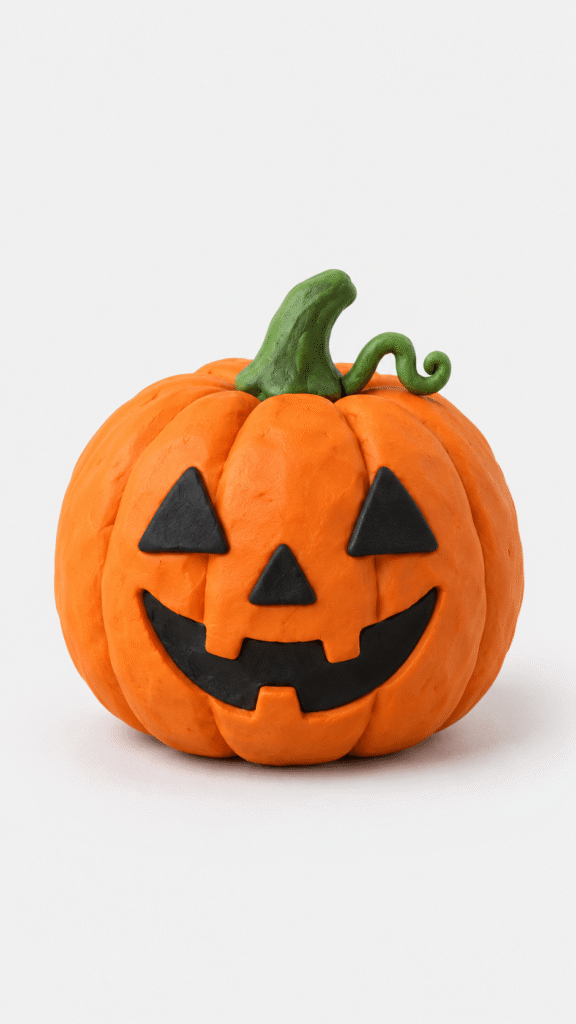
Skill: Beginner | Hands on time: 30 minutes | Clay: Air dry
Bigger than the magnet version, so you can sculpt the grooves properly and give it a shape you can hold.
What you need
- Orange, black, and green air dry clay
How to make it
- Shape the orange clay into a round pumpkin and press in gentle side grooves.
- Form a short green stem and a tiny curly vine.
- Roll the black clay into triangle eyes, a small nose, and a smiling mouth.
- Press the face on and smooth everything in place.
13. Spooky Clay Tray Charm
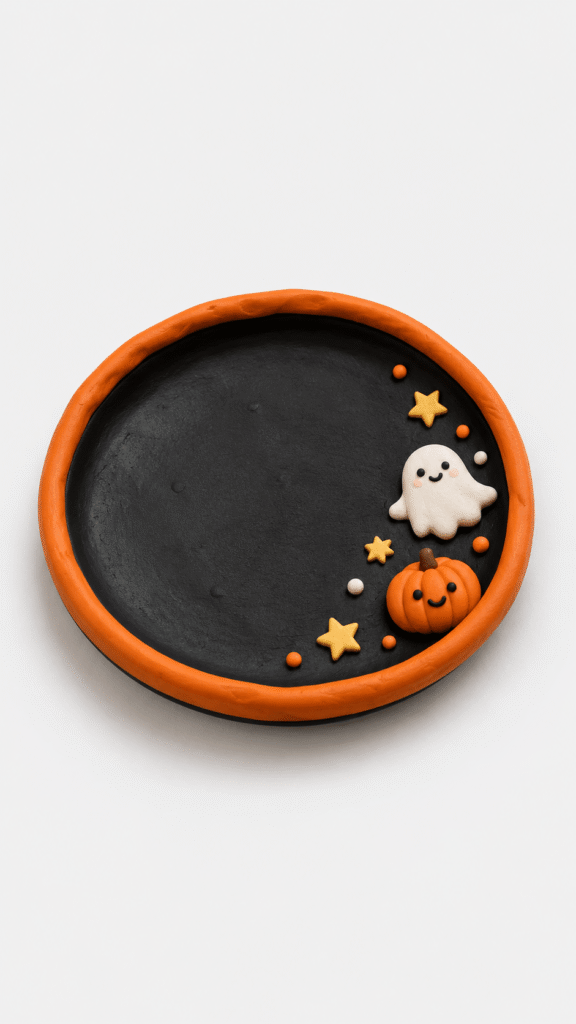
Skill: Intermediate | Hands on time: 45 minutes | Clay: Air dry
Good for rings, buttons, or candy wrappers. It’s not food safe, so keep it for dry items.
What you need
- Black, orange, and white air dry clay
- Small clay tools or a toothpick
How to make it
- Shape the black clay into a flat round tray and smooth the top.
- Roll a thin orange coil and press it around the edge for the rim.
- Form a small ghost, pumpkin, stars, and dots from the extra clay.
- Add simple face details and press every piece gently onto the tray. Flip the tray halfway through drying so it stays flat.
Clay Halloween Crafts to Hang, Gift, or Display
These turn easy clay crafts into things you can give away or use around the house.
14. Sweet Ghost Keychain Charm
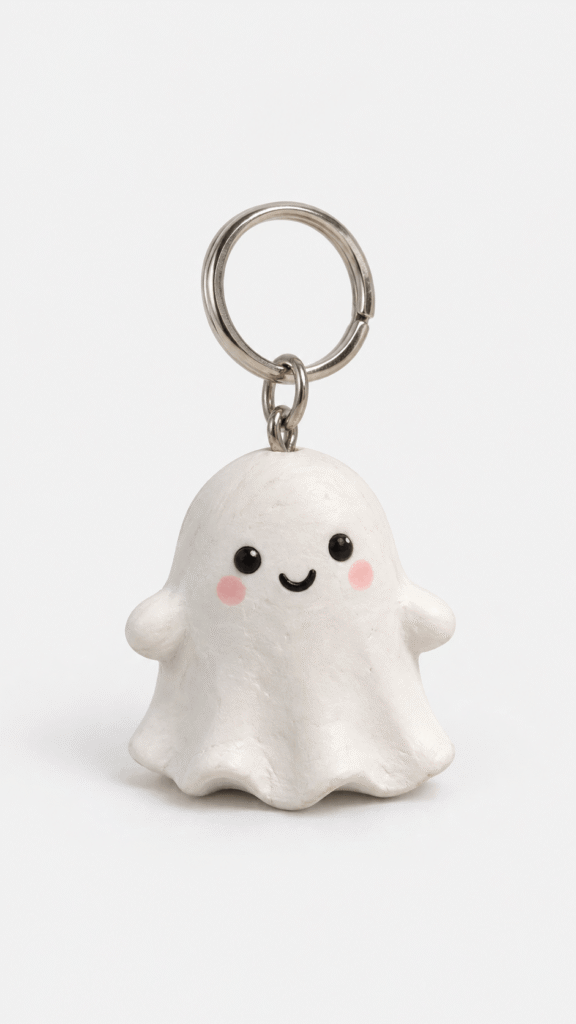
Skill: Intermediate | Hands on time: 40 minutes | Clay: Air dry
Keychains get handled constantly, so the loop has to be anchored well. Glue alone won’t hold.
What you need
- White air dry clay
- Small metal keychain ring
- Black and pink paint or clay for the face
- Craft glue
- An eye pin or small screw eye
How to make it
- Shape the clay into a small ghost body with a rounded top and wavy bottom.
- Pinch out little side arms and smooth the surface.
- Add tiny black eyes, a smiling mouth, and pink cheeks.
- Push the eye pin into the top while the clay is soft, let it dry completely, then attach the ring. A coat of sealer helps it survive a bag.
15. Pumpkin Garland Charm

Skill: Beginner | Hands on time: 60 minutes for a set | Clay: Air dry
Making a row of identical pumpkins is repetitive in a good way. It’s a nice project to do while listening to something.
What you need
- Orange, green, and brown clay
- Twine or cord
- Small craft knife or clay tool
- A straw or toothpick for the holes
How to make it
- Roll orange clay into small pumpkin shapes.
- Add gentle vertical grooves for texture.
- Shape tiny stems and leaves from brown and green clay.
- Press on jack O’Lantern faces and poke a hole through each stem or top before drying. Make it a little wider than you think you need, then string them onto twine once dry.
16. Pumpkin Bat Trio Charm

Skill: Intermediate | Hands on time: 60 minutes | Clay: Air dry
Three small pieces on one cord. The trade off is that they all need loops, so plan the hole before you start decorating.
What you need
- Air dry clay in white, orange, black, and green
- Twine or jute cord
- Clay safe glue
- Small sculpting tool or toothpick
How to make it
- Shape the ghost, pumpkin, and bat bodies from clay and smooth the surfaces.
- Add tiny details like eyes, mouth, stem, wings, and pumpkin face pieces.
- Press a small hole or loop at the top of each piece for hanging.
- Let the pieces dry fully, then thread on twine and tie neat hanging knots.
17. Ghost Candle Holder

Skill: Intermediate | Hands on time: 50 minutes | Clay: Air dry
Use an LED tealight only. Air dry clay isn’t made for flames, and a real candle can scorch or crack it.
What you need
- White air dry clay
- LED tealight
- Black, orange, and green clay
- Clay tool or craft stick
How to make it
- Shape the white clay into a rounded ghost with a wide base and an open center. A standard tealight is about 1.5 inches (4 cm) across, so leave a little extra room.
- Smooth the front opening and press in simple oval eyes and a small mouth.
- Form a tiny witch hat, spider, and pumpkin from the colored clay and attach them to the sides and top.
- Let it dry fully, then place the LED candle inside.
18. Witches’ Potion Bottle Charm

Skill: Intermediate | Hands on time: 60 minutes | Clay: Air dry
This takes the longest to dry because the body is thick. Start early in the week.
What you need
- Purple air dry clay, or a painted clay bottle form
- Small craft cork stopper
- Black, tan, gold, white, and green clay for accents
- Clay tools or a small craft knife
- Strong glue or clay adhesive (E6000 if you work near an open window)
How to make it
- Shape the bottle body and neck, then smooth the surface before adding the cork top.
- Wrap a black clay ring around the neck and add a twisted band for an apothecary look.
- Form a tan label, press tiny lettering into it, and place a small black cauldron in the center.
- Finish with small stars, dots, leaves, and a moon accent, then let everything dry and set firmly.
Polymer Clay Projects That Need an Oven
These two use polymer clay halloween techniques. Polymer clay doesn’t air dry, so it stays soft until baked.
19. Enchanting Witch Hat Clay
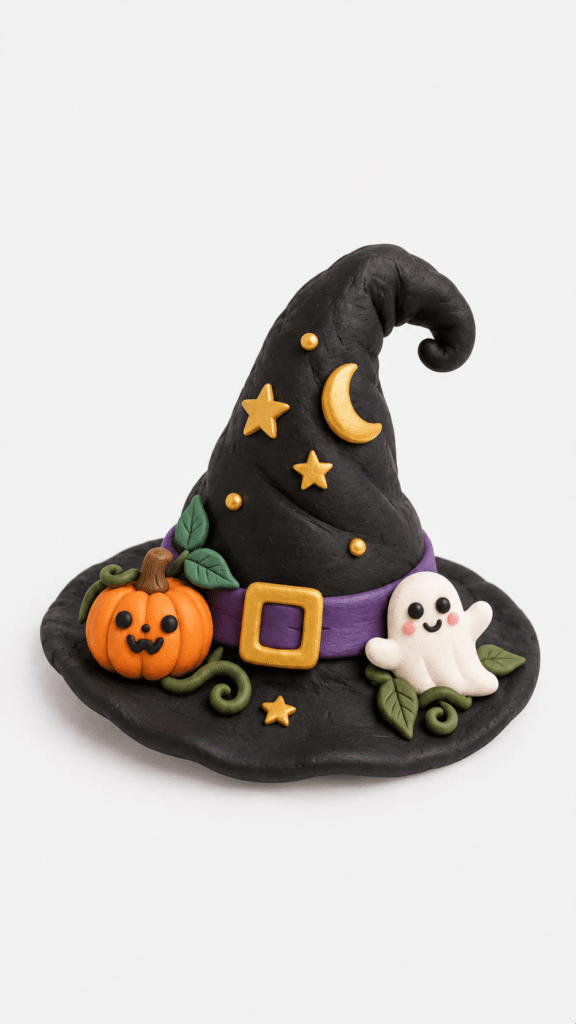
Skill: Intermediate | Hands on time: 60 minutes plus baking | Clay: Polymer
Polymer clay holds fine detail better than air dry clay, which is why the small buckle and charms work here.
What you need
- Black, purple, yellow, orange, and white polymer clay
- Clay sculpting tool
How to make it
- Shape black clay into a wide hat brim and a tall cone, then smooth the surfaces.
- Wrap a purple band around the base of the cone and add a small yellow buckle.
- Sculpt a tiny orange pumpkin and a small white ghost, then add simple face details.
- Press the decorations onto the brim. An adult should bake it following the package directions (most Sculpey and Fimo brands bake between roughly 230 and 275°F, but check your package), then cool it completely before handling.
20. Wicked Cauldron Cutie
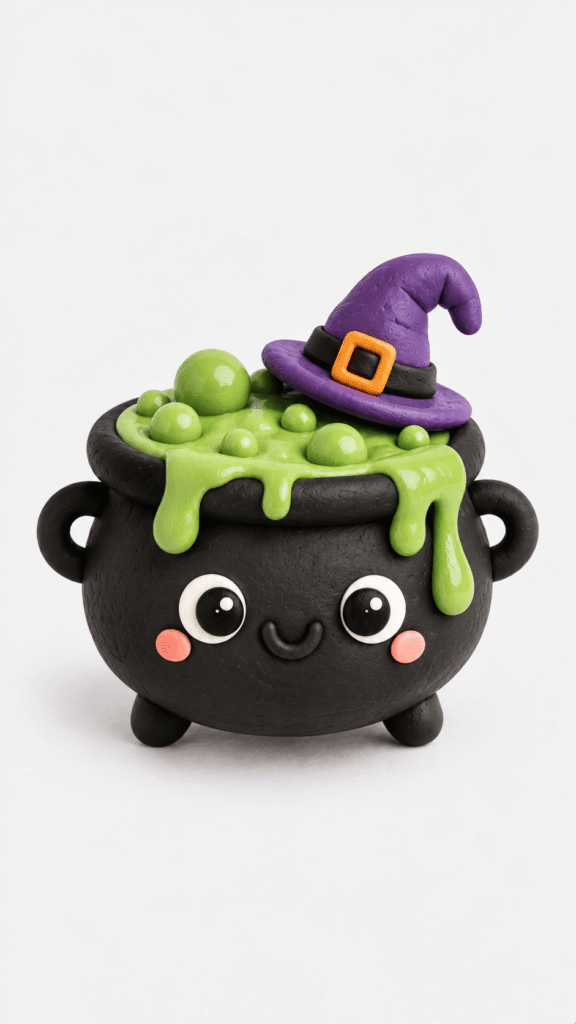
Skill: Intermediate | Hands on time: 60 minutes plus baking | Clay: Polymer
A ball of foil inside the cauldron saves clay and helps it bake evenly.
What you need
- Black, bright green, purple, and orange polymer clay
- White clay or paint for the eyes
- Clay sculpting tool
How to make it
- Shape the black clay into a rounded cauldron body with a wide rim and small side handles.
- Press in simple feet, eyes, and a smiling mouth.
- Add green clay for the potion, bubbles, and dripping ooze over the rim.
- Form a purple witch hat with a black band and orange buckle, place it on top, and bake following the package directions.
Quick Comparison Table
| Project | Clay | Skill | Hands on time |
|---|---|---|---|
| Pumpkin Magnet Clay Charm | Air dry | Beginner | 20 min |
| Clay Ghost Friend | Air dry | Beginner | 20 min |
| Ghoulish Eyeball Orb | Air dry | Beginner | 25 min |
| Cute Black Clay Spider | Air dry | Beginner | 25 min |
| Candy Corn Cutie | Air dry | Beginner | 25 min |
| Cheerful Jack-O’-Lantern Pumpkin | Air dry | Beginner | 30 min |
| Minimal Skull Clay Decor | Air dry | Beginner | 30 min |
| Mummy Clay Cutie | Air dry | Beginner to intermediate | 30 min |
| Playful Bat Clay Friend | Air dry | Intermediate | 40 min |
| Sweet Ghost Keychain Charm | Air dry | Intermediate | 40 min |
| Sweet Black Clay Cat | Air dry | Intermediate | 45 min |
| Purple Monster Clay Buddy | Air dry | Intermediate | 45 min |
| Frankenstein Clay Wall Plaque | Air dry | Intermediate | 45 min |
| Spooky Clay Tray Charm | Air dry | Intermediate | 45 min |
| Ghost Candle Holder | Air dry | Intermediate | 50 min |
| Pumpkin Garland Charm | Air dry | Beginner | 60 min |
| Pumpkin Bat Trio Charm | Air dry | Intermediate | 60 min |
| Witches’ Potion Bottle Charm | Air dry | Intermediate | 60 min |
| Enchanting Witch Hat Clay | Polymer | Intermediate | 60 min plus bake |
| Wicked Cauldron Cutie | Polymer | Intermediate | 60 min plus bake |
Common Mistakes First Timers Make
- Joining pieces dry: Ears, arms, and stems pop off when they’re stuck to dry clay. Score both surfaces, add a dab of water or glue, and press firmly.
- Making things too thin: Wings, legs, and plaques crack or curl. Thicker than you expect is almost always better.
- Working black before white: Black clay leaves smudges that won’t come off white pieces. White first, black last.
- Forgetting the hanging hole: You can’t drill air dry clay easily once it’s hard. Poke it while it’s soft.
- Drying too fast: Putting pieces on a radiator or in a hot sun can crack them. Let them dry at room temperature, away from direct heat.
- Real candles in clay: Use LED tealights in the candle holder, every time.
If you’re collecting halloween ideas for a classroom or party, make one test piece first. It tells you how long your particular clay takes to dry and how it reacts to your tools.
FAQs
What is the easiest clay Halloween craft for beginners?
The clay ghost or the pumpkin magnet. Both use two or three colors, need very few tools, and can be shaped in about 20 minutes.
How long does air dry clay take to dry?
Small pieces usually need 24 to 48 hours. Thick pieces like the potion bottle can take three days or more. Flip flat pieces halfway through so they dry evenly.
Can kids make clay Halloween crafts?
Yes, most of the air dry projects here work for kids around 4 and up with help. Keep small beads and magnets away from children under 3, and have an adult handle the oven for polymer clay.
Do I need to seal air dry clay?
Not always, but a coat of Mod Podge or acrylic varnish adds some durability and shine. It’s worth doing for keychains and anything that gets handled a lot.
Can I use polymer clay instead of air dry clay?
You can for most designs, but polymer clay has to be baked, and it stays soft until then. The air dry projects can switch to polymer, though you’ll need to follow the baking directions on your brand.
Are these easy clay crafts safe for classroom use?
With air dry clay, yes, as long as you supervise small parts and keep glue and sealer in adult hands. Check that your clay carries an AP seal on the label.
Where to Go From Here
Pick one project and make it tonight, then use what you learned for the next one. The ghost and the pumpkin are good first picks, and by the third piece you’ll be shaping without thinking. If you want more projects like these, a couple of our other guides are worth a look.
Save this post to your Halloween board so the supply list and drying times are there when you need them. These are the clay halloween crafts I’d make this October.
