
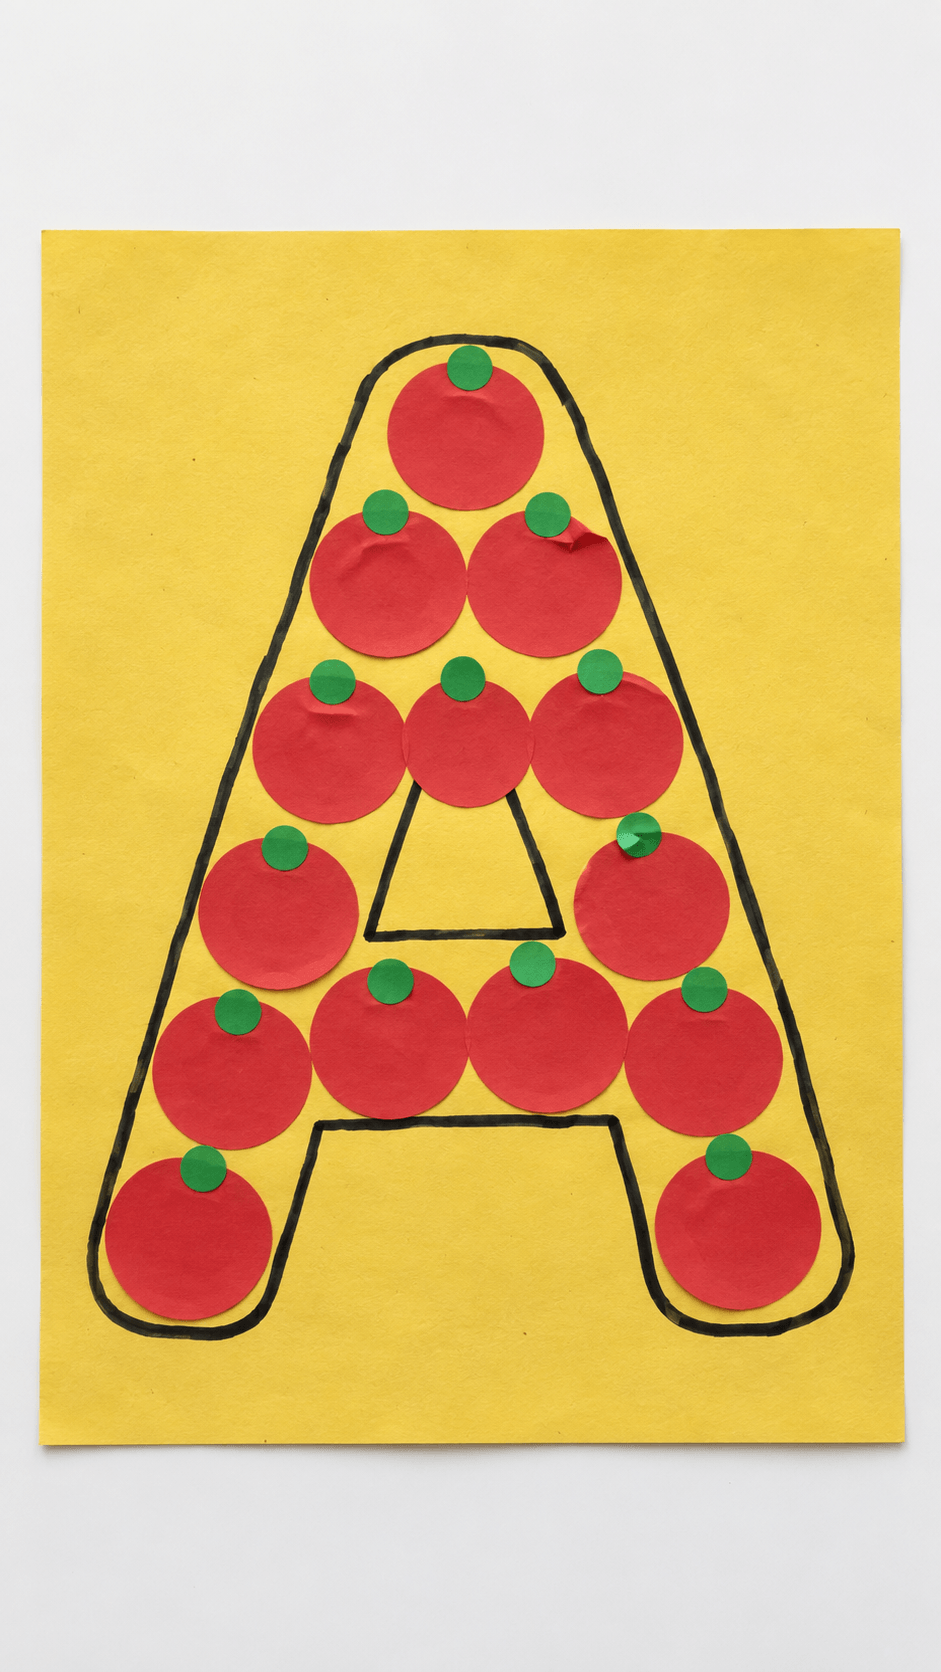
The easiest letter A crafts for preschool apple theme activities use red and green washable paint, stickers, and glue, and take 15 to 30 minutes for ages 3 to 5. Start with the sticker, dot painting, and crayon resist pages, then move on to felt, playdough, and building projects that need adult prep. Say the short A sound (ah, as in apple) while your child traces a big uppercase A.
Your three year old has been carrying a red apple around the house for two days and announcing A for apple to anyone who will listen. You have a stack of paper plates, a free afternoon, and no plan.
I put these letter A crafts together for exactly that moment. Each one pairs a simple apple project with a chance to see, trace, and say the letter, so the craft does a little teaching without feeling like a lesson.
These preschool apple crafts range from a 15 minute sticker page to a few projects that need an adult with a hammer or a hot glue gun. Each one lists ages, a mess level, a realistic time, what to prep, and a cheaper swap for anything you’d have to buy.
If you’re collecting apple crafts for preschoolers for a classroom or a kitchen table, work down the list in order. I ordered it from the lowest prep to the projects that need the most adult help. Many of these letter A activities also work as quick stations for a class, since most need only paper, paint, and glue.
Before You Start: What You Need For Letter A Crafts
Most letter A crafts run on the same small kit. Buy it once and you can make most of the 15 projects below without another store run.
| Staple | Why it earns its spot | Where to find it | Budget swap |
| Washable tempera paint in red and green (Crayola) | Painting, stamping, and handprints that wash out | Craft and big box stores | Washable markers |
| Paper: cardstock, construction paper, and drawing paper (A4 or 8.5 x 11 inch) | The base for every flat craft | Dollar and office supply stores | Printer paper, cereal box panels, paper bags |
| Washable school glue and glue sticks (Elmer’s) | Collage and layering | Grocery and dollar stores | Flour and water paste, about equal parts |
| Blunt tip kids scissors (Fiskars) | Safe cutting for small hands | Craft and big box stores | You cut the shapes ahead of time |
| Crayons, markers, and pencils (Crayola) | Tracing the big A | Anywhere | Whatever is in the junk drawer |
| Red and green stickers, felt, buttons, and pom poms | Texture, counting, and color | Craft and dollar stores | Paper circles from a hole punch |
| Cotton swabs and paper plates | Dot painting and paint trays | Grocery stores | Fingertips and takeout lids |
| Painter’s tape | Taping paper down and marking a floor A | Hardware stores | Masking tape |
Practical note: Washable doesn’t always mean washes out. Red tempera is the worst offender for staining fabric, so put your child in an old shirt, and wipe hands before they touch anything else.
Washable paint labels vary a lot, so it’s worth a closer look before you buy.
Ages, Time, And What To Expect
Ages 3 to 5 is the target. With a 2 year old, you do the drawing and cutting and they stick, dab, and press. With a 5 or 6 year old, they can trace the A themselves, write the lowercase a, and handle the felt and building projects with help.
Most of these take 15 to 30 minutes. A 3 year old is usually done in 15 to 20, so stop while they’re still interested.
Teaching The letter while you craft
Uppercase A is three strokes: slide down the left side from the top, slide down the right side from the top, then a short line across the middle. Say that out loud as your child traces.
The sound in apple is the short A, ah. Say it while they trace, and point to the letter each time you say it.
Mess, Safety, And Supervision
Low mess means dry materials and stickers. Medium means glue or one color of paint. High means a lot of paint.
- Adult only tools: craft or bread knives, hot glue guns, hammers and nails, wire and pliers, needles, and boiling water.
- Washable only: paint and ink, always.
- Drying space: give each child a cookie sheet so wet art has a place to go.
Practical note: Anything that fits through a toilet paper tube can choke a child under 3, and plenty of 3 year olds still mouth things. Beans, buttons, pom poms, beads, and bells all fit through the tube, so swap in paper circles or stickers for those kids.
Pick A Project By Age, Mess Level, And Time
Here are all 15 at a glance, so you can match a project to the kid and the afternoon you actually have. Whether you want quiet apple theme activities or messy ones, and whether you’re after letter A activities for one child or a class, this table gets you to the right project fast.
| Project | Ages | Mess | Time | Adult prep |
| Apple Slice Sticker Scene | 2 to 5 | Low | 15 minutes | Draw the A |
| Apple Dot Painting Pages | 3 to 5 | Medium | 20 minutes plus drying | Print the sheet |
| Apple Crayon Resist Drawing | 3 to 5 | Medium | 20 minutes | Draw the A in crayon |
| Apple Handprint Painting | 2 to 5 | High | 25 minutes plus drying | Set up paint |
| Apple Tree Fingerprint Activity | 3 to 5 | Medium | 15 minutes | Draw the tree |
| Alphabet A Collage | 3 to 5 | Medium | 30 minutes | Cut the A |
| Apple Seed Counting Craft | 3 to 5 | Low | 20 minutes | Cut circles |
| Apple Button Match-Up | 4 to 6 | Low | 20 minutes plus drying | Draw the A and glue buttons |
| Apple Core Rubbing Art | 4 to 6 | Low | 20 minutes plus drying slices | Slice and dry apples |
| Apple Scented Playdough | 3 to 5 | Medium | 30 minutes | Boil water and mix |
| Alphabet A Sensory Bottle | 3 to 6 | Low | 15 minutes plus sealing | Seal the lid |
| Apple Ring Toss Game | 3 to 6 | Low | 20 minutes plus cutting | Cut the rings |
| Apple Pocket Puppets | 4 to 6 | Low | 40 minutes | Sew or glue |
| Apple Tree String Art | 5 and up | Low | 45 minutes | Hammer the nails |
| Apple Leaf Wind Chime | 4 to 6 | Low | 40 minutes | Bend the wire |
This is the table to keep handy. Save this for later, and picking a project on a busy morning takes about ten seconds.
1. Apple Slice Sticker Scene
This is the easiest of the preschool apple crafts here, and the best for a 2 year old. Round red stickers become apple slices inside a big bubble letter A, and peeling stickers is a fine motor workout all by itself.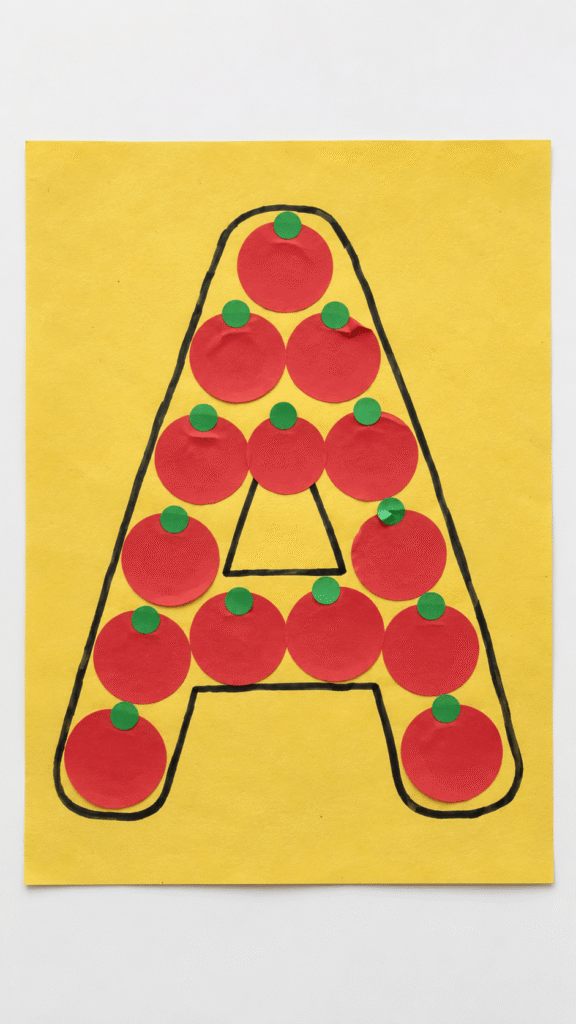
Stickers go on crooked and overlap. That’s fine. The first try problem is the letter getting lost, so draw a thick bubble A with a marker, and make the outline wide enough for stickers to fit inside.
Ages: 2 to 5. Mess: Low. Time: 15 minutes. Letter A skill: Recognizing the uppercase A.
Materials Needed
- Yellow construction paper (or the back of a paper bag)
- Red round stickers, 3/4 inch, 12 per child (or red circles cut from paper and glued)
- Green round stickers, 1/4 inch, 6 per child (or green dots from a marker)
- Black marker
- Ruler
How to Make It
- Use the ruler and marker to draw a bubble letter A about 7 inches tall in the center of the paper, with a thick outline.
- Have your child peel red stickers and fill the inside of the A, two per row for six rows, placed edge to edge like apple wedges.
- Add one green sticker at the top center of each row as a stem.
- Point to the letter and say the sound together: ah, ah, apple.
Tip: Lift one corner of each sticker for a younger child, so they only have to pull.
Safety: Keep stickers away from kids who still mouth small things.
2. Apple Dot Painting Pages
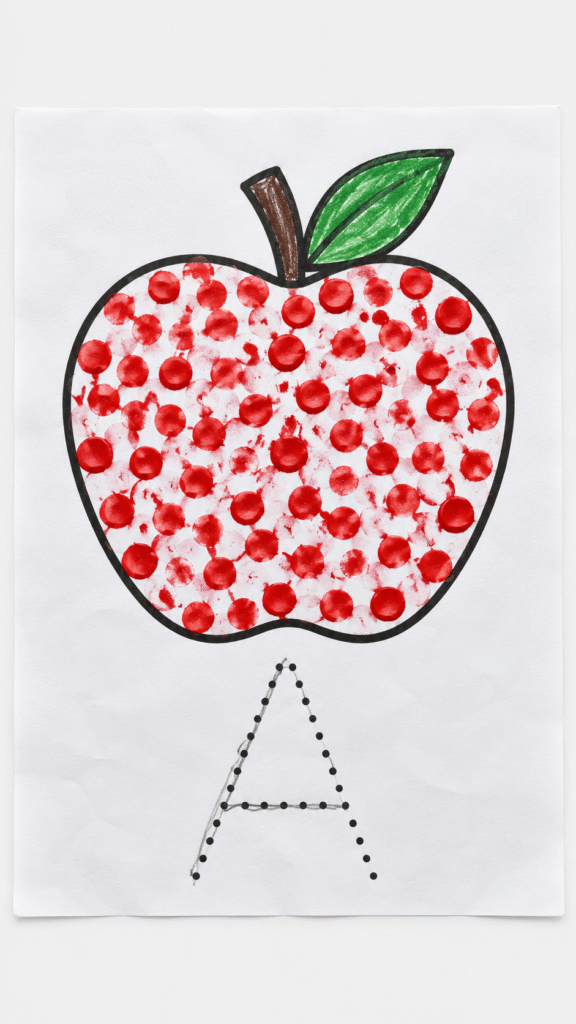
Cotton swabs and red paint fill a printed apple outline, with a dotted letter A beside it for tracing. It’s one of the easiest apple crafts for preschoolers who aren’t ready to paint with a brush yet.
The source called for acrylic paint, but I’d skip it. Acrylic stains clothes for good, so use washable tempera. Dot markers, such as Do A Dot, are the lowest mess swap.
Ages: 3 to 5. Mess: Medium. Time: 20 minutes, plus 15 minutes to dry. Letter A skill: Pencil grip and tracing a dotted A.
Materials Needed
- Printed apple coloring sheet with thick borders (or an apple drawn with a black marker)
- Cotton swabs, about 10 per child
- Red washable tempera paint (or dot markers)
- Paper plate
- Pencil
How to Make It
- Pour a dime sized puddle of red paint onto a paper plate.
- Dip one end of a cotton swab in the paint, tap it once on the plate, and dot it inside the apple outline.
- Keep going until the apple is full, switching to a fresh swab when one gets soggy.
- While it dries, write a dotted A beside the apple for your child to trace with a pencil.
Tip: Tap the swab on the plate before you dot. It’s the difference between neat dots and blobs.
Safety: Swabs are for painting, not mouths. Stay close with younger kids.
3. Apple Crayon Resist Drawing
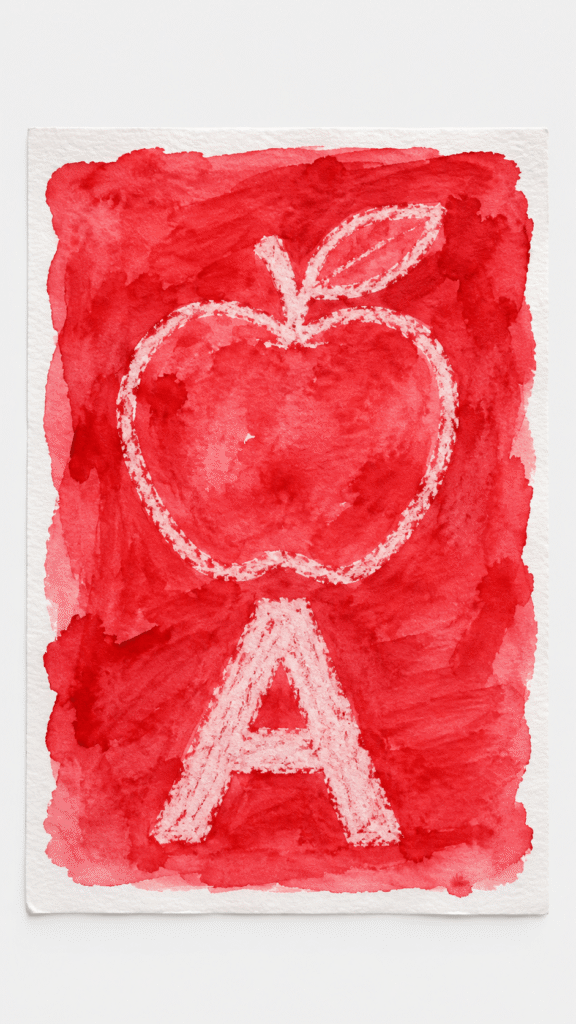
You draw with a white crayon, paint over it with red watercolor, and an apple and an A appear. The reveal is the whole point, and most kids ask to do it again.
Here’s the catch. White crayon on white paper is invisible, so kids lose track of what they drew. Draw the apple and the A yourself first, or use a pale yellow crayon so your child can see it. Press hard either way.
Ages: 3 to 5. Mess: Medium. Time: 20 minutes. Letter A skill: Spotting a hidden uppercase A.
Materials Needed
- White crayon (Crayola)
- Watercolor paper, A4 or letter size (or heavy white paper)
- Red liquid watercolor (or washable watercolor paint, or diluted food coloring)
- A paintbrush, 1/2 inch (or a sponge brush)
- Cup of water and a paper towel
How to Make It
- Draw a large apple and a bold letter A on the paper with the white crayon, pressing hard.
- Mix red watercolor with water in a cup to a light cherry color.
- Paint over the whole page and watch the wax resist the paint.
- Blot the extra paint with a paper towel and lay the page flat to dry.
Tip: Tape the paper to the table so it doesn’t curl when it gets wet.
Safety: Food coloring stains, so use an apron if that’s your paint.
4. Apple Handprint Painting

A palm print turns into a round red apple, and it doubles as a keepsake with your child’s real hand size. I’d write the date on the back.
Curl the fingers up so only the palm touches the paper, and you get a round shape instead of a hand. This is the highest mess project on the list, so spread thin paint with a sponge or brush for an even print.
Ages: 2 to 5. Mess: High. Time: 25 minutes, plus 20 to 30 minutes to dry. Letter A skill: Tracing an uppercase A with a crayon.
Materials Needed
- Red washable tempera paint (Crayola)
- Green washable tempera paint
- White cardstock, A4 or letter size
- A popsicle stick (or a cotton swab) for the stem and leaf
- Paper plate for the paint
- Cup of water and paper towels or wet wipes
How to Make It
- Spread red paint thinly on a paper plate. Have your child press their palm into it, fingers curled up, then press it onto the left side of the cardstock.
- Dip the popsicle stick in green paint and draw a short stem and a curved leaf at the top of the print.
- Let the painting dry flat for 20 to 30 minutes.
- Write a large letter A in pencil near the bottom of the page, and have your child trace it with a black crayon.
Safety: Use washable paint only, and keep wipes close so hands get cleaned before they touch anything else.
5. Apple Tree Fingerprint Activity
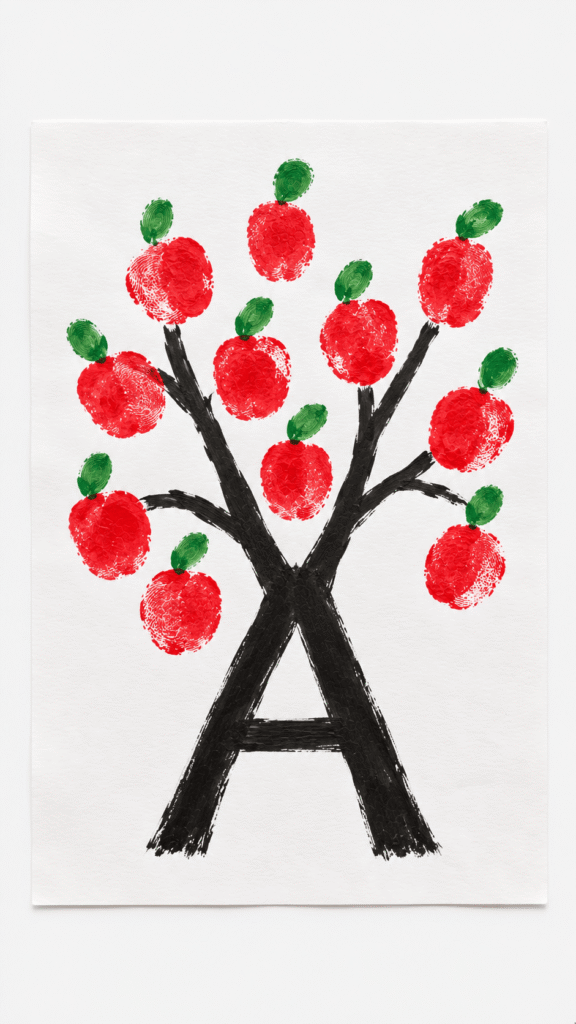
Red fingerprint apples dot the top of a tree, with a black marker trunk and two branches that meet in an A. It’s tidy, quick, and one of the best letter A activities for kids who dislike wet paint.
Ink pads smear when kids press too hard. Teach press, rock, lift. Wipe fingers between colors, or the green turns the red muddy. Use washable pads only, since permanent ink won’t come off.
Ages: 3 to 5. Mess: Medium. Time: 15 minutes. Letter A skill: Seeing the A in the tree.
Materials Needed
- Red washable ink pad (or red paint on a damp sponge in a lid)
- Green washable ink pad (or green paint)
- White drawing paper
- Fine tip black marker
- Baby wipes
How to Make It
- Draw a tall A with the marker, with two diagonal branches that meet at the top and a crossbar. Make it fill most of the page. This is an adult step for younger kids.
- Press a fingertip into the red pad and dot ten apples around the upper half of the A.
- Use a fingertip with the green pad to add a small dab above each apple for a leaf.
- Wipe fingers clean right after stamping.
Tip: Draw the A first. It’s much easier to place apples around a drawing than to add a tree to a page full of dots.
Safety: Washable ink only, and wipe hands right away.
6. Alphabet A Collage
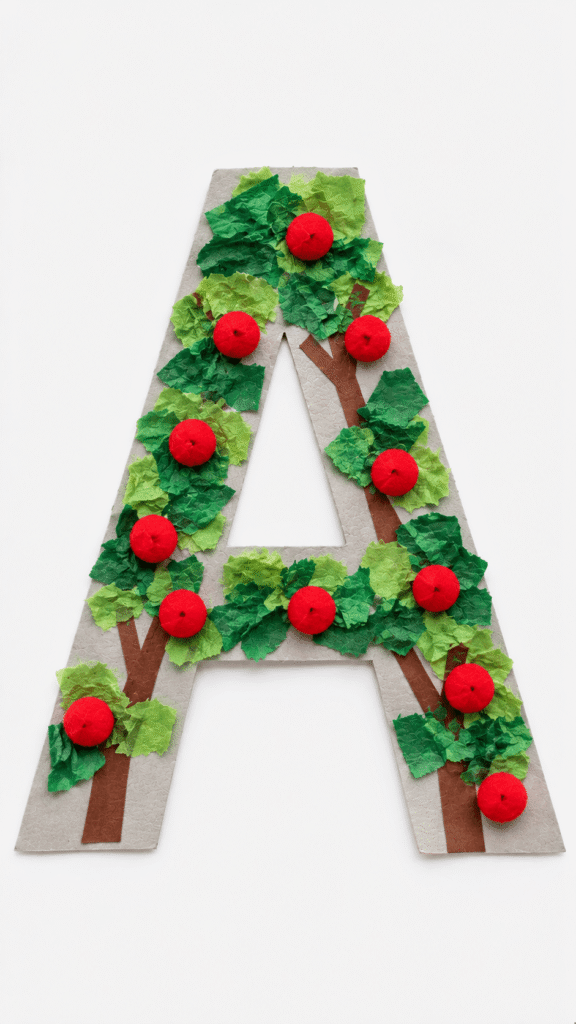
Gluing apple themed bits onto a giant letter A builds fine motor skills and makes the shape of the letter stick. Tiny red apples grow on little trees along the legs of the A, and it makes a good keepsake among letter A activities.
Cutting a thick capital A is the hard part for preschoolers, so you cut it from a template ahead of time. The other first try problem is glue that dries before the pom poms are down. Work one leg at a time.
Ages: 3 to 5. Mess: Medium. Time: 30 minutes. Letter A skill: Building the uppercase A.
Materials Needed
- Light gray cardstock, A4 or letter size (or cereal box cardboard covered in paper)
- Scissors and a ruler
- White school glue (Elmer’s) and a glue brush (or a cotton swab)
- Tiny red pom poms (or red paper circles)
- Brown construction paper scraps
- Green tissue paper squares, 1 inch (or torn green paper)
How to Make It
- Cut a thick capital A about 6 inches tall from the gray cardstock. Print a template and trace it if you want clean edges.
- Brush a thin layer of glue along one leg of the A.
- Sprinkle pom poms along the wet glue as apples, pressing gently so they stick.
- Glue brown scraps at the base of each leg for tree trunks, and add small pieces of green tissue at the top for leaves.
Safety: Tiny pom poms are a choking hazard for kids who mouth things, so use red paper circles for them.
7. Apple Seed Counting Craft
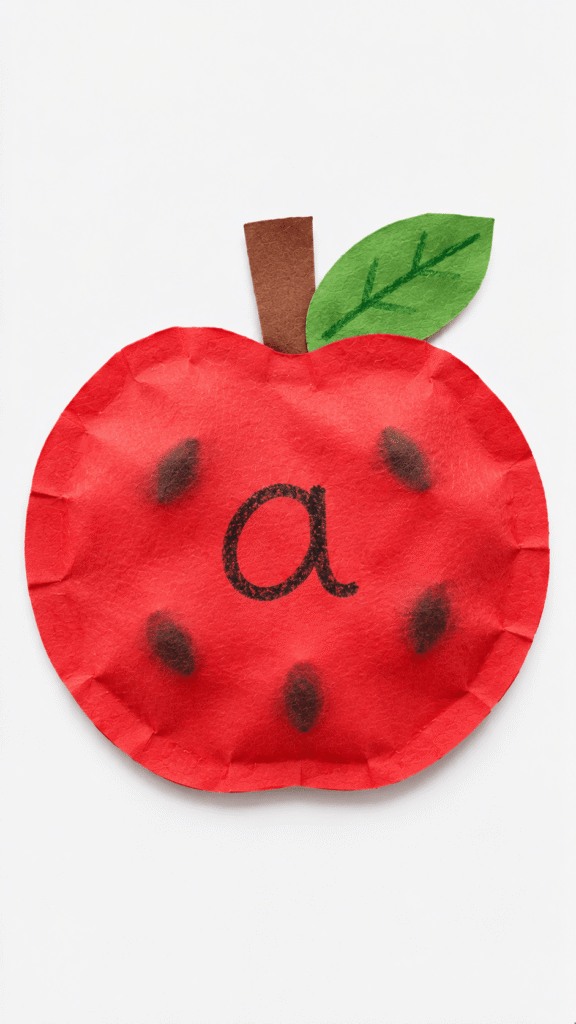
Cut an apple across the middle and you’ll see a star with five seed pockets. That’s the detail this craft uses. Five beans tuck inside a two layer paper apple with a lowercase a on top, and it’s one of the quietest preschool apple crafts on the list.
Dried beans are a choking hazard under 3, so use black sticker dots or black paper circles for younger kids. Use a glue stick around the edge too, because liquid glue slides the beans around.
Ages: 3 to 5. Mess: Low. Time: 20 minutes. Letter A skill: Counting, and the short A sound.
Materials Needed
- Red construction paper
- Dried black beans, 5 per apple (or black sticker dots, or black paper circles)
- Glue stick
- Small bowl for the beans
- Pencil
- A 3 inch circle stencil (or a cup or lid to trace)
How to Make It
- Trace two circles with the stencil onto red paper and cut them out.
- Draw a lowercase a in the center of one apple with a pencil.
- Run the glue stick around the edge of the plain apple, set it flat on the table, and have your child count five beans into the center.
- Press the apple with the a on top, sandwiching the beans, and press the edges to seal. Shake it and listen.
Safety: Stay close when beans are in play, and swap in paper circles for any child who mouths small things.
8. Apple Button Match-Up
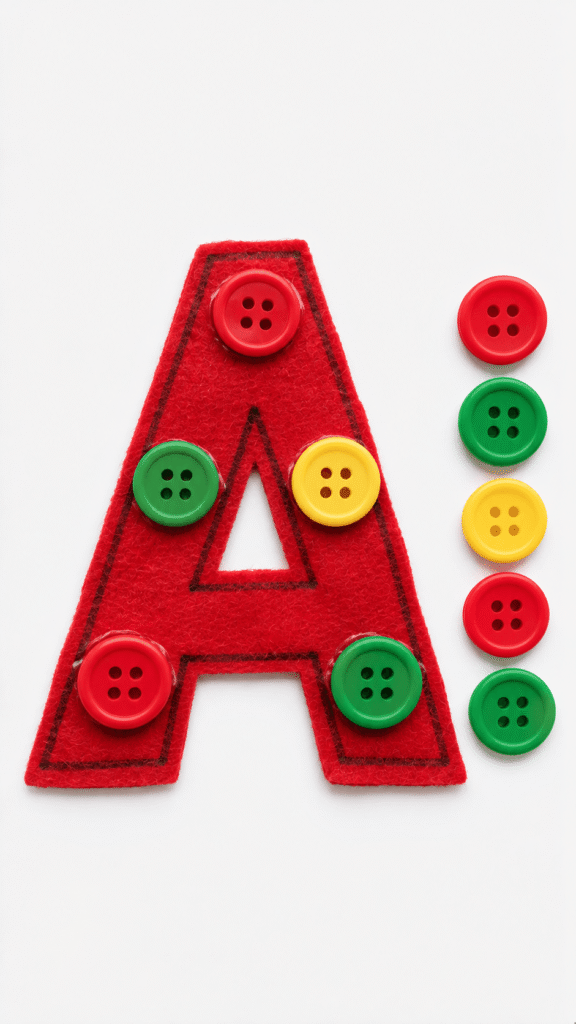
Buttons go onto a felt letter A, and your child finds the matching color for each one. It builds sorting and matching, and it’s one of the letter A activities that works well as a quiet table game.
Glue dots don’t grip felt well, because the fuzz gets in the way. Use a dab of tacky glue and let it dry for an hour. Buttons are small, so use 1 inch buttons if you can find them.
Ages: 4 to 6. Mess: Low. Time: 20 minutes, plus an hour for the glue to dry. Letter A skill: Sorting and matching on an uppercase A.
Materials Needed
- Red felt sheet, 9 x 12 inches (or red cardstock)
- Assorted buttons in red, green, and yellow, about 15, 1 inch wide if you can find them (or paper circles)
- Fabric marker (or a white gel pen)
- Ruler
- Tacky glue (Aleene’s), or glue dots
How to Make It
- Use the marker and ruler to draw a large letter A on the felt.
- Glue five buttons along the A, mixing the colors, and let them dry for an hour.
- Sort the remaining buttons by color into three small bowls.
- Have your child find a matching button for each glued one and place it on top.
Safety: Buttons are small. Stay close, and save this one for kids who keep things out of their mouths.
9. Apple Core Rubbing Art

Rubbing a dried apple slice with the side of a crayon picks up the star shaped seed pockets. Of all the preschool apple crafts here, it’s the one where kids see the inside of the fruit, and they’ll want to cut open every apple in the house afterward.
Fresh cores are wet and soft and won’t take a rubbing, so dry thin slices first. Also skip the white crayon from the original. White on white shows nothing, so use brown or red.
Ages: 4 to 6. Mess: Low. Time: 20 minutes, plus drying the slices. Letter A skill: Rubbing and drawing an uppercase A.
Materials Needed
- 1 or 2 apples, sliced across the middle into 1/4 inch rounds so the seed star shows
- Thin white paper, about 8 x 10 inches (printer paper works)
- Crayons with the paper peeled off, brown or red
- Tape
- A cardboard scrap
How to Make It
- Adult step: dry the slices overnight on a rack, or bake them at 200 F (95 C) for about an hour, until they feel firm.
- Tape a dried slice to the cardboard scrap, cut side up, then tape one edge of the paper over it.
- Rub the side of a peeled crayon back and forth over the slice, holding the paper tight.
- Lift the paper to see the star and seeds. Draw a letter A in the corner with the same crayon.
Tip: No time to dry slices? Press a fresh apple half into paint and stamp it instead. The star shows up beautifully.
Safety: An adult slices the apples and handles the oven.
10. Apple Scented Playdough

Apple and cinnamon dough rolls into mini apples that sit in a muffin tin, with a paper A under each cup. The smell is half the fun.
Boiling water is an adult job, and the dough is hot at first, so let it cool to warm before anyone kneads it. Red food coloring gives you pink and stains hands, and gel coloring gives a deeper red. If the dough is crumbly, knead in water a teaspoon at a time.
Playdough is easy to vary, and there are plenty more recipes to try.
Ages: 3 to 5. Mess: Medium. Time: 30 minutes. Letter A skill: Rolling an apple shape, and matching it to an A.
Materials Needed
- 2 cups all purpose flour
- 1/2 cup salt
- 1 tbsp cream of tartar (or skip it and use the dough within a few days)
- 1 cup boiling water (adults only)
- 2 tbsp vegetable oil
- 1 tsp apple extract (or skip it, since the cinnamon does most of the work)
- 1 tsp ground cinnamon
- Red food coloring (gel gives the deepest red)
- Muffin tin and paper
How to Make It
- Adult step: mix the flour, salt, and cream of tartar in a bowl, then stir in the boiling water, oil, extract, and cinnamon.
- Let the dough cool until warm, then add red food coloring a drop at a time until it’s an even pink. Knead for 3 minutes.
- Roll small balls for apples and pinch a tiny stem on each.
- Write a big A on a few pieces of paper, tuck one into each muffin cup, and set an apple on top.
Safety: This dough is salty and not food, and it has wheat in it. Keep it away from kids who taste things and from dogs. Store it in an airtight container, since it dries out and hardens if left out.
11. Alphabet A Sensory Bottle
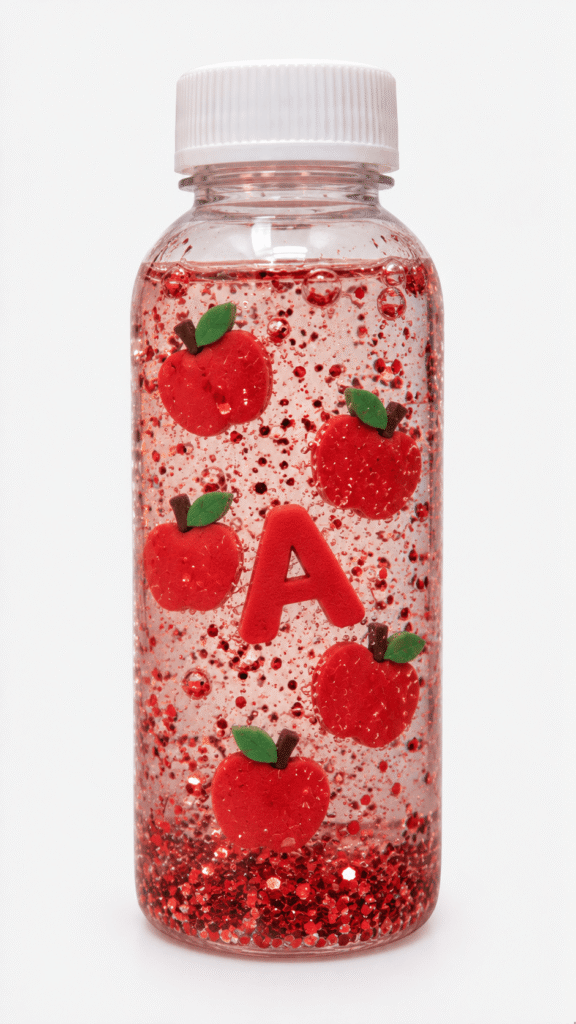
A swirling bottle with red glitter, foam apples, and one A bead gives kids something to watch. It’s one of the quieter apple theme activities, which makes it good for a car ride or a quiet minute.
The source’s amounts didn’t fit an 8 oz bottle, so I fixed the math. Use 1/4 cup glue and about 1/2 cup warm water, which fills the bottle about three quarters of the way and leaves room to swirl. And the lid must be sealed, because the small parts inside are a choking hazard if it opens.
If your kid loves these, there are more bottle ideas to try.
Ages: 3 to 6 (not under 3). Mess: Low. Time: 15 minutes, plus sealing. Letter A skill: Finding the A bead.
Materials Needed
- Empty 8 oz clear plastic bottle with a lid (a small water bottle works)
- Clear school glue, 1/4 cup (Elmer’s)
- Warm water, about 1/2 cup
- Red glitter (or red sequins)
- 5 mini foam apples (or red beads)
- One uppercase A alphabet bead (or a small A cut from craft foam)
- Funnel (or a rolled sheet of paper)
- Hot glue or E6000, and duct tape (adult use)
How to Make It
- Use the funnel to pour 1/4 cup glue into the bottle, then add about 1/2 cup warm water and shake gently.
- Add a pinch of red glitter, the five foam apples, and the A bead.
- Adult step: run a ring of hot glue or E6000 inside the lid, screw it on tight, and wrap duct tape around the cap.
- Turn the bottle slowly and watch everything swirl.
Safety: Never hand over an unsealed bottle, and throw it out if it leaks or the lid loosens.
12. Apple Ring Toss Game

Foam apple rings fly toward a giant letter A taped on the floor. It’s the loudest of the apple theme activities, so save it for the living room or the playground, and it mixes big body movement with seeing the letter.
I changed the setup from the source. Pool noodles are about as thick as a rolled towel, not 1 inch, and a craft knife drags and slips in foam. A serrated bread knife cuts clean rings. A taped A on the floor is easier to land on than a freestanding frame.
Ages: 3 to 6. Mess: Low. Time: 20 minutes, plus cutting. Letter A skill: Seeing a huge A with your whole body.
Materials Needed
- 1 red pool noodle (one gives far more rings than you need)
- 2 green pipe cleaners (or green paper leaves taped on)
- A serrated bread knife (adult use only)
- Painter’s tape or masking tape
How to Make It
- Adult step: cut the noodle into 1 inch rings with the bread knife. Make 8 to 10 rings.
- Twist a green pipe cleaner into a leaf, fold the sharp wire ends over, and poke it into one ring to make a bonus apple.
- Tape a giant capital A on the floor, about 3 feet tall, with painter’s tape.
- Mark a throwing line with tape about 3 feet back (closer for 3 year olds). Toss the rings and try to land them inside the A. The leaf ring is worth double.
Safety: An adult handles the knife. Fold over every wire end, and play on a clear floor.
13. Apple Pocket Puppets
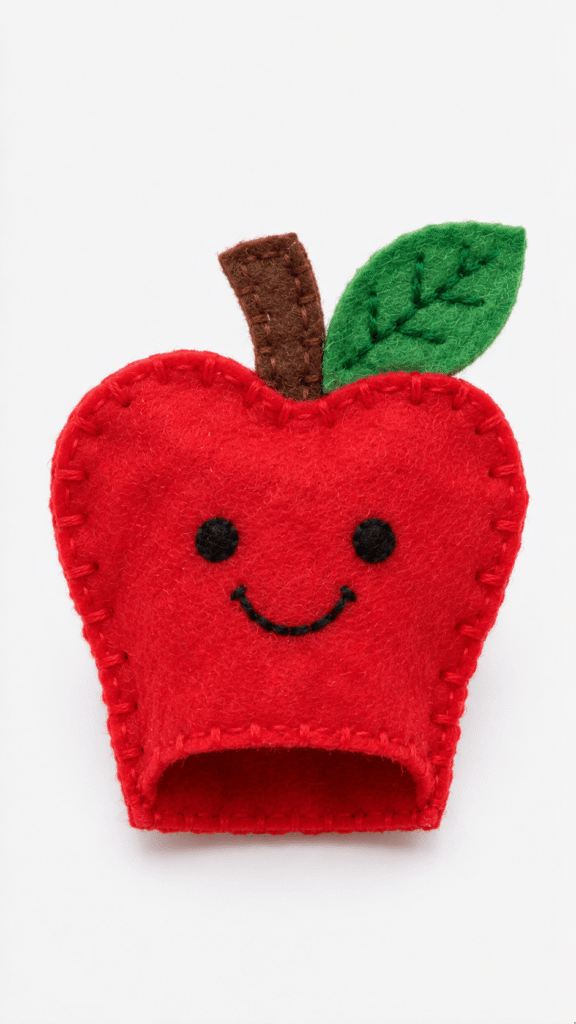
Felt apples with smiling faces slip over a finger and act out stories that start with A. Playtime turns into phonics practice without anyone noticing. The source only cut one apple, but a pocket needs two layers, so cut two and join them. Preschoolers can’t sew, so the stitching is an adult job. Kids decorate with felt scraps, and fabric glue works if you let it dry overnight.
Ages: 4 to 6. Mess: Low. Time: 40 minutes. Letter A skill: Telling A stories.
Materials Needed
- Red felt, 6 x 6 inches (or craft foam)
- Green felt, 2 x 2 inches
- Black embroidery floss (or a fine tip permanent marker)
- Needle and thread (adult use), or fabric glue
- Scissors
- Low temp hot glue gun (adult use only)
How to Make It
- Cut two apple shapes from red felt, about 3 inches tall, and one leaf from green felt.
- Sew or glue the leaf to the top of one apple.
- Stitch black eyes and a smile on that apple, in the lower half so a finger doesn’t cover them.
- Put the two apples back to back and glue or sew along both sides, leaving the bottom open for a finger.
Tip: Clip the glued sides with clothespins while they dry so the seams stay flat.
Safety: Hot glue and needles are adult only. Keep floss and small felt scraps out of reach of toddlers.
14. Apple Tree String Art
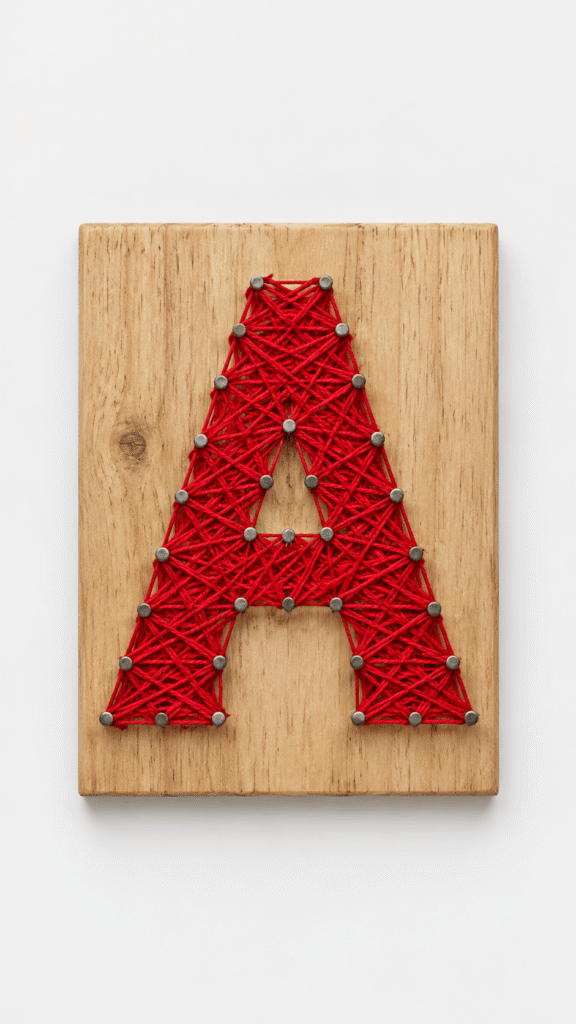
Nails and red floss build a raised letter A that looks like a tree full of red branches. It’s tactile and striking on a classroom wall, and it’s the one project here that needs an adult with a hammer.
The source listed 16 penny nails and called them 1 inch, but 16 penny nails are about 3 1/2 inches long. Use 1 inch brad nails or finishing nails. Tape a printed A to the board and hammer through the paper, then tear it away, so the spacing comes out even.
For kids under 5, make a lacing card version instead. Punch holes around an A cut from cardstock and let them lace yarn through.
Ages: 5 and up (an adult hammers). Mess: Low. Time: 45 minutes. Letter A skill: Building a raised A.
Materials Needed
- Wooden board, 6 x 8 inches (a pine offcut, or thick cardboard for a no hammer version)
- Small hammer
- 1 inch nails, such as brad nails or finishing nails
- Red embroidery floss (or red yarn)
- Black permanent marker and a ruler (or a printed A template)
- A clothespin to hold the nails
How to Make It
- Draw a capital A, 5 inches tall, on the board with the marker and ruler, or tape on a printed template.
- Adult step: hold each nail with a clothespin and hammer them along the outline about 1 inch apart, leaving about 1/2 inch standing up.
- Tie the end of the floss to the bottom left nail and wrap it diagonally across to other nails to fill the shape.
- Keep crisscrossing until the A looks full of branches, then knot and trim the end.
Safety: Wear safety glasses while hammering, and hold nails with a clothespin to protect fingers. Nails are sharp, so keep this away from kids under 5.
15. Apple Leaf Wind Chime
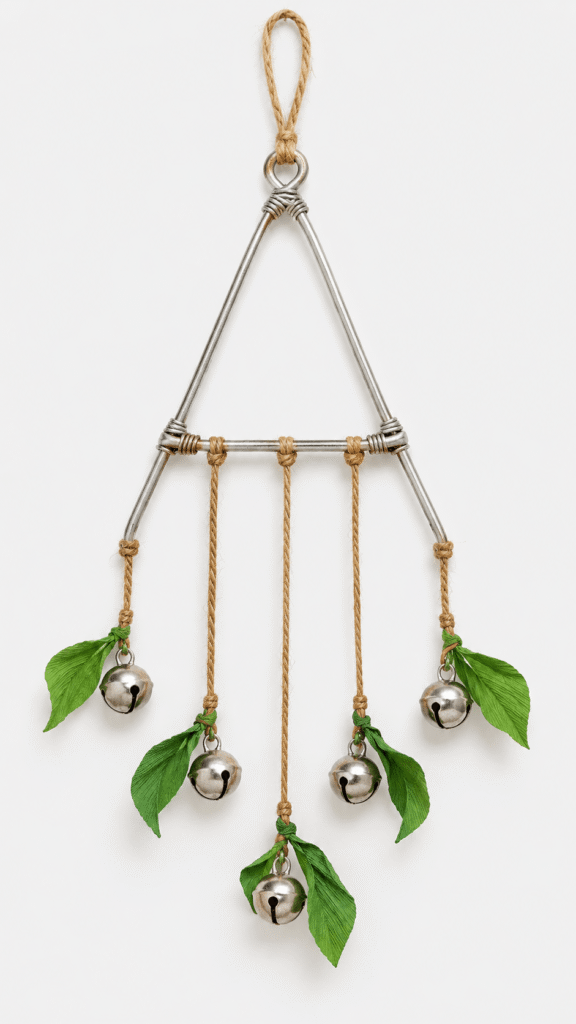
Jingle bells and curly green paper leaves hang from a wire A and jingle with every breeze. Kids make the leaves and tie the bells, and an adult does the wire.
The wire is the hard part. Coat hanger wire is stiff, so bend it over a printed A on the table and use pliers for the corners, then cover the sharp ends with tape. Crepe paper bleeds color when wet, so hang this indoors or under a covered porch.
Ages: 4 to 6 (an adult bends the wire). Mess: Low. Time: 40 minutes. Letter A skill: Seeing the A as a shape in space.
Materials Needed
- Metal wire coat hanger (or heavy craft wire)
- Pliers
- Green crepe paper roll (or green tissue paper)
- Five silver jingle bells, 1/2 inch (or large beads)
- Twine, about 40 inches total (or yarn)
- Scissors and tape
How to Make It
- Adult step: unbend the hanger and reshape it into a capital A with the pliers, then wrap tape over the sharp ends.
- Cut ten 6 inch strips from the crepe paper and twist each into a curly leaf.
- Cut five 6 inch pieces of twine and tie a bell to the end of each.
- Tie the twine strands evenly along the crossbar of the A and tape a leaf near each bell. Add a loop of twine at the top for hanging.
Safety: An adult handles the wire. Bells are small, so hang the chime out of reach of toddlers.
Common Mistakes To Avoid With Letter A Crafts
Even simple preschool apple crafts go sideways in predictable ways. These are the first timer mistakes I see most, and what to do instead.
- Skipping the pre drawn A. For 2 and 3 year olds, draw the letter first and let them fill, trace, or decorate it.
- Planning a 45 minute session. Most 3 year olds are done in 15 to 20 minutes. Set a finish line and save the rest for tomorrow.
- Using tiny parts for kids who mouth things. Beans, buttons, pom poms, and bells need a swap, like paper circles or stickers.
- Using acrylic paint. It stains clothes for good. Stick to washable tempera.
- Skipping a drying spot. Kids carry wet art around the house. Give each child a cookie sheet to park it on.
- Starting with the hardest project. Save the string art, puppets, and wind chime for older kids with an adult nearby.
Practical note: Say the sound, not just the name. The letter is called ay, but the sound in apple is ah. Point to the A and say ah, ah, apple every time your child traces it.
FAQs
What are the easiest apple crafts for preschoolers?
The Apple Slice Sticker Scene, Apple Dot Painting Pages, and Apple Crayon Resist Drawing are the easiest, because they only need stickers, swabs, or crayon and paint. You draw the A, and they do the rest.
How do you teach the letter A with crafts?
Pair each craft with the short A sound and have your child trace a big uppercase A. Keep it to one letter and one craft per session, and say ah, ah, apple as you point.
What age can kids start letter A crafts?
Most kids can enjoy stickers, stamping, and handprints around age 2 to 3. Many are ready to trace a big A around 3 to 4, and writing a neat A on their own usually comes closer to 4 or 5.
What is the safest paint for preschool crafts?
Washable tempera, such as Crayola washable kids paint, is the standard choice. Skip acrylic, which stains clothes for good, and keep all paint away from mouths.
How do you make a sensory bottle safe for kids?
Seal the lid with hot glue or E6000 and wrap duct tape around the cap, and skip sensory bottles for kids under 3. Throw the bottle out if it leaks.
Which letter A activities work best in a classroom?
Low prep apple theme activities like the sticker scene, dot painting, and crayon resist work well as stations. Prep the A and the supplies ahead and rotate groups every 15 minutes.
Where To Start This Week
Pick three and spread them across the week. Choose one quick and dry, like the Apple Slice Sticker Scene, one messy, like the Apple Handprint Painting, and one that gets them moving, like the Apple Ring Toss Game. That gives you letter A crafts for three different moods, and each one has your child finding and saying the A in a different way.
If you’re planning a whole week of preschool apple crafts, the sensory bottle and the playdough make good quiet time add ons. For a class, set up three or four apple crafts for preschoolers as stations and rotate groups every 15 minutes.
The best letter A activities are the ones you repeat, so trace the A, say the sound, and find the letter in a book at the end. Hang the finished pieces together as a little gallery, and it feels like a project instead of a pile of paper.
If the letters are going well, here’s what to try next. If your child loves the apple theme, there’s more in the same spirit Pick one project, write the big A tonight, and let your child do the rest tomorrow. Put it on the fridge, crooked edges and all.
