
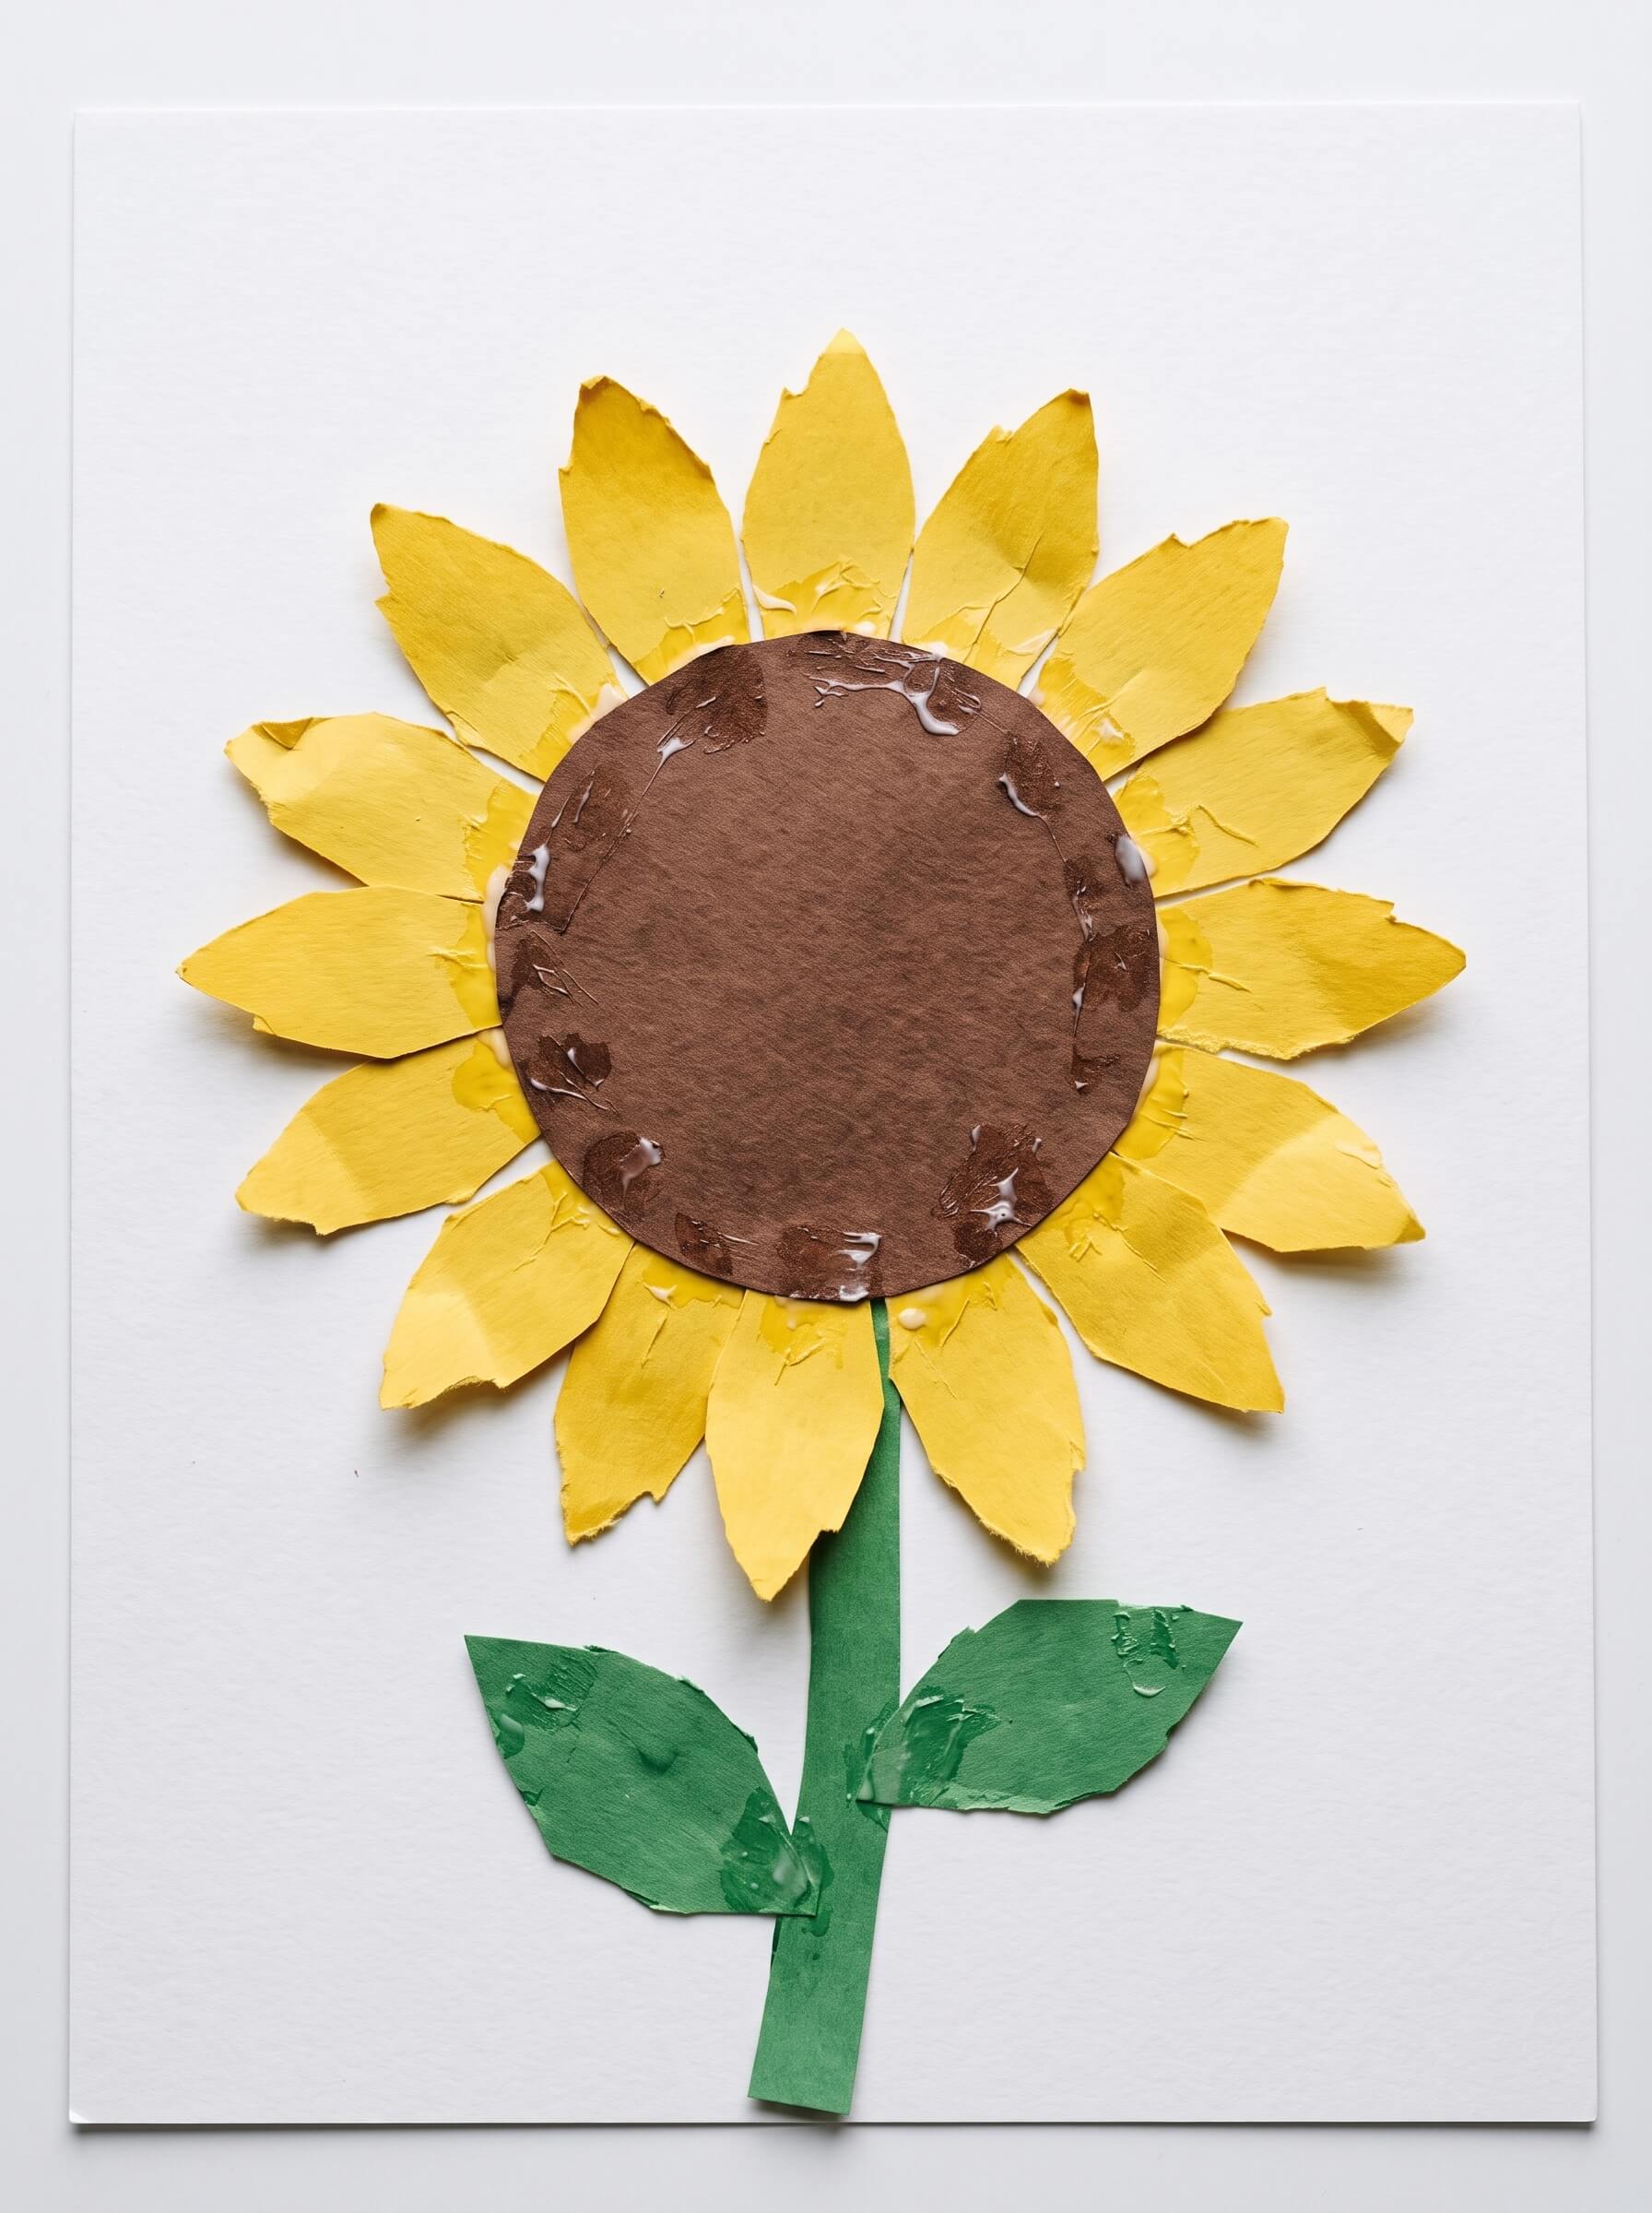
Last July we ran out of yellow. Not low on yellow. Out. Three kids at the table, a stack of paper plates, and one bottle of Crayola washable tempera that a very determined four year old had used mostly on her own forearms. So we finished in orange. The orange ones looked more like real sunflowers than the yellow ones did. Real petals go gold at the base and pale at the tip, and nobody at that table cared either way.
That is most of what I know about crafting sunflowers with kids. The flower is forgiving. Crooked petals still read as a sunflower, which is exactly why it works for small hands. Below are 15 of them, ordered easiest to hardest, with the honest version of each: how long it really takes, how much mess to expect, and the thing that goes wrong on the first try.
Quick answer: The easiest sunflower crafts for kids are the ones with no cutting: yellow fingerprints pressed in a ring, petals stamped with the back of a plastic fork, and a paper plate painted brown for the seed center. Most take 10 to 20 minutes and need only paper, yellow and brown paint, white glue, and a few things out of the recycling bin. Toddlers do best stamping and gluing shapes you cut ahead of time, while kids around 6 and up can manage the coffee filter, bookmark, and suncatcher versions that involve scissors, layering, and drying time.
Pick Your Project: Age, Time, And Mess At A Glance
Mess is rated 1 to 5, where 1 means paper scraps on the floor and 5 means a change of clothes and a wiped down chair. Times are hands-on minutes, not including drying.
| Craft | Best ages | Hands-on time | Mess (1 to 5) | Drying time |
|---|---|---|---|---|
| Fingerprint sunflower | 18 months to 5 | 10 min | 2 | None |
| Fork printed sunflower | 2 to 6 | 10 to 15 min | 3 | 10 min before the stem |
| Cardboard tube stamped | 3 to 7 | 15 min | 4 | 15 min |
| Paper plate sunflower | 3 to 7 | 20 min | 3 | 15 min mid project |
| Tissue paper sunflower | 3 to 7 | 25 to 30 min | 2 | 1 hour |
| Handprint keepsake | 1 to 6 | 15 min | 4 | 20 min |
| Construction paper sunflower | 4 to 8 | 20 min | 1 | None |
| Coffee filter sunflower | 4 to 9 | 15 min | 3 | 30 to 60 min |
| Craft stick sunflower | 4 to 8 | 20 min | 3 | 20 min, plus glue set |
| Sunflower seed art | 4 to 9 (not under 3) | 20 min | 2 | Overnight |
| Real leaf sunflower | 4 to 9 | 20 min plus a walk | 2 | Press leaves overnight first |
| Sunflower life cycle craft | 5 to 9 | 30 min | 1 | None |
| Sunflower bookmark | 6 to 10 | 20 min | 1 | 10 min |
| Sunflower suncatcher | 5 to 10, adult cuts the plate | 25 min | 2 | None |
| Sunflower card or gift | 5 to 10 | 30 min | 2 | 15 min |
Supplies For Sunflower Crafts For Kids (and the free swap for everything)
Gather these once and you can make any project on this list. I have put a free or cheap swap next to everything, because none of this needs a craft store run.
- Yellow and brown washable tempera paint. Crayola washable tempera is the one I keep buying, mostly because it comes off the table with a damp cloth an hour later. Swap: skip paint entirely and color with crayons, or tear petals from junk mail and the yellow pages of a magazine.
- White school glue. Elmer’s School Glue holds seeds and scrunched tissue, which a glue stick will not. Swap: flour paste, roughly equal parts flour and water stirred smooth. Fine for paper and tissue, not strong enough for seeds.
- Construction paper or cardstock. Swap: cereal box card for anything that needs stiffness, and a brown paper grocery bag for flower centers.
- Blunt tip kids’ scissors. Swap: tear the paper instead. Torn petals actually look better than cut ones on the tissue and plate versions.
- Paper plates. Buy the cheap thin uncoated ones. Swap: trace a bowl on cereal box card.
- Coffee filters. Swap: a single ply white paper napkin, opened flat.
- Raw, unsalted, in shell sunflower seeds. Bulk bin at the grocery store, usually under two dollars for more than you need. Swap: dried coffee grounds sprinkled onto wet glue. The texture is close and the smell is a bonus.
- Craft sticks. Swap: washed popsicle sticks, or half inch strips cut from a cereal box.
- Tissue paper. Swap: yellow paper napkins, gift bag stuffing, or crepe streamers left over from a birthday.
- Clear contact paper, sold as shelf liner (Con-Tact is the usual brand, hardware store or the kitchen aisle). Swap: overlapping strips of packing tape laid sticky side up across the opening. Works, sags a little, costs nothing.
- A spray bottle. Swap: a wet paintbrush flicked over the paper, or clean fingers.
Practical note: if you buy one thing off this list, make it the raw seeds. They turn three of these crafts from “a picture of a sunflower” into something with real texture, and kids press them in one at a time with a focus you rarely get from a paintbrush.
Safety And Mess, Honestly
These are kids’ paper crafts, so there is nothing here involving fumes, heat, or blades. The real risks are smaller and easier to miss.
Seeds and kids under 3. Raw seeds are a choking size. I leave them out entirely for toddlers and use coffee grounds or punched paper dots instead. If you do use them with a 3 or 4 year old, stay at the table the whole time rather than stepping away to answer the door.
Sunflower seed allergy is a real thing. Because sunflower butter is the standard nut free swap in so many schools, people assume the seeds themselves are universally safe. They are not. Ask before you bring seeds into a classroom or a group, and have the coffee grounds version ready as a backup.
Paint. Look for the AP seal from the Art and Creative Materials Institute on the bottle, which is the labeling that tells you it has been reviewed as non toxic. “Washable” applies to skin and hard surfaces more than fabric, so brown tempera on a good shirt is a gamble.
Set up before, not after. Old vinyl tablecloth or a flattened cereal box under the work, sleeves pushed up, and a damp cloth already on the table. The mess ratings above assume you did that. Skip it and add a point to every one of them.
Scissors. Kids can cut petals from around age 4 with blunt tips. The one cut I always do myself is the center out of a paper plate for the suncatcher, because you have to pierce the plate first and that step wants adult hands.
15 Sunflower Crafts For Kids, Easiest First
Start at the top with toddlers and work down as they get older. There is no reason to do them in order, and there is no reason to do all 15. Pick one for a rainy afternoon and come back in September when the real sunflowers are drooping and full of seed.
1. Fingerprint Sunflower
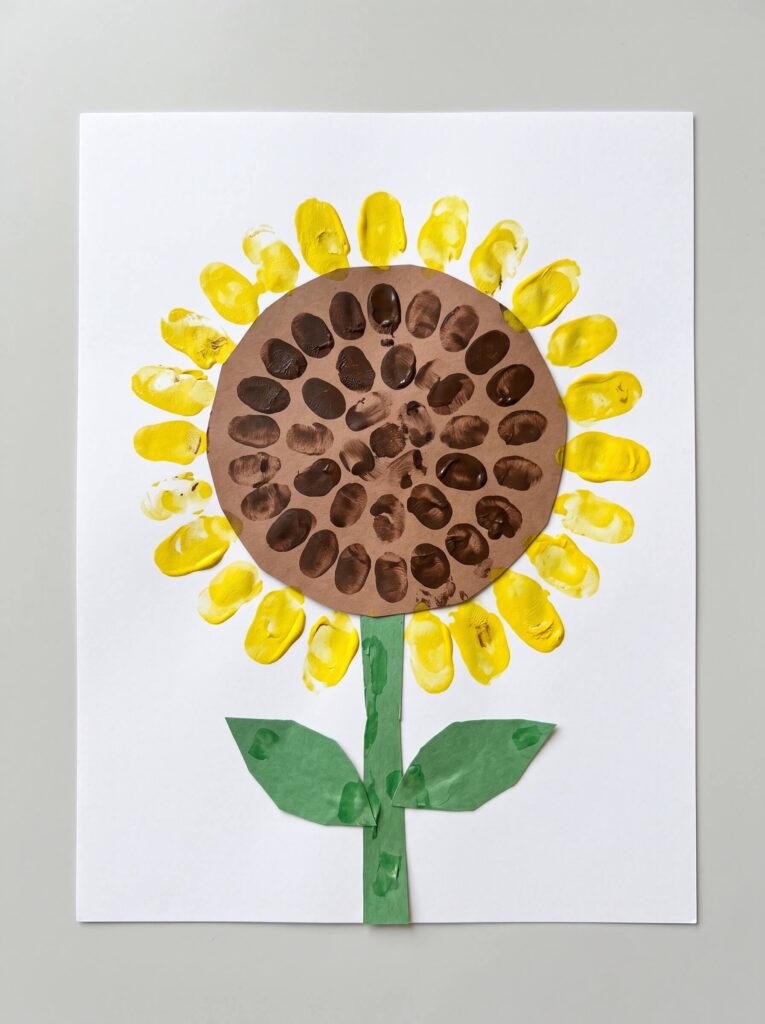
Ages 18 months to 5 | 10 minutes | Mess 2 | No scissors, no drying
The one I reach for when a toddler wants in on whatever the big kids are doing.
- Draw a brown circle about the size of a bottle cap on paper, with a green stem and two leaves.
- Squeeze a thin puddle of yellow paint onto a plastic lid, or use a washable stamp pad.
- Press yellow fingerprints in a ring around the circle for petals.
- Switch to brown and fill the center with fingerprints for the seeds.
- Wipe the finger clean between colors so the yellow stays yellow.
Tip: A washable ink pad gives much crisper petals than paint does. Paint spreads under the pressure of a small hand.
First try snag: Paint dries on the fingertip after three or four presses and the petals start coming out patchy and faint. Re-dip every couple of prints.
2. Fork Printed Sunflower

Ages 2 to 6 | 10 to 15 minutes | Mess 3 | 10 minutes drying before the stem
A plastic fork makes better petals than a brush, and the shape it prints looks properly sunflower-ish rather than daisy-ish.
- Make the center first: dip a bottle cap in brown paint and stamp it, or draw it with marker.
- Pour yellow paint onto a plate, thick, straight from the bottle. Do not water it down.
- Press the back of the fork tines into the paint, then press straight down on the paper next to the center, then lift straight up.
- Work around the circle until the petals meet.
- Once the petals are dry to the touch, add a stem and leaves with a brush.
First try snag: Dragging the fork sideways instead of lifting it straight up, which smears the whole ring into a sunburst. Heavier picnic forks hold their shape under pressure. The flimsy takeout kind flexes and prints a smudge.
3. Cardboard Tube Stamped Sunflower
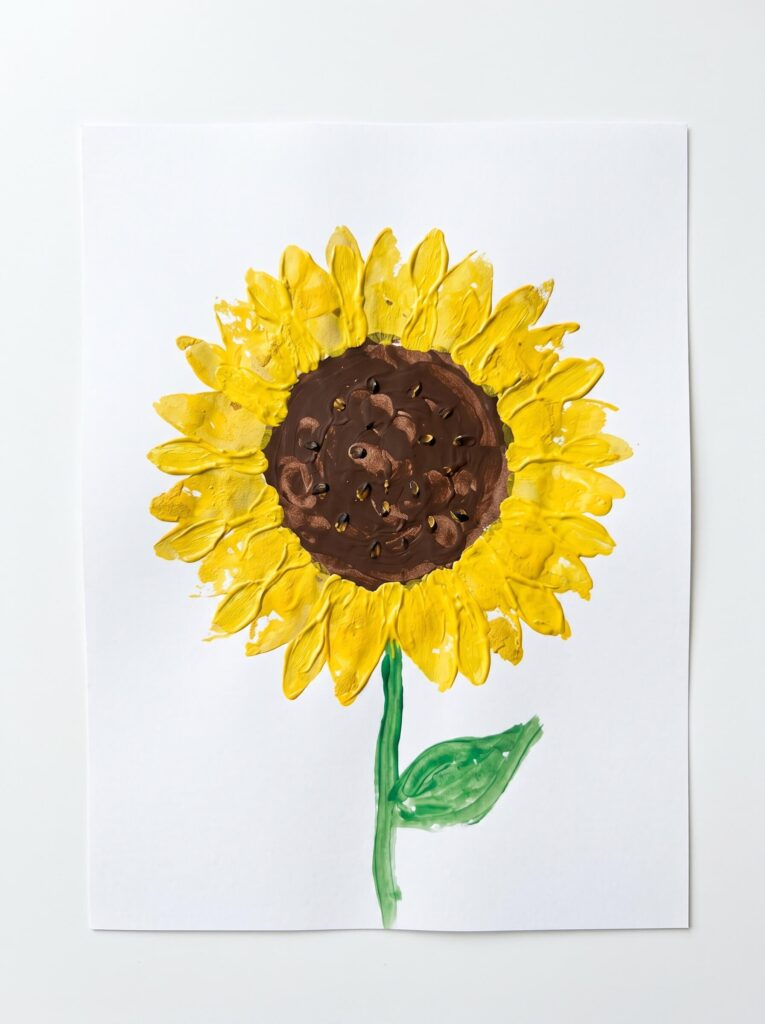
Ages 3 to 7 | 15 minutes | Mess 4 | 15 minutes drying
The best possible use for the cardboard tubes piling up behind the bathroom door.
- Cut an empty tube into rings about an inch wide. One tube gives you four.
- Pinch each ring into a teardrop and hold that pinch with your fingers.
- Dip the pinched end in yellow paint on a plate and stamp it around a circle, petal by petal.
- Fill the center with brown paint, or brown thumbprints, and add a stem.
First try snag: an unpinched ring flexes flat under pressure and prints a fat oval blob instead of a petal. Pinch it and keep holding, or wrap a piece of tape around the pinch to lock the shape.
Mess note: Paint always ends up on the fingers holding the ring. This is a wet cloth project, not a tissue project.
4. Paper Plate Sunflower
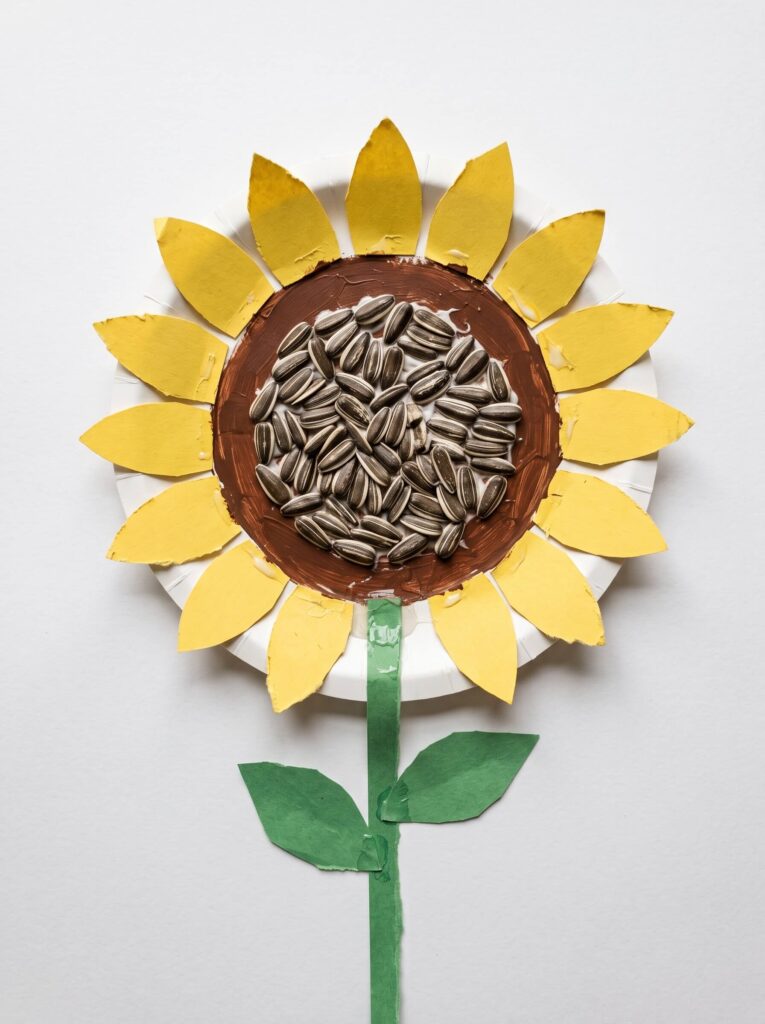
Ages 3 to 7 | 20 minutes | Mess 3 | 15 minutes drying mid project
The classic, and the one worth getting right because everything else on this list borrows from it.
- Paint the flat middle of a paper plate brown. Leave the rim bare. Let it dry 15 minutes.
- While it dries, cut or tear 12 to 16 yellow petals, roughly 2 inches long.
- Glue the petals in a ring on the back of the plate so the ends tuck underneath and the rim hides them.
- Press raw seeds into a fresh layer of glue on the brown center, or dab fingertip dots of darker brown paint.
- Add a green paper strip stem and two leaves.
Tip: Make the brown center bigger than feels right, close to half the width of the whole flower. A small center with long petals reads as a daisy, and that single proportion is the difference between “flower” and “sunflower.”
First try snag: Glossy coated plates. Tempera beads up on the coating, stays tacky for ages, then flakes off in sheets when the plate flexes. The cheap thin uncoated plates soak it up and behave.
5. Tissue Paper Sunflower
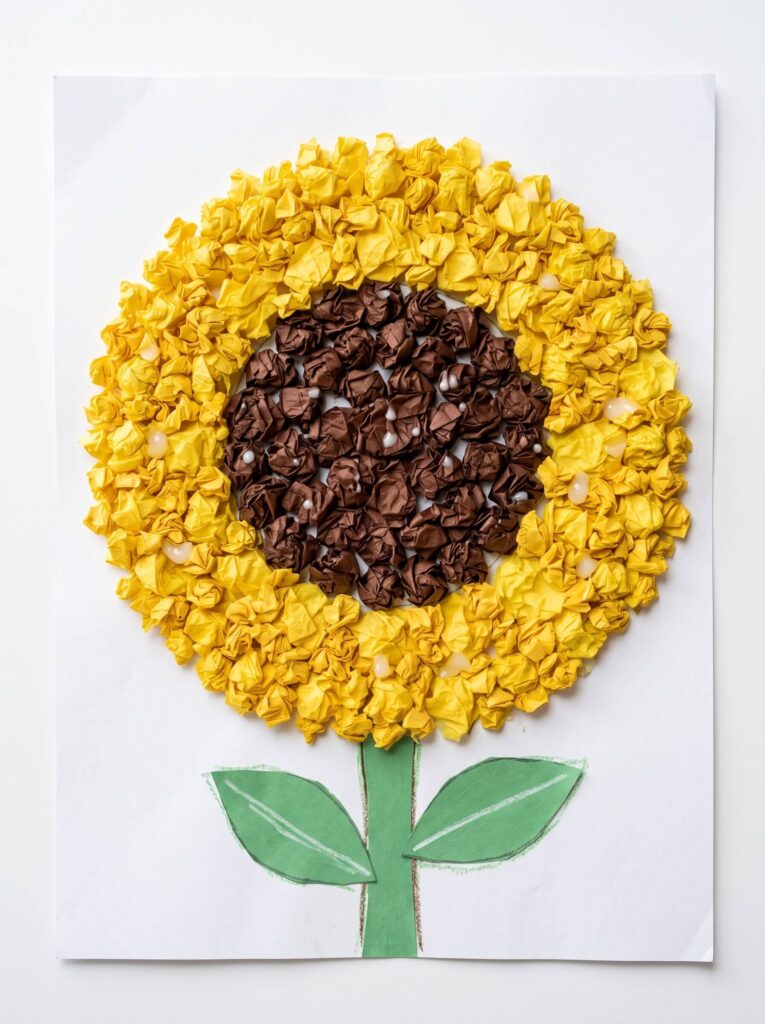
Ages 3 to 7 | 25 to 30 minutes | Mess 2 | 1 hour drying
The quiet one. Scrunching keeps hands busy far longer than any of the painting projects, and the finished texture is worth the time.
- Cut or tear yellow tissue paper into rough 2 inch squares. Forty is plenty.
- Center a square over the eraser end of a pencil and scrunch it up around the pencil.
- Dot white glue onto a drawn sunflower outline, press the scrunch on, hold for two seconds, pull the pencil out.
- Fill the petal ring first, then pack the center with brown scrunches.
First try snag: Using a glue stick. It looks fine while wet and then every single scrunch pops off within a day. White glue dots, and let it dry flat.
6. Handprint Sunflower Keepsake

Ages 1 to 6 | 15 minutes | Mess 4 | 20 minutes drying
The one that ends up in a memory box. Worth the mess once a year.
- Brush yellow paint onto the palm and fingers with a foam brush. Do not dip the hand in a dish.
- Press the hand onto paper at an angle, fingers pointing outward from where the center will go.
- Hold the palm down with your own hand, then press each finger flat one at a time.
- Repeat around a circle, repainting the hand each time. Four to six prints makes a full flower.
- Glue a brown center over the palm prints and write the date and age on the back.
Tip: Brushing the paint on instead of dipping is the whole trick. Dipping puts paint up the wrist and gives you blobby fingers with no definition.
First try snag: Kids curl their fingers the second the hand touches paper. Press finger by finger, and expect the first print to be a write-off.
If your child hates paint on their skin: Trace their hand on yellow paper five times, cut, and glue the cutouts in a ring instead. Same keepsake, no sensory battle.
7. Construction Paper Sunflower
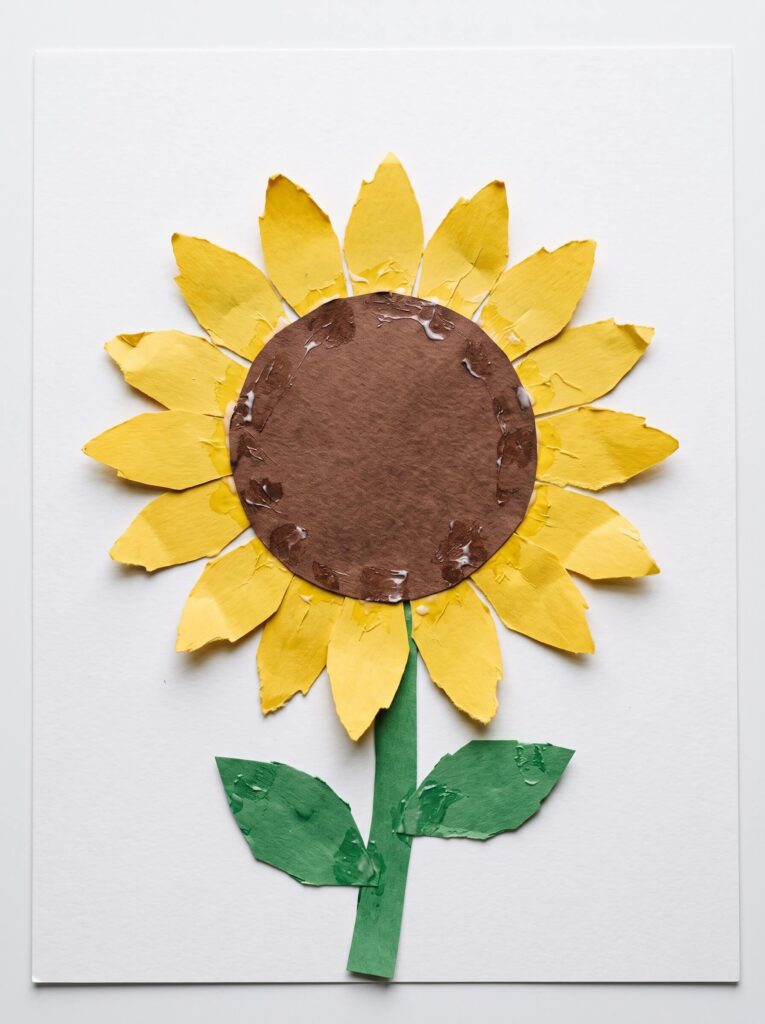
Ages 4 to 8 | 20 minutes | Mess 1 | No drying
The lowest mess project here, and the best one for scissor practice.
- Trace a mug or jar lid on brown paper for the center and cut it out.
- Cut one petal from cereal box card to use as a reusable template.
- Have your child trace the template 12 to 14 times on yellow paper and cut the petals out.
- Pencil a light circle on the background page as a guide, then glue the petals around it, overlapping slightly.
- Glue the brown center over the petal ends. Add a stem and two leaves.
Tip: The cardboard template is the activity for a 5 year old. Tracing and cutting 14 petals is the part they are proud of, so resist doing it for them.
First try snag: Petals glued pointing inward, or crammed edge to edge with no overlap. The pencil guide circle solves both.
8. Coffee Filter Sunflower

Ages 4 to 9 | 15 minutes | Mess 3 | 30 to 60 minutes drying
Half craft, half science experiment. This is the one my kids ask to do twice.
- Flatten a coffee filter on a plate or tray.
- Color it heavily with washable markers, yellow through the middle and orange around the outer edge.
- Spritz with water, three or four pumps only, and watch the colors bleed and blend.
- Let it dry flat on a cooling rack, then pinch the middle and glue on a small brown circle.
- Add a stem, or staple it to a craft stick.
Tip: Dry it on a wire rack rather than a paper towel. A wet filter grabs towel fibers and takes the fuzz with it when you lift it off.
First try snag: Two mistakes here, and both are common. Permanent markers will not bleed at all, so it has to be water based washable ones. And soaking it instead of spritzing turns the filter translucent and it tears the moment you pick it up.
9. Craft Stick Sunflower

Ages 4 to 8 | 20 minutes | Mess 3 | 20 minutes drying plus glue set
For the kid who would rather build something than color it.
- Paint 8 to 10 craft sticks yellow on both sides and lay them flat to dry.
- Cut a 2 inch brown circle from cardstock or a cereal box.
- Glue one end of each stick to the back of the circle like spokes on a wheel.
- Press the whole thing under a book for 10 minutes while the glue grabs.
- Glue a longer green stick or a paper strip on for the stem.
First try snag: Painted craft sticks bow as they dry, and a bowed stick will not sit flat against the center. Dry them under a sheet of wax paper with a book on top and they stay straight.
Save this one for later. If you are the person who bookmarks a craft in July and actually opens it in September, pin this now, because that is exactly when the seed and leaf projects below come into their own.
10. Sunflower Seed Art
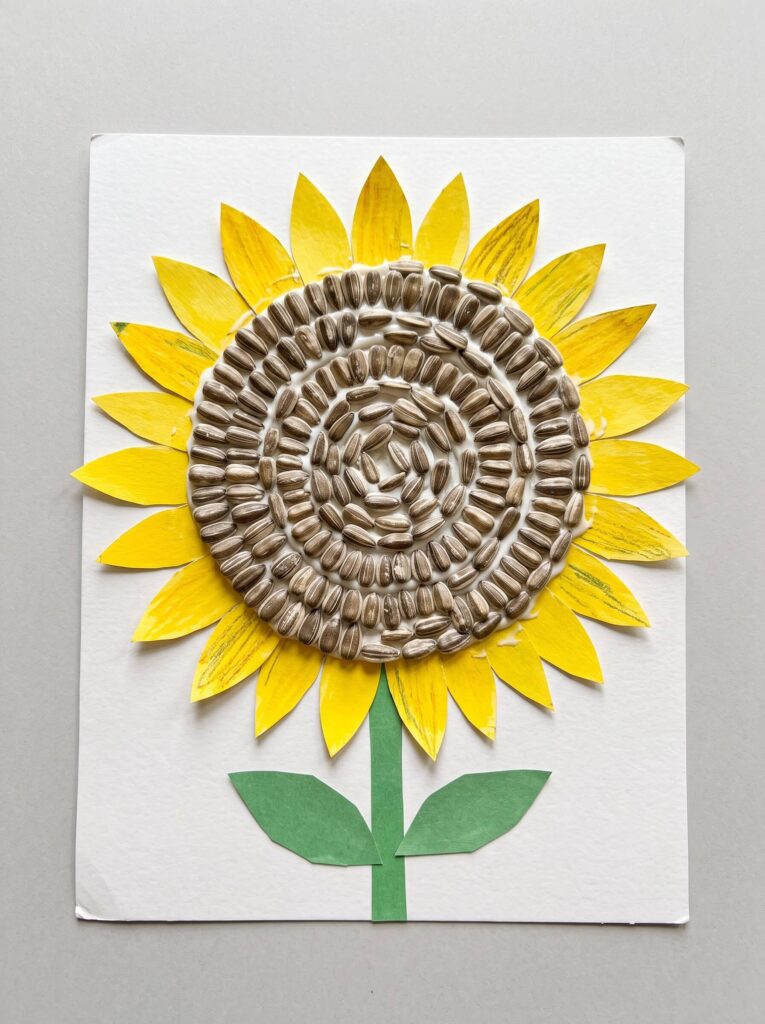
Ages 4 to 9, not under 3 | 20 minutes | Mess 2 | Dries overnight
Real seeds, real texture. Do it after a snack, or after cutting open a spent flower head if you grew any this year.
- Draw a simple sunflower outline on cardstock, not thin paper. Seeds are heavy.
- Brush a thick puddle of white glue over the center. Thicker than feels sensible.
- Press seeds in one at a time, working from the outer edge inward in a spiral, the way they actually grow.
- Add painted or paper petals around the outside.
- Leave it flat overnight before standing it up or hanging it.
Tip: Raw, unsalted, in shell seeds only. Roasted and salted ones leach oil and leave brown rings around every seed after a few weeks on the paper.
First try snag: A thin glue layer. The seeds feel stuck, then half of them shed the first time the paper bends. Puddle the glue and let it be gloopy.
11. Real Leaf Sunflower

Ages 4 to 9 | 20 minutes plus a walk | Mess 2 | Press leaves overnight first
This one starts outside, which is half the appeal.
- On a walk, collect 10 to 14 leaves of roughly the same size. Elm, birch, and small maple leaves make the best petals.
- Press them overnight between two paper towels under a stack of books.
- Arrange the pressed leaves in a ring, stems pointing in, and glue them down with plenty of white glue.
- Glue a brown paper circle over the leaf stems and press seeds into the center.
First try snag: Skipping the pressing step. Fresh leaves curl as they dry out and lift clean off the glue within about two days. One night under books is all it takes.
Right now, in early fall 2026, This is the best version of the project on the list. Leaves are turning, the sunflowers are going over, and you can build the whole thing from a single walk around the block.
12. Sunflower Life Cycle Craft

Ages 5 to 9 | 30 minutes | Mess 1 | No drying
The one that earns its place in a homeschool or classroom morning.
- Fold a sheet of paper into four sections, or draw four circles, and number them.
- Section one: glue on a real sunflower seed.
- Section two: a sprout with two rounded seed leaves and a thin root going down.
- Section three: a tall stalk with big leaves and a closed green bud.
- Section four: the open bloom. Add a fifth section for the heavy brown seed head if you have room.
- Let older kids label each stage themselves.
Here is the bit that makes the conversation stick. Young sunflower plants really do follow the sun, tracking it east to west across the day and swinging back overnight to face east again before dawn. Once the flower opens fully, though, the head mostly stops moving and settles facing east for good. So if a child tells you sunflowers follow the sun all their lives, they are half right, and a field of mature blooms all staring the same direction is the proof.
First try snag: Kids draw four blooms in four sizes instead of four different stages. Sketch the boxes and talk through what happens in each one before anyone picks up a pencil.
13. Sunflower Bookmark
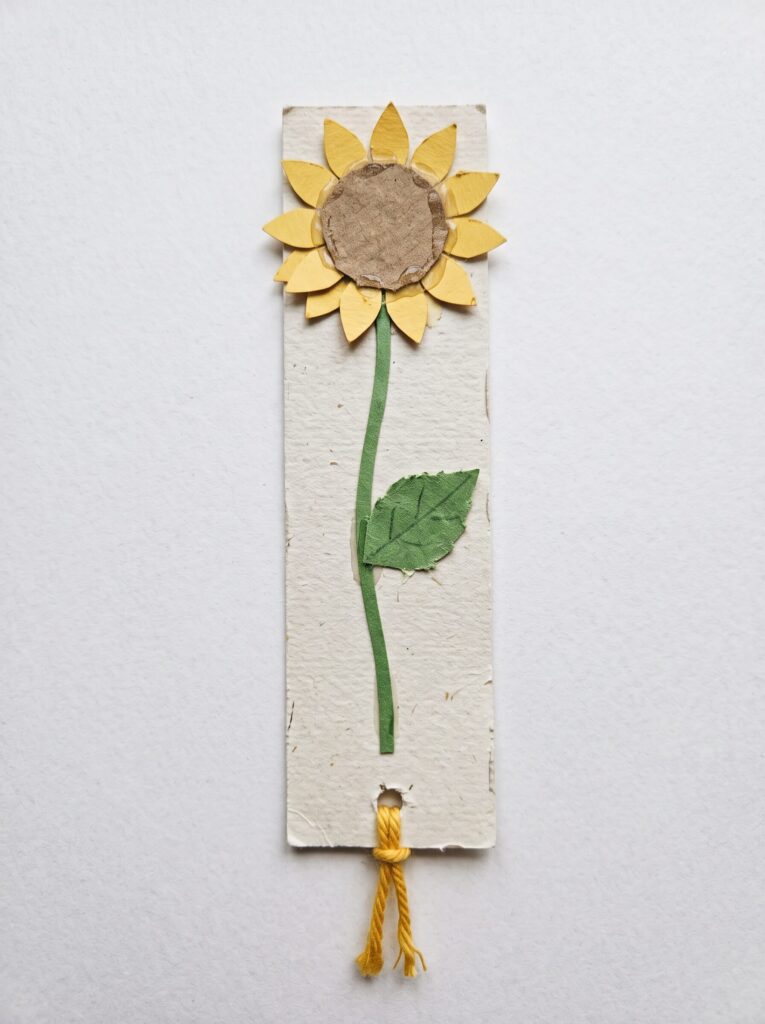
Ages 6 to 10 | 20 minutes | Mess 1 | 10 minutes drying
A craft that gets used all winter, which not many paper crafts manage.
- Cut a strip of cardstock about 2 by 7 inches.
- Cut a 1 inch brown circle and 8 to 10 small teardrop petals.
- Glue the sunflower at the top of the strip, keeping the petals inside the width of the strip.
- Draw or glue a green stem running down the length, with a leaf halfway.
- Punch a hole at the bottom and tie a short piece of yarn.
Tip: Cover both sides with clear packing tape, or run it through a laminator if you have one. A bare cardstock bookmark lasts about a week in a school bag.
First try snag: Petals that stick out past the edges of the strip. They get bent and torn the first time the book closes. Keep the flower narrower than the bookmark.
14. Sunflower Suncatcher

Ages 5 to 10, adult cuts the plate | 25 minutes | Mess 2 | No drying
The showpiece. Save it for a day when you have a bit more patience than usual.
- Adult job: cut the center out of a paper plate, leaving a rim about an inch wide.
- Cut a piece of clear contact paper an inch larger than the opening. Tape it across the back of the rim, sticky side facing up through the hole, pulled taut.
- Tear yellow and orange tissue into pieces and press them onto the sticky sheet, overlapping as you go.
- Seal it with a second piece of contact paper over the top if you want it dust proof.
- Glue or staple petals around the rim, and tape it to a window that gets direct sun.
Tip: Two overlapping layers of tissue is what makes it glow. A single layer looks pale and washed out from inside the room, which is the only side anybody actually looks at it from.
First try snag: Kids plant a whole flat palm on the exposed sticky sheet within about four seconds. It kills the tack instantly and nothing sticks there afterward. Keep a scrap of paper laid over the part you are not filling yet.
Fair warning: Tissue in a bright south facing window fades noticeably in a few weeks. It is paper in the sun, so treat it as a summer thing rather than a permanent one.
15. Sunflower Card Or Gift

Ages 5 to 10 | 30 minutes | Mess 2 | 15 minutes drying
Any flower on this list becomes a gift with one extra step. This works for Mother’s Day, Father’s Day, teacher thank yous, and grandparents.
- Fold cardstock in half for the card base.
- Make a small version of any sunflower above on the front, whichever medium your child liked best.
- Write the message on the brown center circle before gluing it down. “You are my sunshine” fits neatly on a 2 inch circle.
- Glue the flower on, then sign and date the inside.
First try snag: Writing on the center after it is glued down. Kids run out of room, press hard, and dent the card. Write it flat on the table first, every time.
Practical note: A sunflower is one of the better gift flowers for a kid to make, because it stays recognizable even when the execution is rough. A wonky rose looks like a mistake. A wonky sunflower looks like a sunflower.
Why Sunflowers Work So Sell For Little Hands
A sunflower is a circle with a ring of marks around it. That is the entire drawing, and a three year old can already do it, which is why sunflowers show up in kids’ art long before anyone teaches them how flowers are built.
They also forgive mistakes better than almost any other flower. Petals are supposed to be uneven lengths, the center is supposed to look lumpy and textured, and real ones lean and droop. Every accident lands inside the range of “yes, that’s a sunflower.”
And there is a real conversation sitting inside the craft. Mammoth varieties grow 9 to 12 feet tall, so a child can plant something in May that ends up taller than their dad by August. Add the sun tracking behavior from project 12 and you have the kind of fact kids repeat to other people, which is how you know it landed.
What Goes Wrong The First Time
Six specific things, all of which I have done.
- Watering the paint down. Thin paint spreads under the fork or the tube stamp and every petal blurs into the next one. Use it straight from the bottle for anything stamped.
- Making the center too small. This is the single biggest reason a kid’s sunflower comes out looking like a daisy. Aim for the brown center to be about a third to a half of the flower’s total width.
- Reaching for the glue stick. It will not hold scrunched tissue, seeds, pressed leaves, or craft sticks. White glue for anything with weight or bulk.
- Using shiny paper plates. The paint beads, stays sticky, then flakes. Cheap uncoated plates only.
- Prepping too much, or too little. Cut everything yourself and a 6 year old is left with nothing to do but glue, which they find boring within four minutes. Cut nothing and a 4 year old is defeated before the flower exists. Prep the fiddly shapes, leave the repetitive ones.
- Stacking wet crafts. Tempera looks dry in 10 minutes and is still soft underneath. Two paper plate sunflowers stacked to “keep them safe” will bond to each other overnight.
FAQs
What age are sunflower crafts good for?
Most of these suit ages 2 through 9. Fingerprint, fork printed, and handprint sunflowers work from about 18 months with an adult sitting alongside, while the coffee filter, bookmark, and suncatcher versions are better from 5 or 6 up because they involve scissors, layering, and waiting for things to dry.
What supplies do I need for sunflower crafts for kids?
Yellow and brown paint or paper, white school glue, blunt tip scissors, and a paper plate cover nearly everything on this list. A coffee filter, a cardboard tube, a plastic fork, and a handful of raw sunflower seeds add four more projects for almost nothing.
How long do sunflower crafts take?
Plan on 10 to 30 minutes of hands-on time per project. Anything painted needs another 15 to 60 minutes of drying before you can add a stem or hang it up, and seed art is best left flat overnight.
Can you use real sunflower seeds in kids’ crafts?
Yes, and raw unsalted in shell seeds are the ones to use. Salted or roasted seeds slowly release oil that leaves brown rings on the paper. Keep seeds away from children under 3, and check for sunflower seed allergies before using them with a group.
How do you make a paper plate sunflower?
Paint the flat center of a cheap uncoated paper plate brown and let it dry, then glue 12 to 16 yellow paper petals around the back of the rim so the ends are hidden. Press raw sunflower seeds into a layer of glue on the brown center and add a green paper stem. Total time is about 20 minutes plus drying.
Which sunflower crafts work best for a classroom or big group?
The construction paper, fingerprint, and fork printed sunflowers scale best, because they need no drying breaks and no adult cutting mid activity. Prep petal templates and pre-cut centers the night before, put paint in shared lids rather than one bottle per table, and save the suncatcher for a small group where you can cut the plates yourself.