
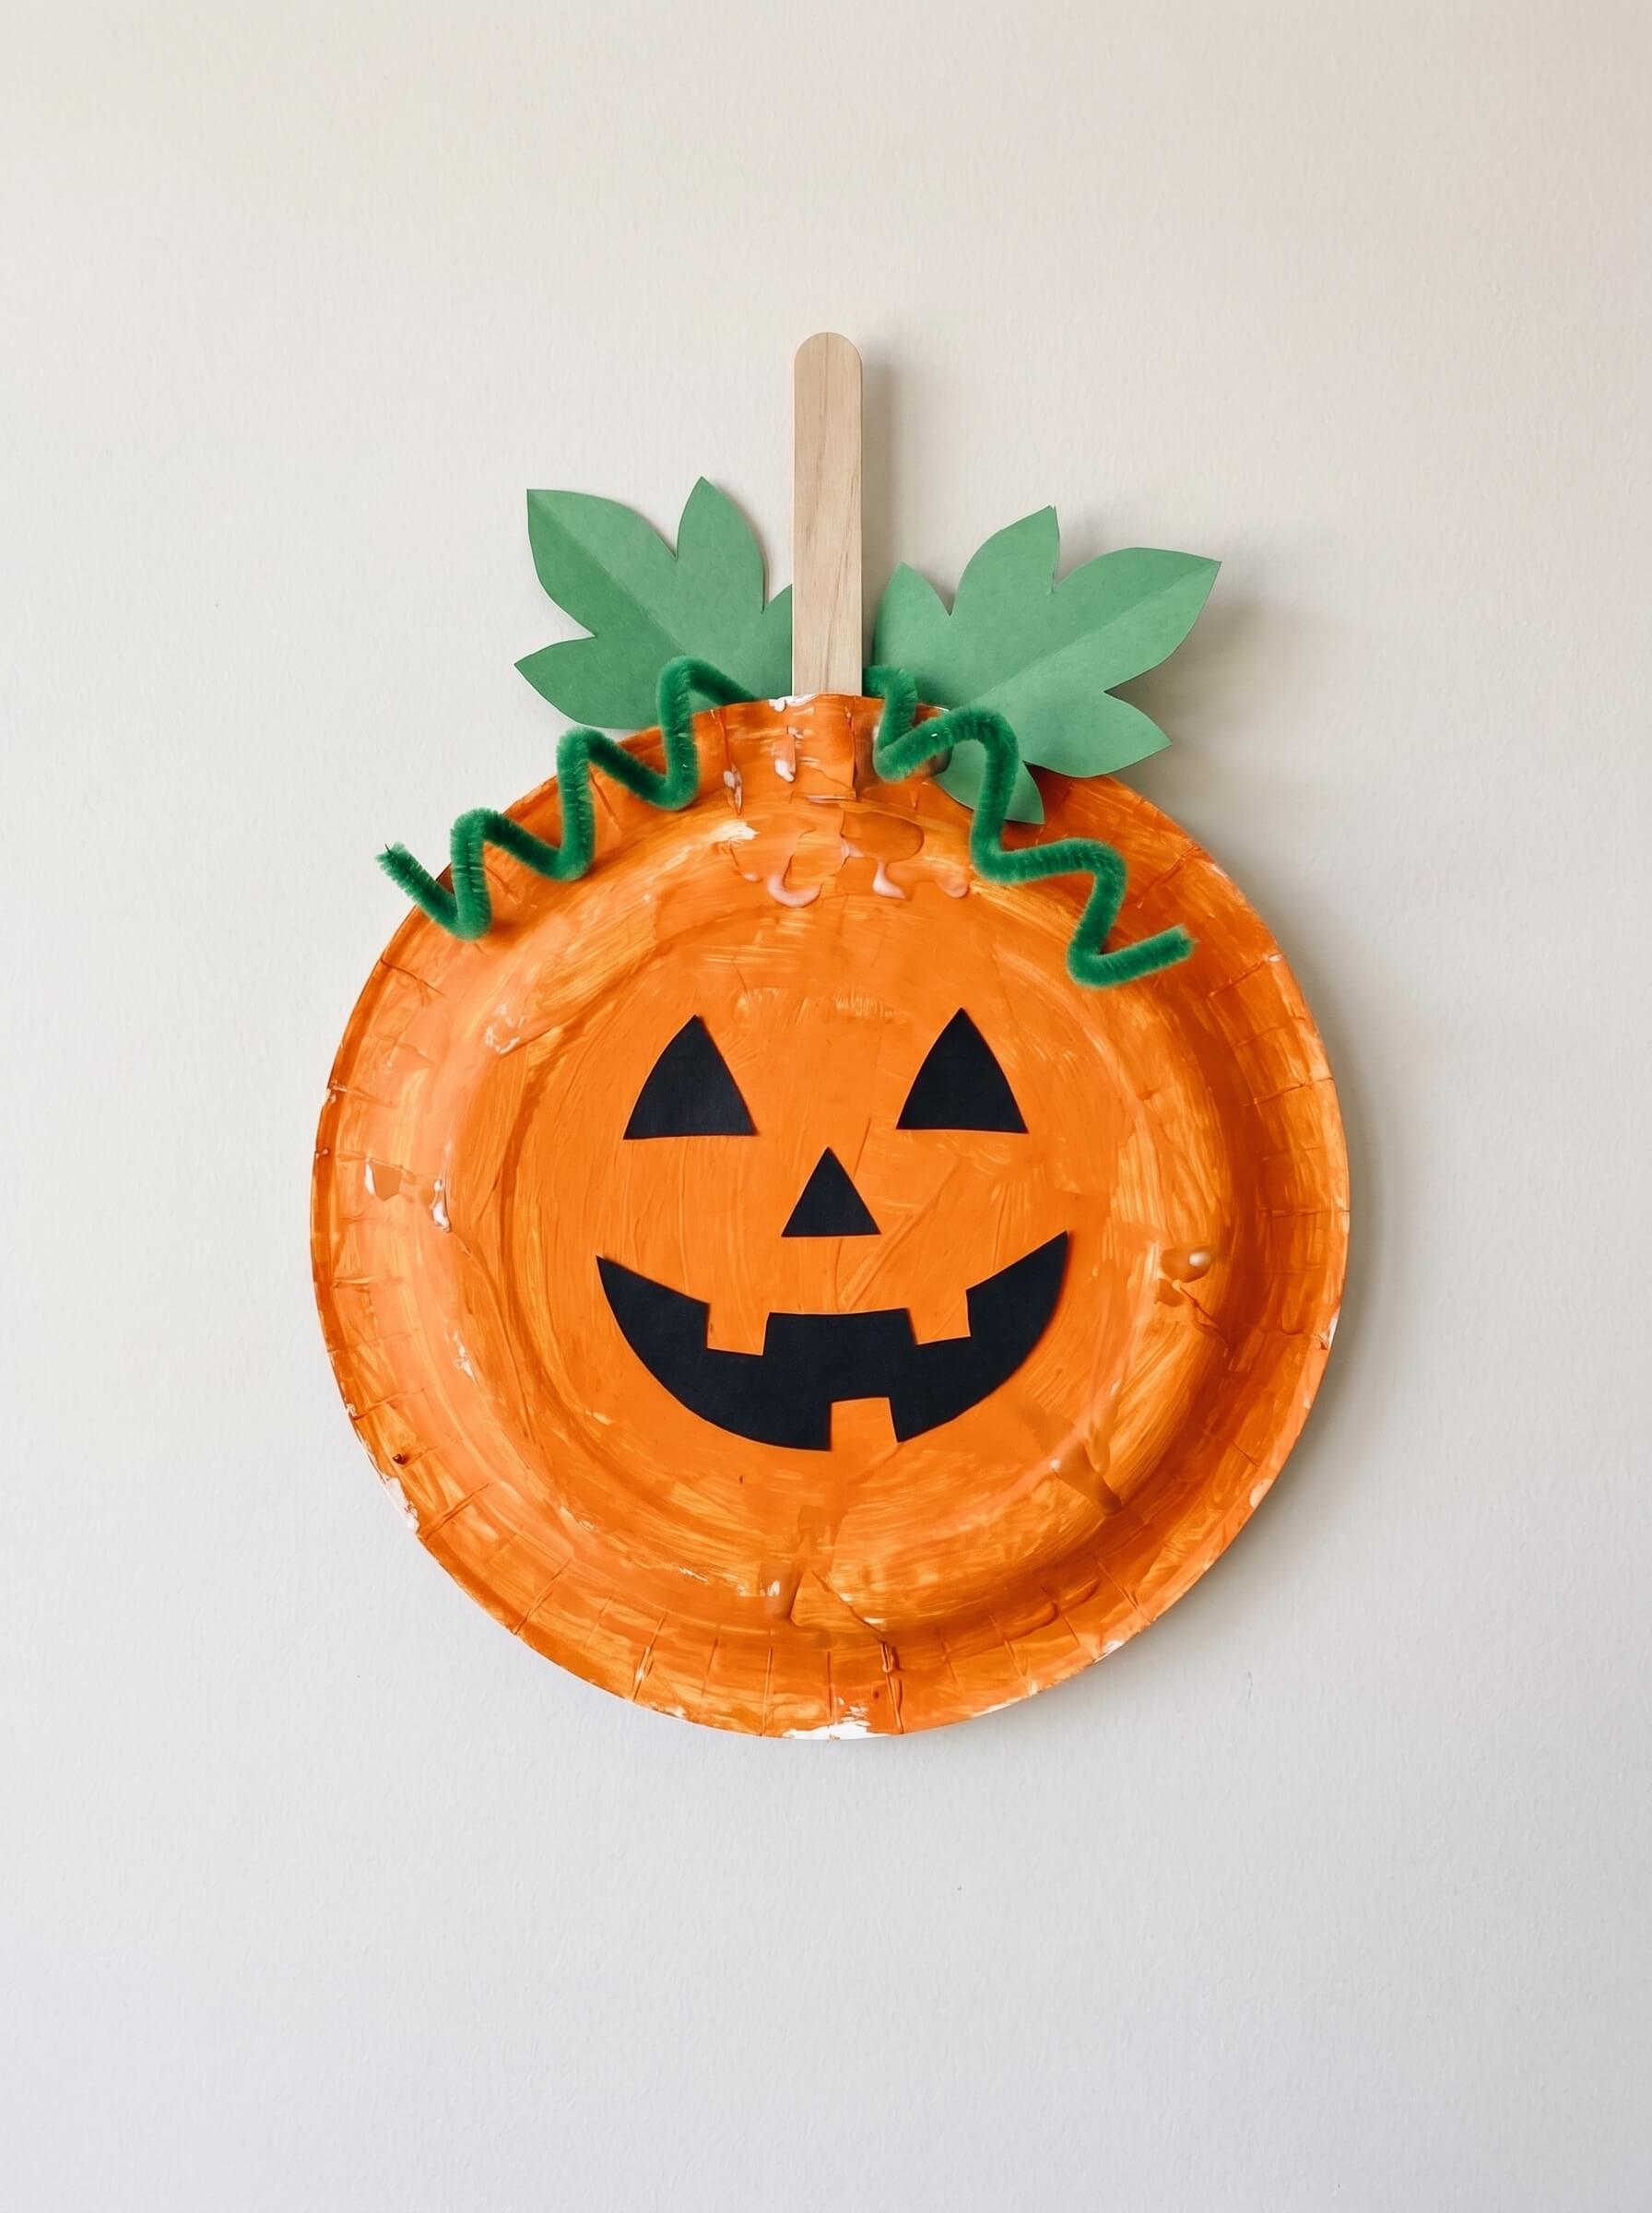
The easiest Halloween pumpkin crafts skip carving completely and use a base that will not rot: paper, felt, glass jars, wood offcuts, pinecones or a faux pumpkin from a craft shop. Paper plate and handprint pumpkins take about 15 minutes and work from around age 3, while yarn wrapped pumpkins, felt garlands and painted jar lanterns take 30 to 60 minutes and suit older children or adults. A pumpkin wreath or pumpkin gnome is the big one, roughly two hours with a hot glue gun, and it is the only group here that really needs adult hands throughout.
Why I Stopped Carving
There is a specific moment every October when the carved pumpkin on the front step gives up. You go to move it, the sides feel like a wet sponge, and the bottom stays behind on the doorstep. If you carve early in the month you get maybe five days of good looks and then a fortnight of slow collapse.
So the display in this house is now mostly fake, and honestly it looks better. Faux pumpkins get boxed up in November and come back out the next autumn. Paper ones cost nothing. Jars I already had.
Below are 20 Halloween pumpkin crafts, plus one bonus that costs nothing, sorted by what they actually ask of you: time, skill, mess, and whether you need a glue gun. Real pumpkins get a mention too, because painting one is a different beast from carving it, and it lasts far longer.
Quick Pick: Which Halloween Pumpkin Craft Suits Your Time And Skill
Skim this, pick one, then jump to the instructions. Times assume you have the supplies already and are making one item, not a set of six.
| Project | Skill | Active time | Mess | Best for | Glue gun needed |
|---|---|---|---|---|---|
| Paper cup pumpkin | Very easy | 10 to 15 min | Low | Age 3+ | No |
| Paper plate pumpkin | Very easy | 15 min | Medium if painting | Age 3+ | No |
| Handprint pumpkin keepsake | Very easy | 15 min plus drying | High | Age 1+ | No |
| Lolly stick pumpkin face | Very easy | 20 min plus glue drying | Low | Age 4+ | No |
| Jar lantern with paper face | Very easy | 20 min | Low | Age 5+ | No |
| Book page pumpkin | Easy | 30 min | Low | Age 7+ | Optional |
| Folded paper jack-o’-lantern | Easy | 30 min | Low | Age 6+ | No |
| Air-dry clay pumpkin face | Easy | 20 min plus 24 to 48 hr drying | Medium | Age 5+ | No |
| Painted mini pumpkin faces | Easy | 30 min plus drying | Medium | Age 4+ | No |
| Painted jar pumpkin lantern | Easy | 30 min plus drying | Medium | Age 7+ | No |
| Wood block pumpkin | Easy | 45 min plus drying | Medium | Age 5+ with help | Yes for the leaf |
| Button pumpkin wall art | Easy | 45 min | Low | Age 6+ | No, glue dots |
| Paper pumpkin garland | Easy | 45 min for six | Low | Age 6+ | No |
| Twine wrapped pumpkin | Easy but fiddly | 20 to 30 min | Low | Teens and adults | Yes |
| Yarn wrapped pumpkin | Easy but slow | 40 min | Low | Age 7+ | Yes, sparingly |
| Pinecone pumpkin centrepiece | Intermediate | 1 hr plus drying | Medium to high | Adult led, kids assist | Yes |
| Felt pumpkin garland | Intermediate, hand sewing | 1.5 to 2 hr for five | Low | Age 9+ or adult | No |
| Felt pumpkin coasters | Intermediate, stitching | 30 min each | Low | Age 10+ or adult | No |
| Pumpkin flower bouquet | Intermediate | 45 min | Medium | Adult, craft knife | Yes |
| Pumpkin wreath with bows | Intermediate | 1.5 to 2 hr | Low | Adult | Yes |
| Pumpkin gnome | Advanced-ish, fiddly | 2 hr | Low | Adult | Yes |
That is 21 rows for 20 projects, because the jar lantern comes in two versions that behave completely differently (painted glass and a paper face), and I have thrown in a book page pumpkin for anyone who does not want to buy a single thing.
Practical note: If you are making these with a group of children, the only projects that reliably finish inside one sitting are the paper and lolly stick ones. Anything with paint or air-dry clay needs a second session, so plan the drying gap into your afternoon rather than fighting it.
Paper And Card Halloween Pumpkin Crafts Kids Can Do Alone
These are the cheapest projects here and the ones you can set up in two minutes. Everything in this group is scissors and glue, no heat, so you can sit down with a cup of tea nearby instead of hovering.
1. Paper Cup Pumpkin
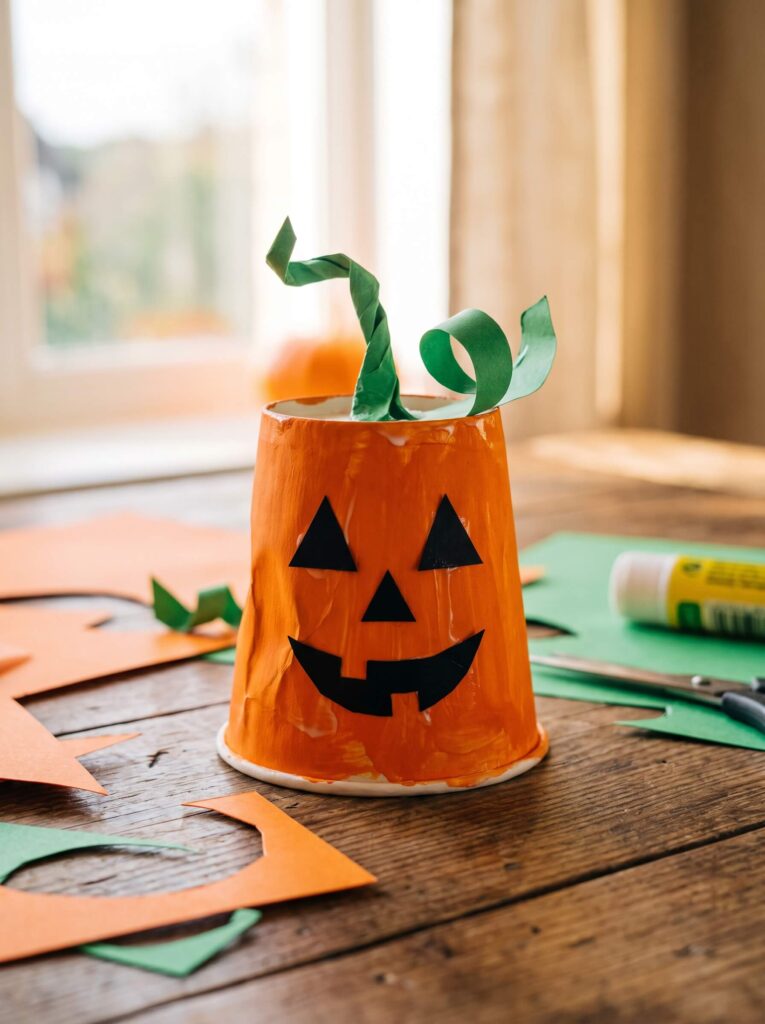
The one to start with if you have a wriggly three year old and fifteen minutes before tea.
You need: An orange paper cup or a cardboard tube, black paper, green paper, glue stick, scissors.
Cheaper option: A plain white cup coloured in with a fat orange marker, or the inner tube from a roll of kitchen roll. A toilet roll tube works and nobody can tell in a photo.
- If the cup is not already orange, wrap it in orange paper and glue the seam at the back.
- Cut two triangles for eyes, a small triangle nose and a mouth from black paper.
- Glue the face on, sitting it slightly high on the cup so it does not vanish when the cup is viewed from above.
- Roll a green strip into a tube for the stem, glue it inside the rim, then add a leaf.
Tip: Cut the triangles bigger than feels right. Small features read as a smudge from across the room, and children find big shapes much easier to place.
What goes wrong: Glue sticks barely hold paper to a waxy cup. If it keeps lifting, switch to PVA glue or a couple of glue dots.
2. Paper Plate Pumpkin
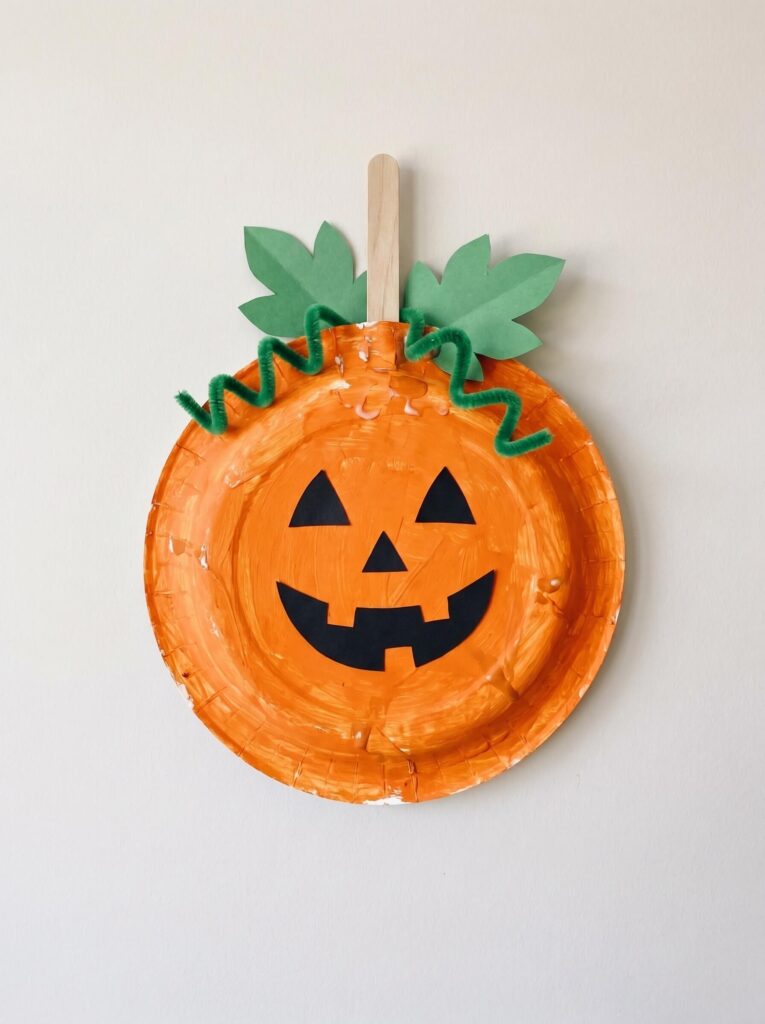
A wall or window filler. Good for classrooms and childminder groups because you can make twelve for the price of a packet of plates.
You need: A paper plate, orange paint or a thick orange marker, black and green paper, a lolly stick for the stem, a green pipe cleaner, glue, scissors.
Cheaper option: Skip the paint entirely and use an orange paper plate, or cut a circle from a cereal box and colour it. The stem can be a strip of brown paper rolled tight.
- Paint the plate orange, both the flat centre and the rim, and leave it to dry properly. Rushed plates go bumpy.
- Cut the face shapes from black paper and glue them on.
- Glue the lolly stick stem behind the top edge, add two green leaves either side.
- Wind the pipe cleaner around a pencil to make a curl, then glue it next to the stem.
Tip: Paint the plates the day before. Wet paint plus paper equals a warped plate, and the warp never fully flattens out.
What goes wrong: Heavy poster paint on a thin plate makes it cup inwards as it dries. Weigh it down under a book while it dries and the problem disappears.
3. Handprint Pumpkin Keepsake
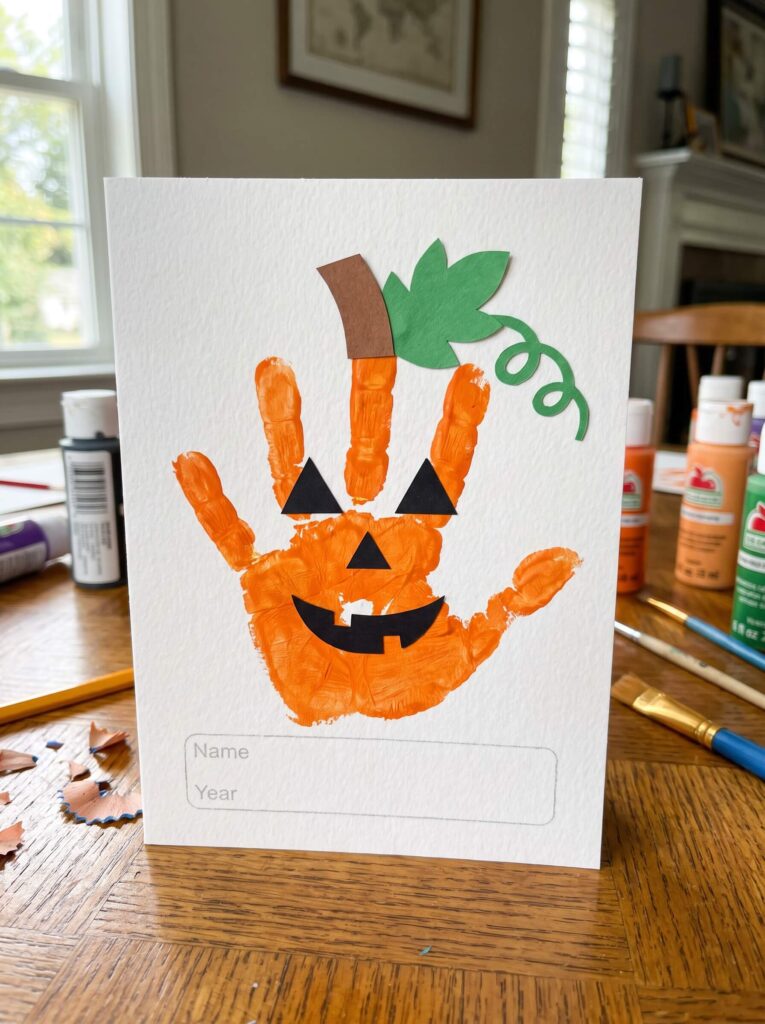
This is the one people actually keep. The pumpkin body is a handprint, so it dates itself.
You need: White cardstock, orange washable paint, green paper or felt, brown paper, black paper, glue, fine black marker.
Cheaper option: The inside of a cereal box painted white, or plain printer paper glued onto card for stiffness. Washable poster paint from a supermarket does the job.
- Brush orange paint onto the palm and all five fingers. Brushing beats dipping, you get a much cleaner print.
- Press the hand down firmly onto the card, fingers together and pointing up, then lift straight off without dragging.
- Once dry, add a short brown stem, two green leaves and a curled vine at the top.
- Glue on black triangle eyes, a nose and a smile, then write the name and the year underneath.
Tip: Do a practice print on scrap paper first. The first print is always too wet and the second is nearly always the good one.
What goes wrong: Fingers spread while pressing down and you end up with a starfish rather than a pumpkin. Hold the child’s fingers together yourself as they press.
[IMAGE: close-up of a finished handprint pumpkin where you can see the skin texture and the slightly patchy paint where the palm did not press evenly. That patchiness is the proof it is a real print and not a printable.]
4. Lolly Stick Pumpkin Face
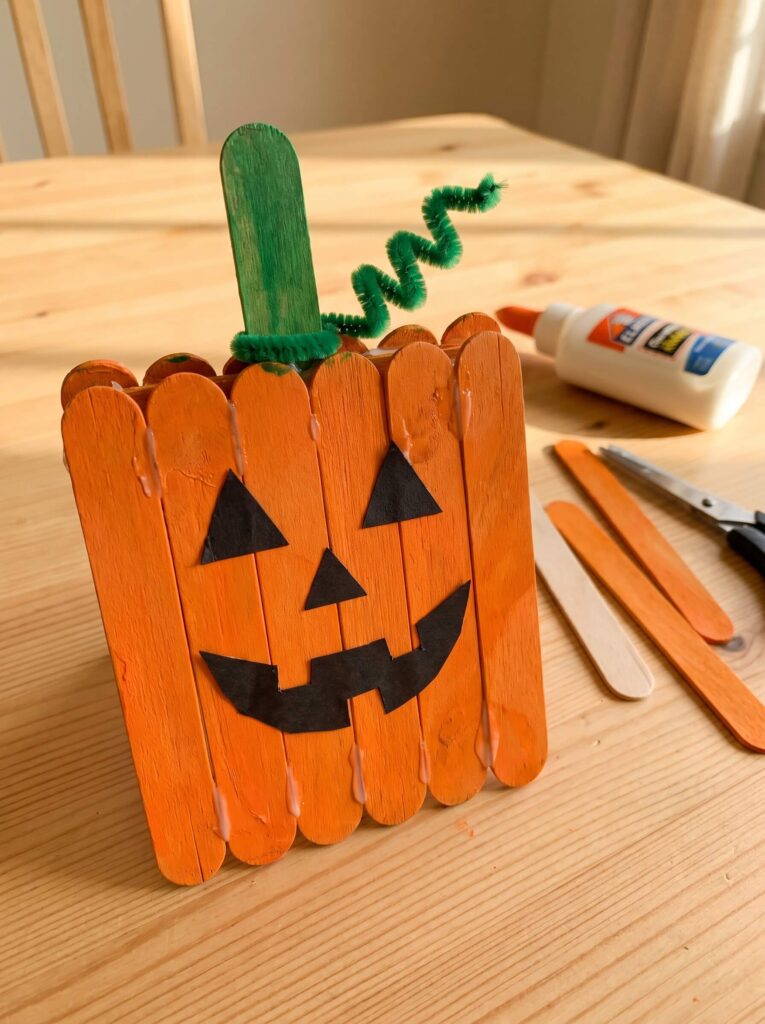
Sturdier than paper, so it survives being blu-tacked to a wall and taken down again.
You need: Eight orange craft sticks (lolly sticks), one green stick, a green pipe cleaner, black craft foam or paper, PVA or a glue stick.
Cheaper option: Buy plain natural sticks and paint them orange, which costs a fraction of pre-coloured packs. Washed and dried ice lolly sticks from the freezer work fine and children enjoy the collecting.
- Lay the eight orange sticks side by side, edges touching, and check the block looks square before gluing.
- Glue two short offcuts horizontally across the back to hold everything together. Do not skip this, glue between the edges alone will snap.
- Glue the green stick across the top for the stem, or upright behind it if you prefer a tall stem.
- Twist the pipe cleaner around a pencil for a vine, then glue on the black face shapes.
Tip: Glue the back braces on, then leave it flat under a book for an hour. Standing it up early is how you end up with a fan shape.
What goes wrong: Painting the sticks after assembly. Paint seeps between them, glues them together unevenly and the whole thing warps. Paint first, dry flat, then build.
5. Folded Paper Jack-o’-lantern
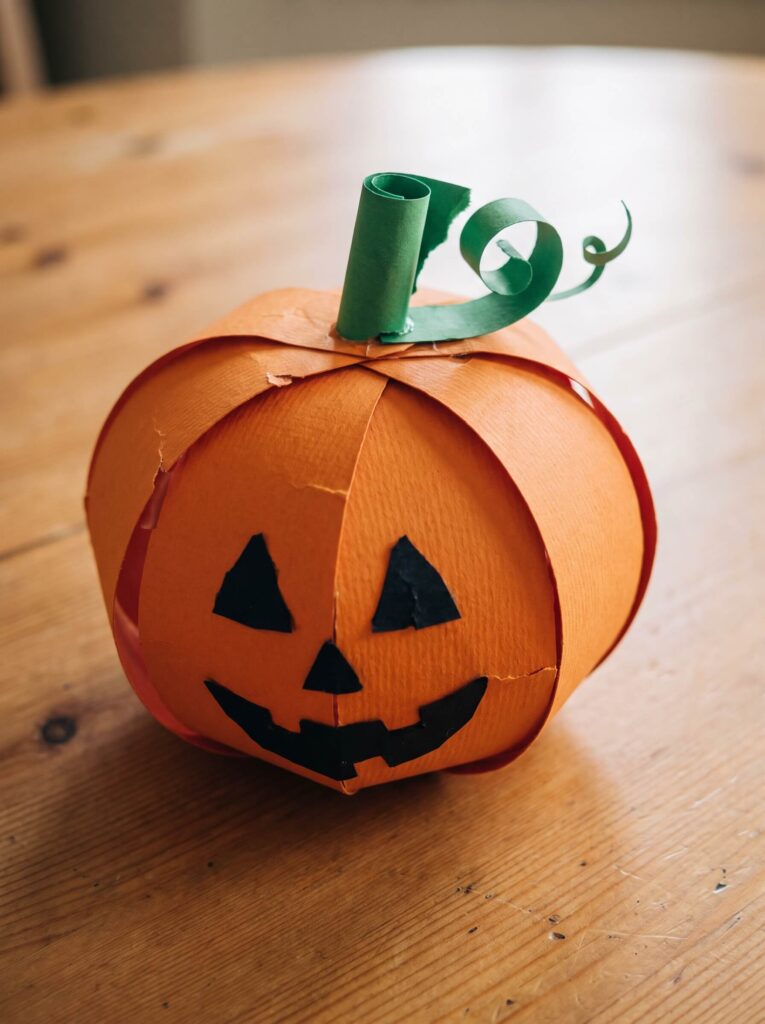
A three dimensional pumpkin from flat paper. This is the first project on the list that needs a bit of patience.
You need: Orange cardstock, green and black paper, glue or double sided tape, scissors, a ruler.
Cheaper option: Old orange envelopes, a painted cereal box, or brown paper coloured orange. Cardstock matters more than colour, thin paper will not hold the curve.
- Cut six identical strips of orange cardstock, roughly the same length and width. Trace one and use it as a template rather than measuring each time.
- Stack the strips and staple or glue them together at both ends.
- Fan the strips out so they bow away from each other and form a sphere.
- Add a rolled green stem, a leaf and a curled vine, then glue the black face onto the front strip.
Tip: Run each strip over the edge of a table, like curling ribbon, before you assemble. It pre-loads the curve and the pumpkin holds its shape instead of flattening.
What goes wrong: Strips of slightly different lengths, which gives you a lopsided ball. Cut them all in one go from a folded stack if you can.
6. Paper Pumpkin Garland
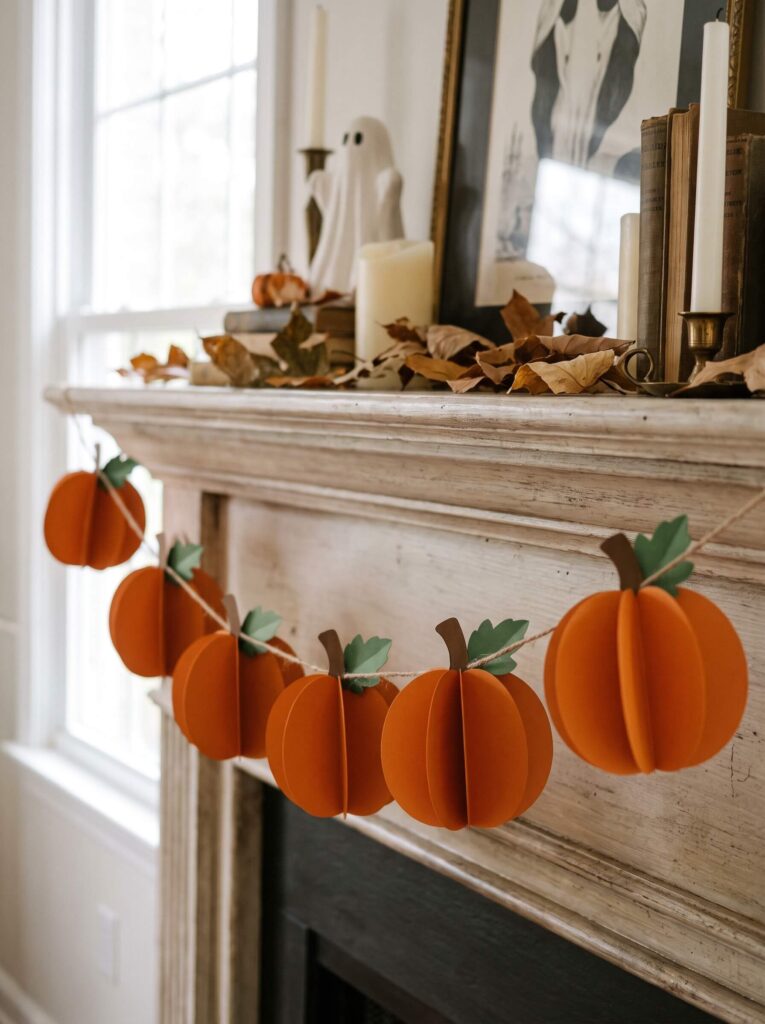
The fastest way to make a mantelpiece look decorated. Six pumpkins, under an hour.
You need: Orange cardstock, green and brown cardstock, twine, scissors, glue or tape.
Cheaper option: Paint sample cards from a DIY shop, brown paper bags coloured orange, or pages from a magazine with orange in them. A shoelace works instead of twine.
- Cut rounded pumpkin panels, three or four per pumpkin, all the same size.
- Fold each panel down the middle and glue half of each to the next so the pumpkin has depth.
- Add a brown stem and a small green leaf to the top of each.
- Tape the pumpkins to the twine, spacing them about a hand’s width apart so the garland does not look crowded.
Tip: Tape the pumpkins on from behind rather than threading them. Threaded paper pumpkins spin and show you their backs all evening.
What goes wrong: Hanging the twine before the glue is dry. The weight pulls the folds open. Give it twenty minutes.
7. Book Page Pumpkin
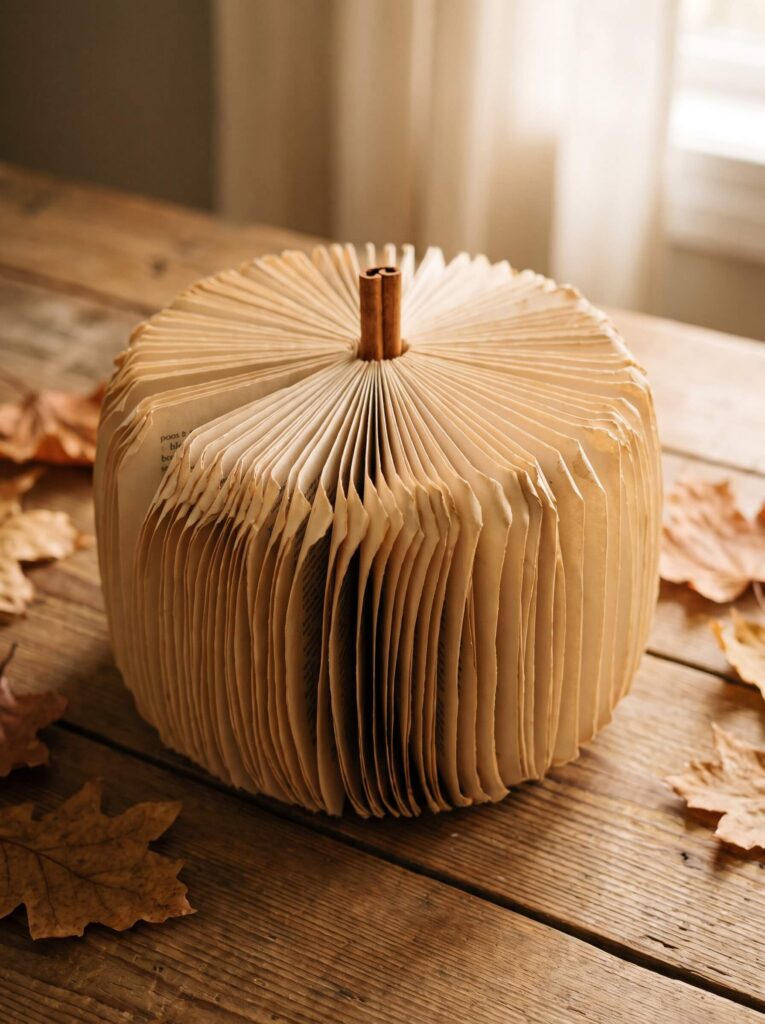
The only project here that costs absolutely nothing. It uses a paperback nobody will miss and the folding is oddly relaxing once you get going.
You need: An old paperback, a cinnamon stick or a twig for the stem, glue.
Cheaper option: It is already free. Charity shops sell battered paperbacks for pennies if you cannot bring yourself to cut up one of your own.
- Fold the top corner of each page down to the spine, then fold the bottom corner up the same way. Repeat for every page.
- Keep going until the whole book fans into a circle, then glue the front and back covers together.
- Push a cinnamon stick or twig into the centre top for the stem.
- Fluff the folded edges outwards so the shape sits round rather than oval.
Tip: Fold in batches of ten pages and check your creases are landing in the same place. Drift by a few millimetres over 200 pages gives you a spiral instead of a sphere.
What goes wrong: Choosing a book with glossy or very thick pages. Cheap yellowed paperback pages crease sharply and hold, glossy ones spring back.
Fabric, Felt And Yarn Pumpkins
Softer, slower, and the group most likely to become a keeper you use every autumn. Two of these need a needle and one needs a glue gun.
8. Twine Wrapped Pumpkin
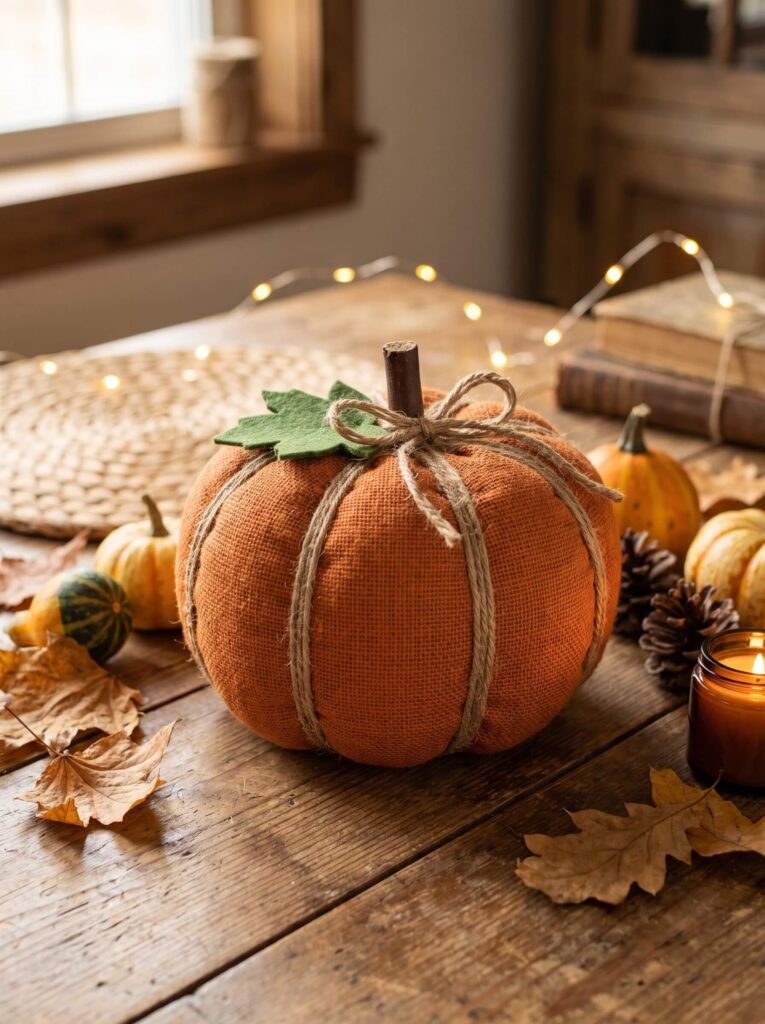
Farmhouse look, twenty minutes, and it hides a tired looking fabric pumpkin nicely.
You need: An orange fabric pumpkin, jute twine, a green felt scrap, a hot glue gun.
Cheaper option: Wrap a ball of scrunched newspaper covered in a stocking or an old sock, tied into segments with thread. Garden string works instead of jute.
- Glue the twine end at the base, then wrap around the pumpkin in even lines, working from the bottom up.
- Add a dab of glue every quarter turn. Twine slides on fabric, and without those dabs the whole wrap loosens within a day.
- Cut a simple leaf from green felt and tuck it under the stem while the glue is still tacky.
- Tie a small twine bow and glue it beside the stem.
Tip: Keep the twine tension firm but not tight. Pull too hard and you squash the pumpkin into an egg.
What goes wrong: Starting at the top. The wraps crowd around the stem and you run out of room, so begin at the widest point and work outwards.
9. Yarn Wrapped Pumpkin
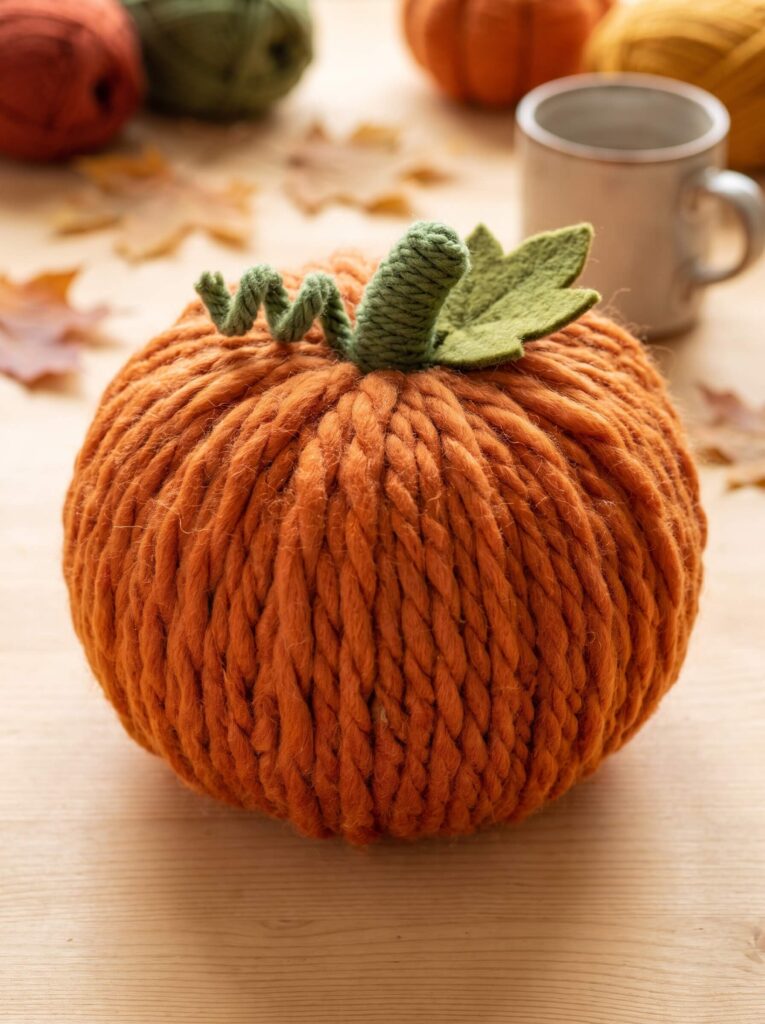
Same idea, softer finish, and much more forgiving of gaps because the fibres fill in.
You need: Orange yarn, a polystyrene ball or a foam pumpkin base, green yarn or twine, a felt leaf, craft glue. Cheaper option: Unravel an old orange jumper from a charity shop, you will get more yarn than a new ball costs. A ball of scrunched foil works as a base.
- Glue the yarn end to the base and wrap snugly, changing direction every so often so no bald patches show.
- Use craft glue rather than hot glue on polystyrene. Hot glue melts a dent into the ball and you will feel it through the yarn.
- Wrap green yarn around a short cardboard tube or a rolled felt strip for the stem.
- Glue the stem on, add a felt leaf, then rub the surface gently with your palm to even the strands out.
Tip: chunky yarn covers a base in a third of the time of double knit, and the ridges look more like a real pumpkin.
What goes wrong: wrapping in one direction only, which gives you a barrel rather than a pumpkin. Cross over the top and bottom points repeatedly.
10. Felt Pumpkin Garland
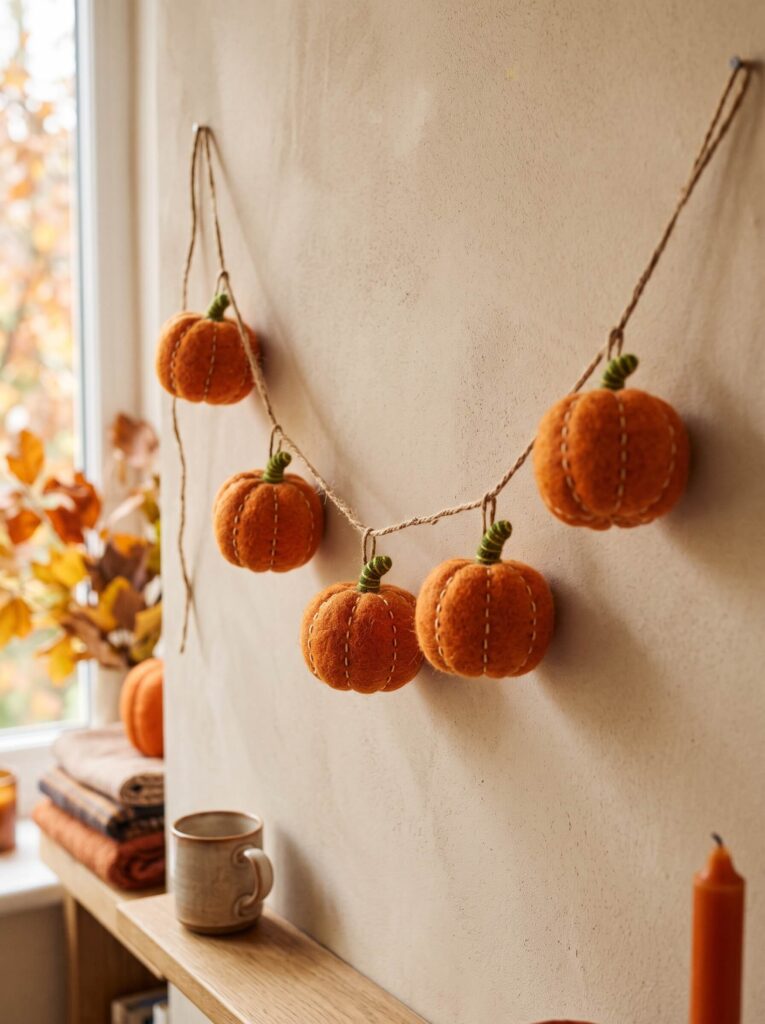
A proper sit down project with a film on. Five small pumpkins takes me most of two hours including the stems.
You need: Orange felt, green felt, brown twine, polyester stuffing, needle and thread, scissors.
Cheaper option: cut up an old felt Christmas decoration or a wool blanket. Stuff with cotton wool balls, torn up carrier bags or the stuffing from a dead cushion.
- Cut two matching pumpkin shapes per ornament. Make a card template first, freehand shapes never match.
- Stitch the pair together with a small running stitch around the edge, leaving a gap of about two fingers wide.
- Stuff lightly, then close the gap. Overstuffing is the usual mistake, a slightly under-filled pumpkin sits flatter and hangs better.
- Take a long stitch from top to bottom and pull gently to make a segment line, repeat twice more, then attach the green stems and tie each pumpkin to the twine.
Tip: Use embroidery floss rather than sewing thread. It shows on purpose, which makes wobbly stitches look like a design choice.
What goes wrong: Cheap acrylic craft felt pills and stretches at the seams once stuffed. Wool blend felt costs more per sheet and behaves far better if you want to reuse the garland next year.
11. Felt Pumpkin Coasters
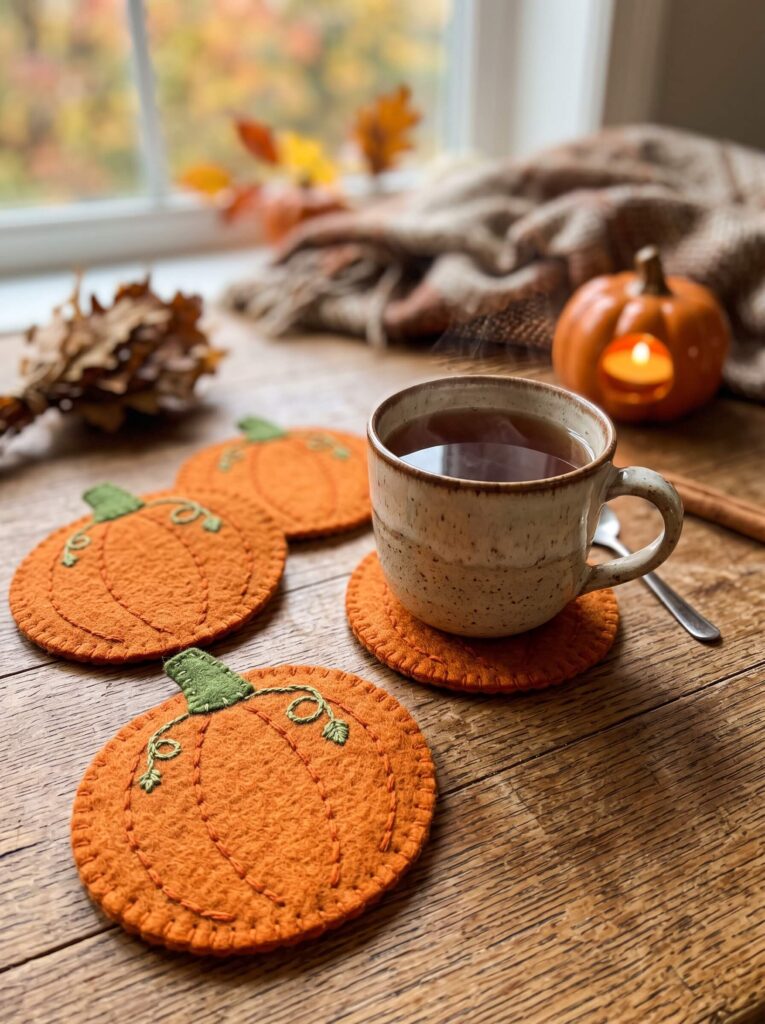
The most useful thing on this list. Flat, quick, and they actually get used past Halloween into November.
You need: Orange felt sheets, green felt scraps, embroidery floss, needle, scissors, fabric glue.
Cheaper option: Cut circles from an old jumper and blanket stitch the edge. Two layers of thick felt beat one layer for heat.
- Cut two circles per coaster, around nine to ten centimetres across. Draw round a mug for the size.
- Cut a small green stem and a curled vine, then glue or stitch them to the top edge of the front circle.
- Stitch curved lines down the front piece for the pumpkin ribs, three or four is plenty.
- Stitch the two circles together around the edge and trim any wobble off once it is assembled, not before.
Tip: put the ribs on before you join the layers. Stitching through both layers pulls the coaster into a dome.
Practical note: felt is not heatproof. These are for a mug of tea, not a hot pan, and a very hot mug will still leave a mark on a wooden table over time. Use a hard coaster underneath if the table matters to you.
Painted Halloween Pumpkin Crafts And Glowing Jar Lanterns
Paint is where most people’s pumpkin crafts go wrong, usually because of what is underneath the paint rather than the paint itself. Glass and glossy faux pumpkins both need a bit of prep.
12. Air-dry Clay Pumpkin Face
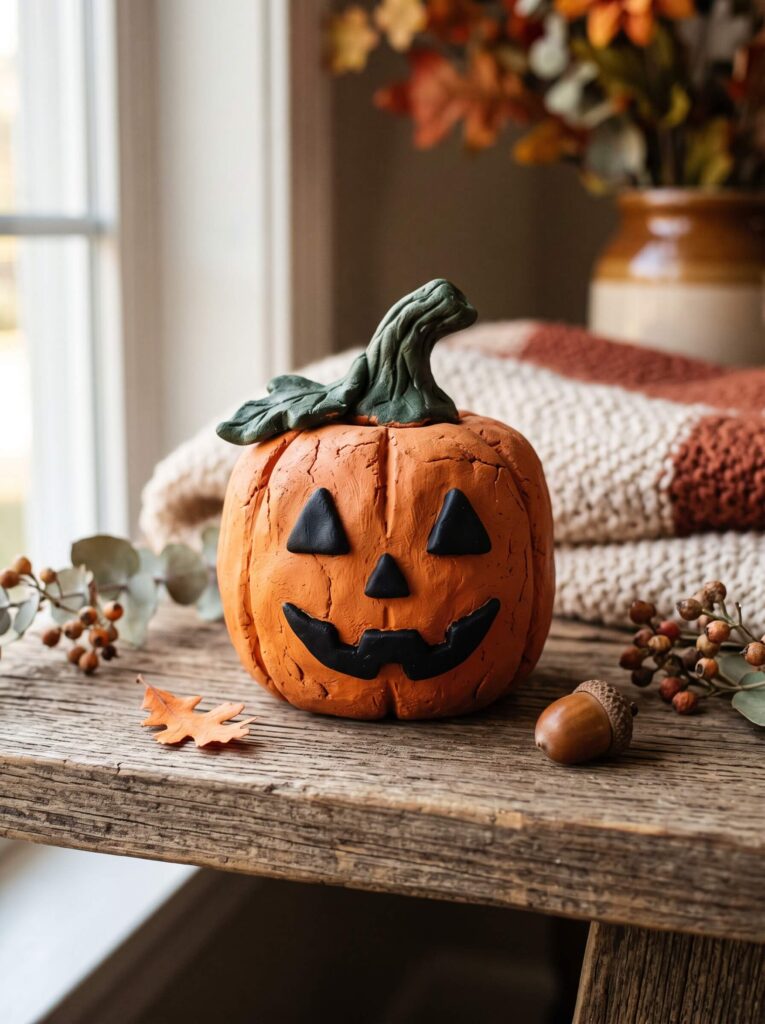
Small, solid, sits on a shelf. The drying time is the whole story here.
You need: Orange, green and black air-dry clay, or white clay plus acrylic paint.
Cheaper option: Homemade salt dough, which is flour, salt and water, then painted once baked. Das white air-dry clay painted afterwards works out cheaper than buying three colours.
- Roll the orange clay into a ball, then press grooves down the sides with the back of a knife or a chopstick.
- Roll a short green stem and press it into the top, scoring both surfaces first so they grip.
- Cut face shapes from thinly rolled black clay and press them on while everything is still damp.
- Leave to dry somewhere cool for 24 to 48 hours, turning it once so the base dries too.
Tip: Dampen your fingertip and smooth every join. Air-dry clay separates at dry joins as it shrinks, and a face that falls off in a week is the most common complaint with this one.
What goes wrong: drying it on a radiator to speed things up. The outside sets before the inside and it cracks across the middle. Slow and cool wins.
13. Painted Mini Pumpkin Faces
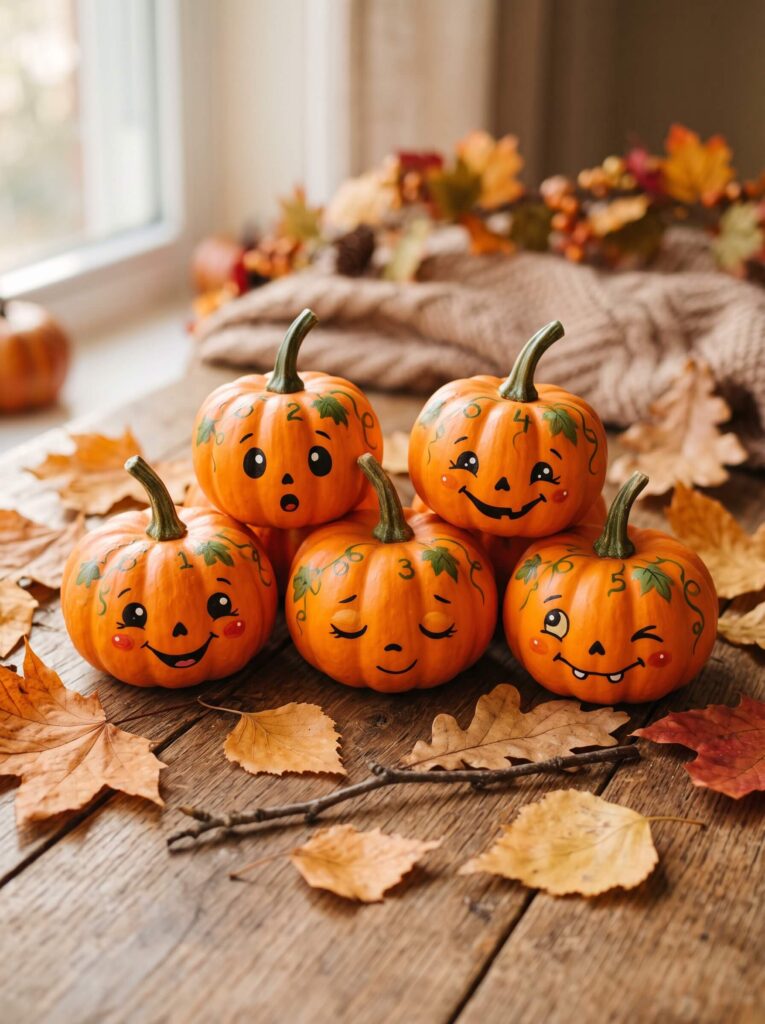
A cluster of five little faces is more effective than one big pumpkin, and it takes half an hour.
You need: Small faux pumpkins, orange and green acrylic paint, a black paint pen, a fine brush, pink paint for cheeks.
Cheaper option: Real mini pumpkins or small gourds from a greengrocer. Painted rather than carved, a real one holds up for weeks because the skin stays sealed.
- If the faux pumpkins are glossy, scuff them lightly with a nail file or fine sandpaper first, then paint. Acrylic peels straight off a slick surface.
- Paint the body orange, two thin coats rather than one thick one, and let each dry.
- Add green stems and vine details.
- Draw the faces with a black paint pen. A Posca PC-5M gives you a controllable line where a brush wobbles, and it does not bleed.
Tip: Sketch each face in pencil first. Pencil wipes off acrylic with a damp finger, and the difference between a cute pumpkin and a strange one is a couple of millimetres of eye spacing.
What goes wrong: Painting the face on before the base coat has fully cured. The black lifts the orange and you get muddy edges. Give the base a few hours, ideally overnight.
14. Painted Jar Pumpkin Lantern
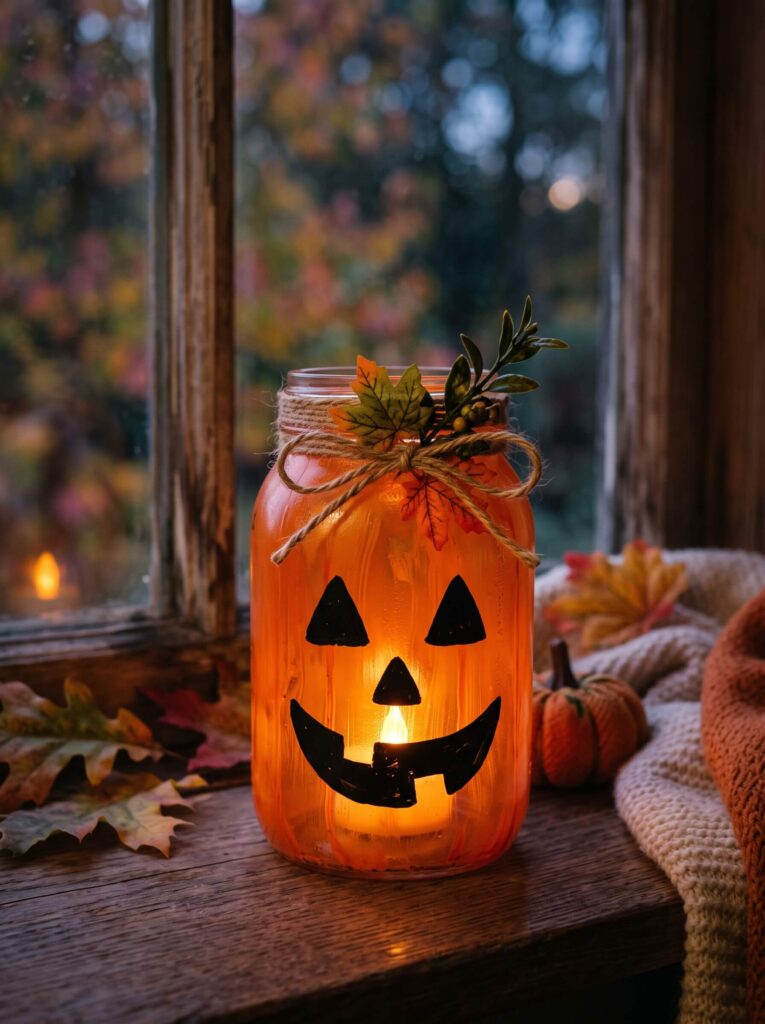
The glow is the point, so this one earns its place on a windowsill.
You need: a clean glass jar, orange acrylic paint, black paint or vinyl for the face, twine, faux leaves, an LED tea light. Cheaper option: a passata or coffee jar you already have. Orange tissue paper stuck on with watered down PVA gives a better glow than paint and costs almost nothing.
- Wash the jar in hot soapy water, then wipe the outside with white vinegar or rubbing alcohol. Any grease and the paint will flake off in strips later.
- Brush orange paint on in thin coats, drying between each. Two or three coats gets you even colour without brush lines.
- Add the face in black paint or cut vinyl, keeping the shapes chunky so they read from a distance.
- Tie twine around the neck, tuck in leaves, drop in an LED tea light.
Tip: Paint the inside of the jar instead, poured and swirled, if you want a smoother look. It cannot chip, though the jar then has to stay dry inside and you must use a battery light.
What goes wrong: Skipping the degreasing step. Nine times out of ten, peeling paint on glass is a cleaning problem rather than a paint problem.
15. Jar Lantern With A Paper Face
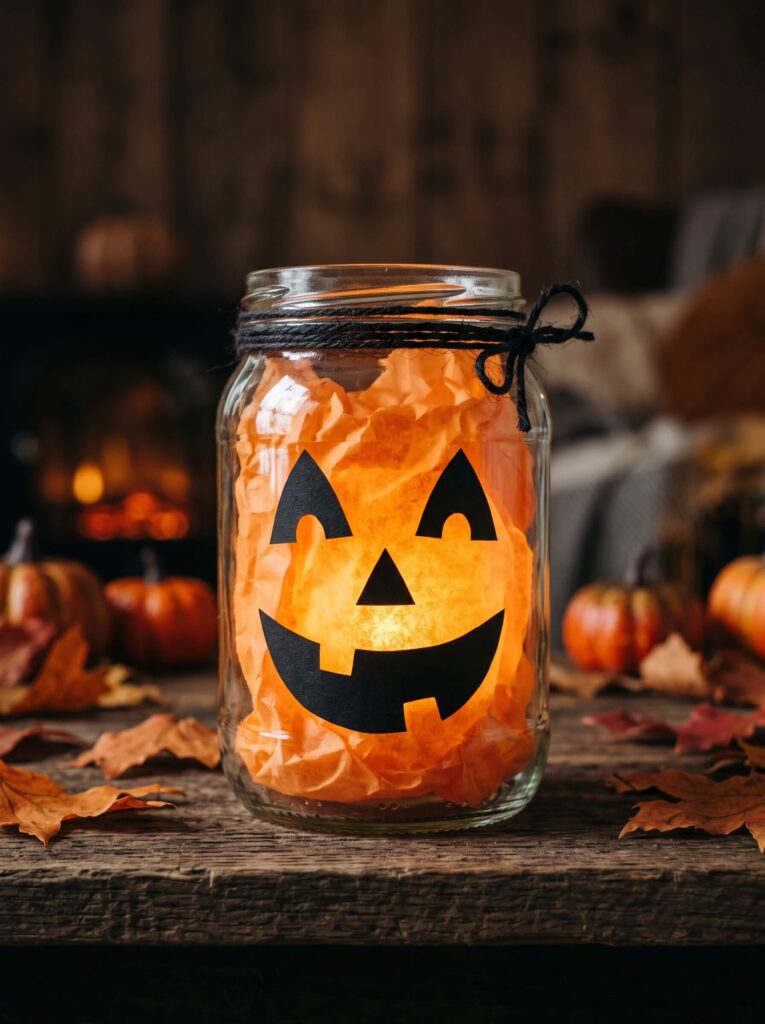
The no-paint version, and the one to hand to a five year old. Ten minutes, no drying.
You need: a glass jar, black craft paper, glue stick, black ribbon or twine, an LED tea light.
Cheaper option: a jam jar and the black card from a cereal packet insert. If you want colour, line the inside with orange tissue paper instead of painting it.
- Cut the eyes, nose and mouth from black paper.
- Glue them to the outside of the jar, spacing the eyes wider than feels natural. Curved glass narrows the face visually.
- Tie ribbon or twine around the neck.
- Put an LED tea light inside and turn the lights off to check the face reads properly.
Tip: Stick the face to the inside of the glass if the jar will live outside. The glass then protects the paper from rain and the silhouette looks sharper when lit.
[IMAGE: two photos side by side of the same jar, one in daylight and one lit in a dark room, so readers can see how much the face changes when it glows. Shoot your own, ideally showing the faint texture of the brush strokes catching the light.]
Wood, Pinecone And Natural Material Pumpkins
Autumn hands you most of this for free. Collect pinecones on a dry day, because damp ones open and close as they dry and will pop your paint.
16. Wood Block Pumpkin
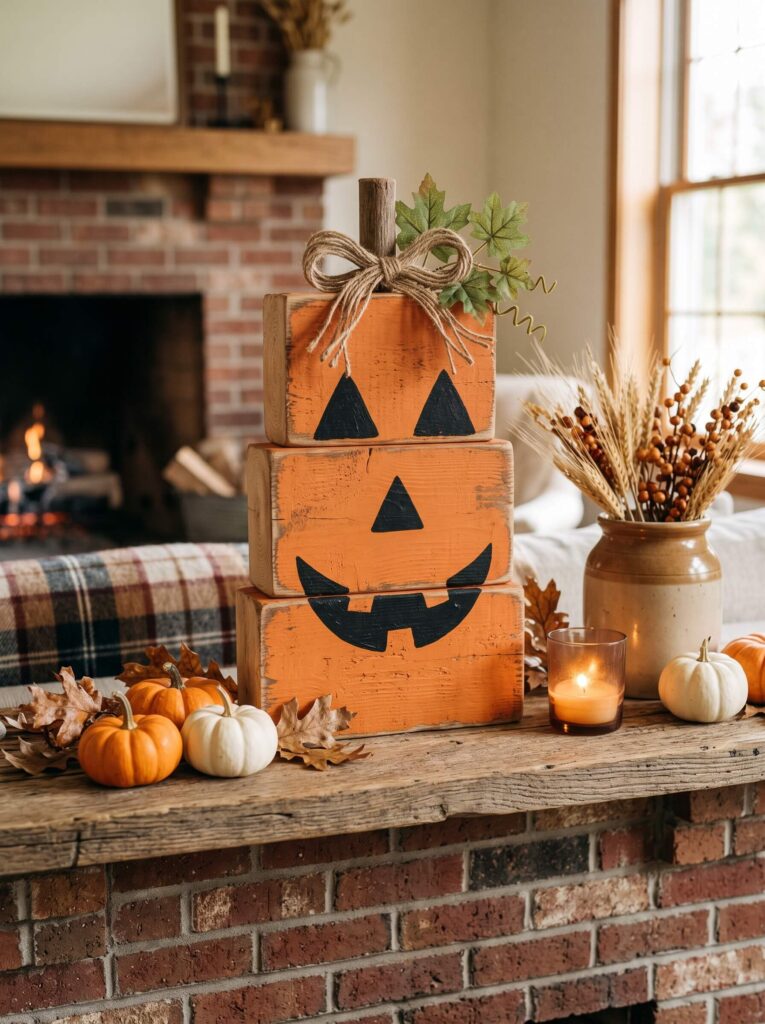
Three stacked blocks, painted, with a face across the front. It looks good on a mantelpiece and survives being knocked over.
You need: Three wooden blocks, orange and black acrylic paint, brushes, jute twine, a faux leaf.
Cheaper option: Offcuts from a timber merchant, often free or nearly free from the scrap bin. Children’s wooden bricks work if you do not mind painting them.
- Sand any rough edges first, especially if you are using offcuts. Splinters and a shelf display do not mix.
- Paint all three blocks orange, including the sides you think nobody will see, and let them dry.
- Paint one jack-o’-lantern face spread across the front of all three blocks so it lines up when stacked.
- Tie twine round the top block in a bow and glue a faux leaf beside it.
Tip: Paint the blocks stacked in position with a pencil mark on each so you reassemble them the same way. Rotate one and the face stops matching.
What goes wrong: Bare wood drinks the first coat and dries patchy. A cheap white base coat, or watered down PVA as a primer, fixes it and saves you a third coat of orange.
17. Pinecone Pumpkin Centrepiece
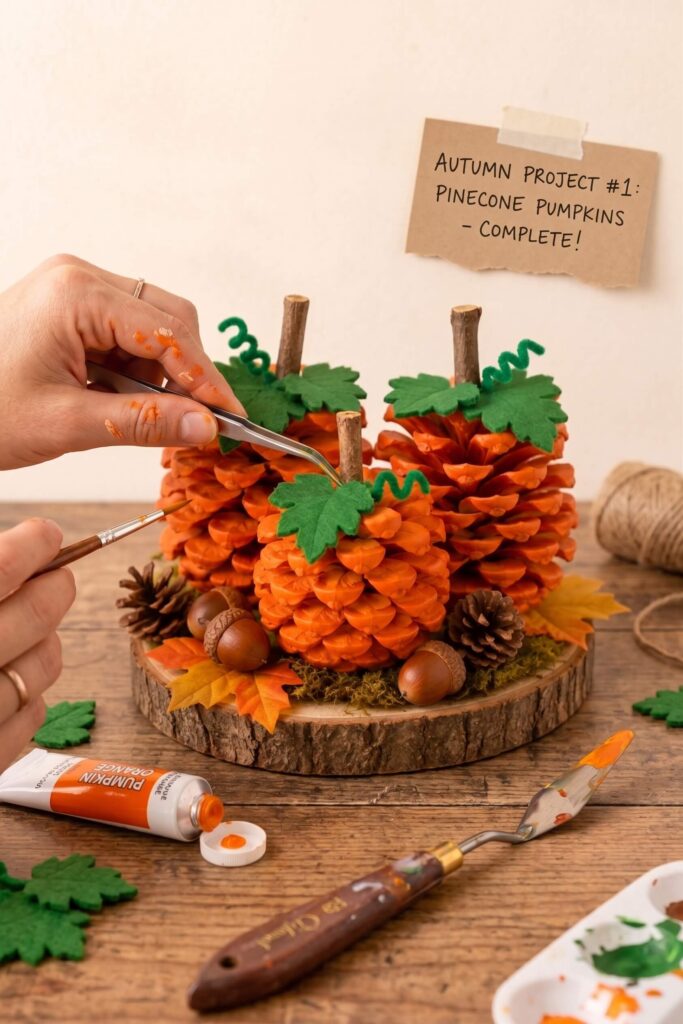
The most satisfying one here, and the messiest. Set aside an hour plus drying, and expect paint on your fingers.
You need: Three pinecones, orange acrylic paint, small sticks for stems, green felt leaves, green pipe cleaners, a wood slice base, moss, mini acorns, a hot glue gun.
Cheaper option: Everything but the paint and glue can come from a walk. Use a plate or a slab of bark instead of a bought wood slice.
- Bake the pinecones on a lined tray at around 90 to 100 degrees Celsius for 30 to 45 minutes to dry them out and evict any insects. Stay in the kitchen while they are in there, sap drips and the cones are dry material in a hot oven.
- Once cool, dab paint into the scales with a stiff brush rather than stroking it on. Stroking only coats the tips and leaves dark gaps.
- Glue a short stick into the top of each cone for a stem, then add felt leaves and a twisted pipe cleaner vine.
- Arrange the three cones on the wood slice with moss and acorns tucked into the gaps, gluing as you go.
Tip: Two thin coats of orange over a white base coat gives you a proper pumpkin colour. Straight orange onto a dark brown cone always looks muddy, whatever the packet promises.
What goes wrong: Painting freshly collected cones. They are still closing and opening as they dry, so the paint cracks along the scales within days. Bake or air dry them for a week first.
Statement Halloween Pumpkin Crafts For The Door And Table
These four take real time and a glue gun. They are also the ones guests notice, so if you only make one thing this year, make one of these.
18. Button Pumpkin Wall Art
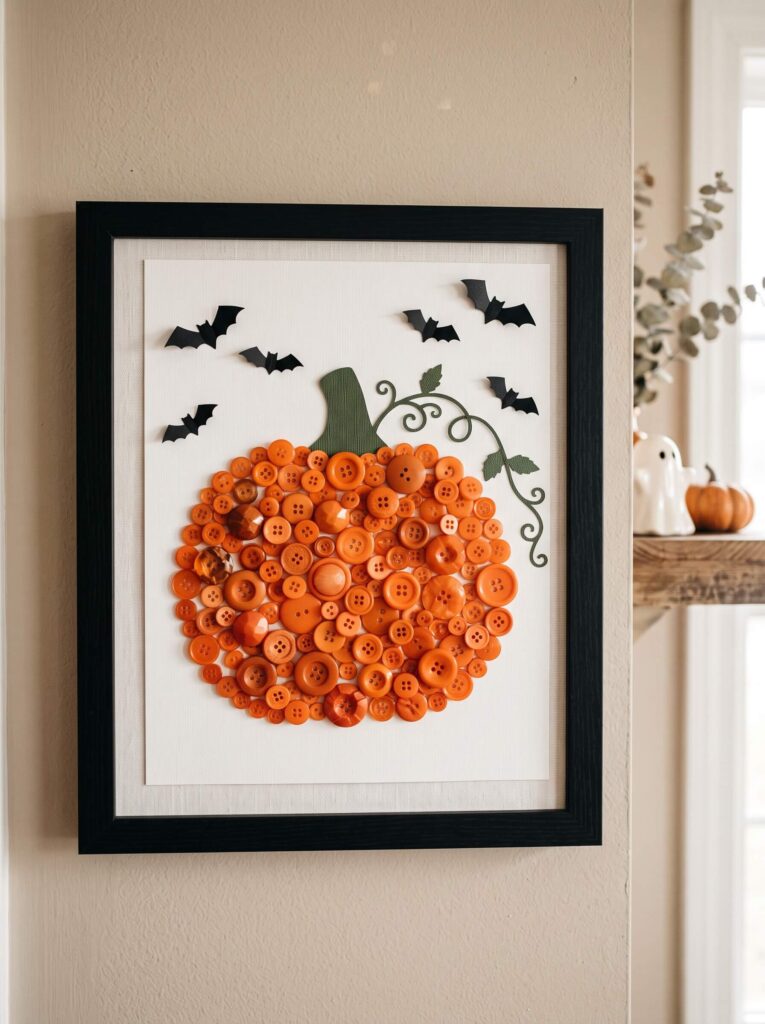
Texture without technique. A good project for anyone who does not trust their own painting.
You need: A black picture frame with a white backing board, orange buttons in mixed sizes, green cardstock, black paper for bats, glue dots or craft glue.
Cheaper option: Raid a button tin, or cut circles from orange card in three sizes for a similar layered look. Charity shops sell button jars cheaply.
- Lay the buttons out into a pumpkin shape on the backing board without any glue and photograph it. You will move things and want the original back.
- Place the biggest buttons first, then fill the gaps with the smallest ones. Gaps are what make this look unfinished.
- Glue everything down with glue dots, which sit flatter than craft glue and do not seep out around the edges.
- Add a green stem, a leaf and a curled vine, then the bat cutouts, and letter your message underneath.
Tip: Leave the glass out of the frame. Buttons are thicker than the rebate allows and the glass will either bow or crack.
What goes wrong: Buttons on a fabric-covered backing board pull away over time. Card or paper backing holds far better.
19. Pumpkin Wreath With Bows
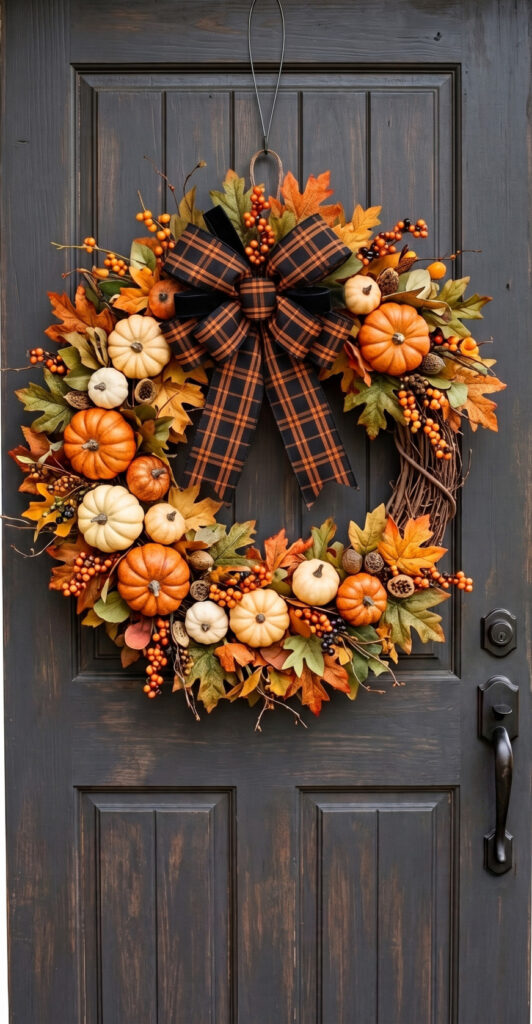
Budget an hour and a half and a full glue stick or two. This is the one people ask about.
You need: A grapevine wreath base, mini faux pumpkins in orange and cream, artificial autumn leaves, berry sprigs, orange and black ribbon, a hot glue gun.
Cheaper option: Bend a wire coat hanger into a circle and bind it with garden twine or ivy for the base. Real dried leaves, pressed for a week between books, look better than plastic ones and cost nothing.
- Build the leaves up first, all pointing the same way around the circle, and keep going until you cannot see the base through them.
- Position the pumpkins before gluing, alternating orange and cream, and check the balance by hanging it on the door.
- Push glue right under each pumpkin and hold for a slow count of ten. Faux pumpkins are heavier than they look and a light tack will fail on a windy door.
- Tuck berry sprigs into the gaps, then tie the ribbon bow and wire it on as well as gluing it.
Tip: Glue in the direction the wreath will hang. Hot glue only really holds against gravity if the join is loaded downwards, not sideways.
What goes wrong: Hanging an unsealed wreath on a door that gets direct rain. Berries fade and cardboard stems soften. A coat of Mod Podge Outdoor on the pumpkins, or a sheltered porch, sorts it.
20. Pumpkin Gnome
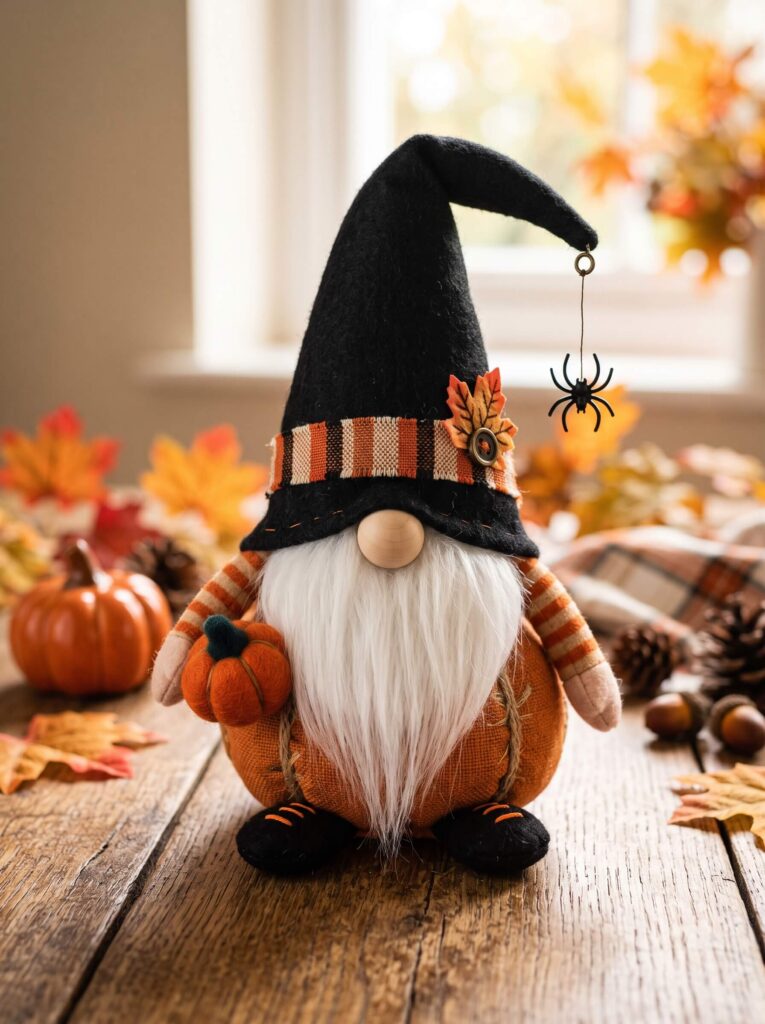
The fiddliest project here. Two hours, lots of small pieces, and worth doing once you have made a couple of the simpler ones.
You need: A fabric or stuffed pumpkin base, black felt for the hat and shoes, orange and beige felt for arms, faux fur for the beard, a wooden bead for the nose, twine, a tiny spider, a small pumpkin embellishment, strong craft glue or a glue gun.
Cheaper option: Make the base from a square of orange fabric gathered around stuffing and tied at the bottom. Beard from an old fleece or a cotton wool pad, hat from a felt offcut.
- Cut a wide triangle of black felt for the hat, roll it into a cone and glue the seam, then check it sits over the pumpkin before attaching.
- Glue the beard on first, then the hat, then the bead nose last. Nose first and you will never get the proportions right.
- Add the arms along the sides and the felt shoes at the base.
- Finish with a striped hat band, the mini pumpkin and the dangling spider.
Tip: Cut the fur from the back with a craft knife rather than scissors through the pile. You get a clean edge instead of a blunt fringe, which is the difference between a gnome beard and a shaving brush.
21. Pumpkin Flower Bouquet
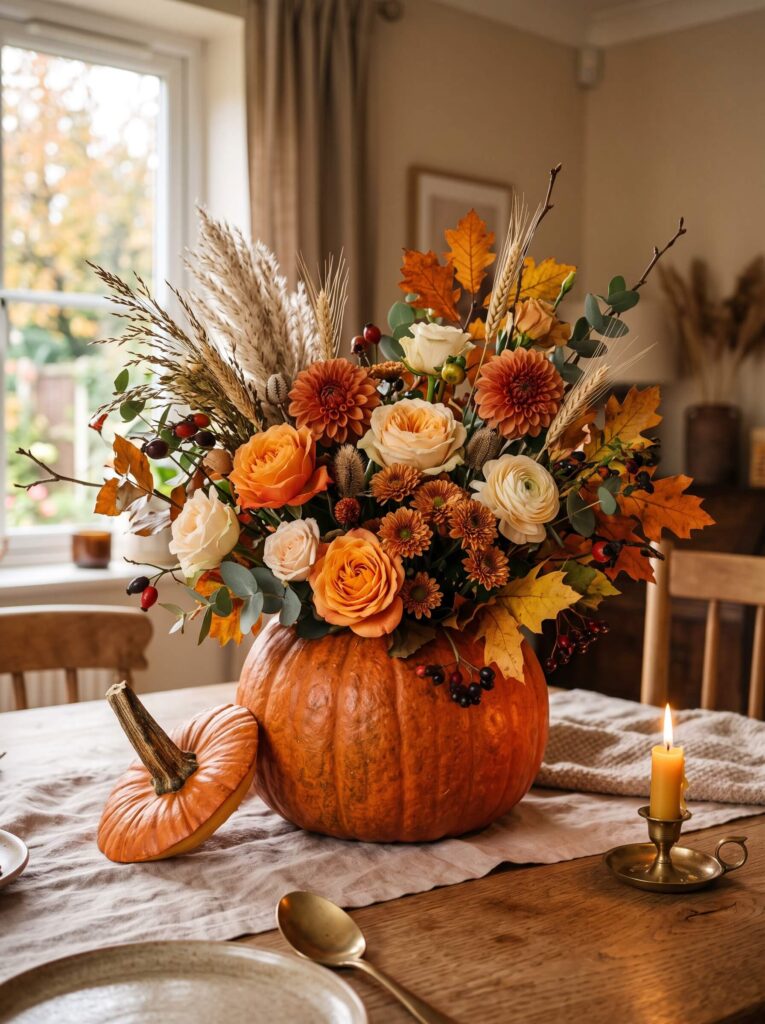
The best centrepiece on this list and the only project that needs a blade. Adults only for the cutting stage.
You need: A faux pumpkin (or a real one), assorted faux autumn flowers, floral foam, a glue gun, a serrated knife or craft knife.
Cheaper option: A real small pumpkin, which is cheap in October, plus flowers from a supermarket bunch or dried grasses and seed heads from a hedgerow. A scrunched ball of chicken wire works instead of floral foam.
- Draw the opening on the top first, then cut on the line. Cutting freehand into a curved surface is how people slip.
- Cut floral foam to fit snugly. If it rattles, glue it in place or wedge it with offcuts.
- Place your three largest flowers first in a triangle, then fill in with medium blooms, then leaves and small stems at the edges to hide the foam.
- Trim stems short. Long stems make it top heavy and it will tip over the first time someone knocks the table.
Tip: if you use a real pumpkin, line the inside with a freezer bag before adding foam. It stops the flesh going soggy and buys you an extra week or two.
Practical note: if this bouquet is going on a table with real flowers and water, use a plastic pot inside the pumpkin rather than soaking foam directly against the flesh. Wet pumpkin flesh starts to smell within about three days indoors.
Supplies List With A cheaper Alternative For Everything
You do not need all of this. Pick your project, check its list, and cross reference here.
| Bought item | What it does | Free or cheap swap |
|---|---|---|
| Faux pumpkins | Reusable base for painting, wreaths, gnomes | Real mini pumpkins or gourds, scrunched newspaper in a stocking |
| Orange cardstock | Body of paper projects | Cereal boxes painted orange, old envelopes, paint sample cards |
| Craft felt | Garlands, coasters, leaves | Old wool jumper, blanket offcuts, charity shop felt decorations |
| Polyester stuffing | Fills felt pumpkins | Cotton wool, offcuts of old cushion, torn up fabric scraps |
| Jute twine | Wrapping, bows, garland string | Garden string, shoelaces, unravelled hessian |
| Acrylic paint | Everything painted | Poster paint for paper only, tester pots of emulsion for wood |
| Air-dry clay | Modelled pumpkins | Salt dough (flour, salt, water), then paint once baked |
| Hot glue gun | Wreath, gnome, pinecones, twine | Strong craft glue such as UHU or Bostik, plus overnight drying |
| Glass jars | Lanterns | Passata, jam and coffee jars, soaked to remove labels |
| Faux autumn leaves | Wreath filler | Real leaves pressed flat between books for a week |
| Pinecones and acorns | Natural pumpkins, wreath detail | A walk, then a low oven bake to dry them out |
| Wood slice base | Centrepiece stand | A slab of bark, a chopping board, a cake stand |
| LED tea lights | Lantern glow | Fairy lights bunched inside the jar, or a phone torch for photos only |
Where to buy: Hobbycraft and The Range for felt, glue guns and faux pumpkins, Poundland and B&M for tea lights, buttons and paper plates, supermarket floral aisles for real mini pumpkins from late September. Timber merchants will often give away offcuts if you ask nicely.
[EDITOR SUGGESTION: a printable one page supplies checklist as a download, ticked by project, plus a short “which pumpkin craft suits your time and skill” quiz that filters the table above by age, time and whether the reader owns a glue gun. Both are the kind of on-page asset an AI summary cannot reproduce. Build separately rather than faking it in the copy.]
Safety And Mess, Honestly
Most of this list is genuinely low risk. Three parts of it are not, and they get glossed over constantly.
Hot glue guns. The glue leaves the nozzle at around 190 degrees Celsius and it sticks to skin before you can wipe it off, which is what makes the burn worse than a splash of hot water. Adults only for the wreath, gnome, pinecone and twine projects. If a child is helping, give them the placing job while you do the gluing. Keep a bowl of cold water on the table, not just nearby.
Blades. The flower bouquet needs a knife. Cut on a board, cut away from your body, and never hold the pumpkin in your lap. Children can do the flower arranging afterwards, they should not do the opening.
Candles. Use LED tea lights in every jar and lantern here. Paper faces, dried leaves, moss, twine and faux fur are all flammable, and a real flame in a jar with a paper face is not a risk worth taking for the sake of a flicker. If you want real candles, keep them well away from anything dried or paper.
Little ones. Buttons, mini acorns, beads and small embellishments are choking hazards for under threes. Air-dry clay and salt dough are not food safe and salt dough in particular tastes tempting and is genuinely harmful in quantity, so keep it away from toddlers and pets.
Mess ratings, from experience: handprint painting is the worst, closely followed by pinecone painting where the paint gets into the scales and then onto everything. Paper projects are almost mess free. Cover the table with newspaper for anything painted and put the glue gun on a tile or a folded sheet of foil, because the drips do reach the table.
Mistakes first timers make with Halloween pumpkin crafts
- Painting glossy faux pumpkins without scuffing them. The paint sits on the surface and peels off in sheets, usually the day after you finish. Thirty seconds with a nail file prevents it.
- Not degreasing jars. Fingerprints and dishwasher residue are enough to stop acrylic bonding to glass.
- One thick coat instead of two thin ones. Thick acrylic stays slightly tacky, picks up dust and dents under a fingernail weeks later.
- Hot glue on polystyrene. It melts a crater. Craft glue or PVA on foam bases, every time.
- Cutting felt shapes freehand. Two halves that do not match cannot be stitched neatly. Make a card template, it takes two minutes.
- Overstuffing felt pumpkins. They go spherical, the seams gape and they hang badly. Slightly under-filled looks more like a real pumpkin.
- Drying air-dry clay fast. Radiators and hairdryers crack it. Cool room, 24 to 48 hours, turned once.
- Making faces too small and too close together. This is the single most common reason a finished pumpkin looks slightly off. Wide eyes, chunky shapes, and pencil it in first.
- Building a wreath without hanging it halfway through. What looks balanced flat on a table looks lopsided on a door.
- Leaving it to the last week. Faux pumpkins, orange felt and mini pumpkins all sell out through October, and by the final week you are choosing from what is left rather than what you wanted.
FAQs
What can I make out of a pumpkin without carving it?
Painted faces, flower bouquets and drilled patterns all work on a real pumpkin without cutting it open, and an unbroken skin means it lasts weeks rather than days. For decor you keep, use a faux pumpkin, paper, felt or a glass jar instead.
How do I stop paint peeling off my pumpkin craft?
Prep the surface first: scuff glossy faux pumpkins with fine sandpaper, and wipe glass jars with vinegar or rubbing alcohol to remove grease. Then use two thin coats of acrylic rather than one thick one, and seal outdoor pieces with an outdoor Mod Podge or a clear acrylic spray.
How long do painted real pumpkins last?
Kept somewhere cool and dry with the skin intact, a painted pumpkin usually holds up for several weeks, far longer than a carved one, which softens within about a week. Wipe the skin dry before painting and keep it off damp stone or soil, since moisture underneath is what starts the rot.
What is the easiest Halloween pumpkin craft for toddlers?
The handprint pumpkin and the paper cup pumpkin. Both take about fifteen minutes, need no heat or blades, and the results look good even when a two year old does most of the work.
What glue works best on faux pumpkins and felt?
Hot glue for fabric pumpkins, wreaths and anything structural, since it grabs instantly. Fabric glue or PVA for felt on felt, and craft glue rather than hot glue on any polystyrene base because the heat melts it.
Can I reuse these decorations next year?
The felt, wood, jar, button and faux pumpkin projects all store well in a lidded box with tissue between the layers. Paper projects rarely survive a year in storage, so treat those as the ones you remake each autumn.